
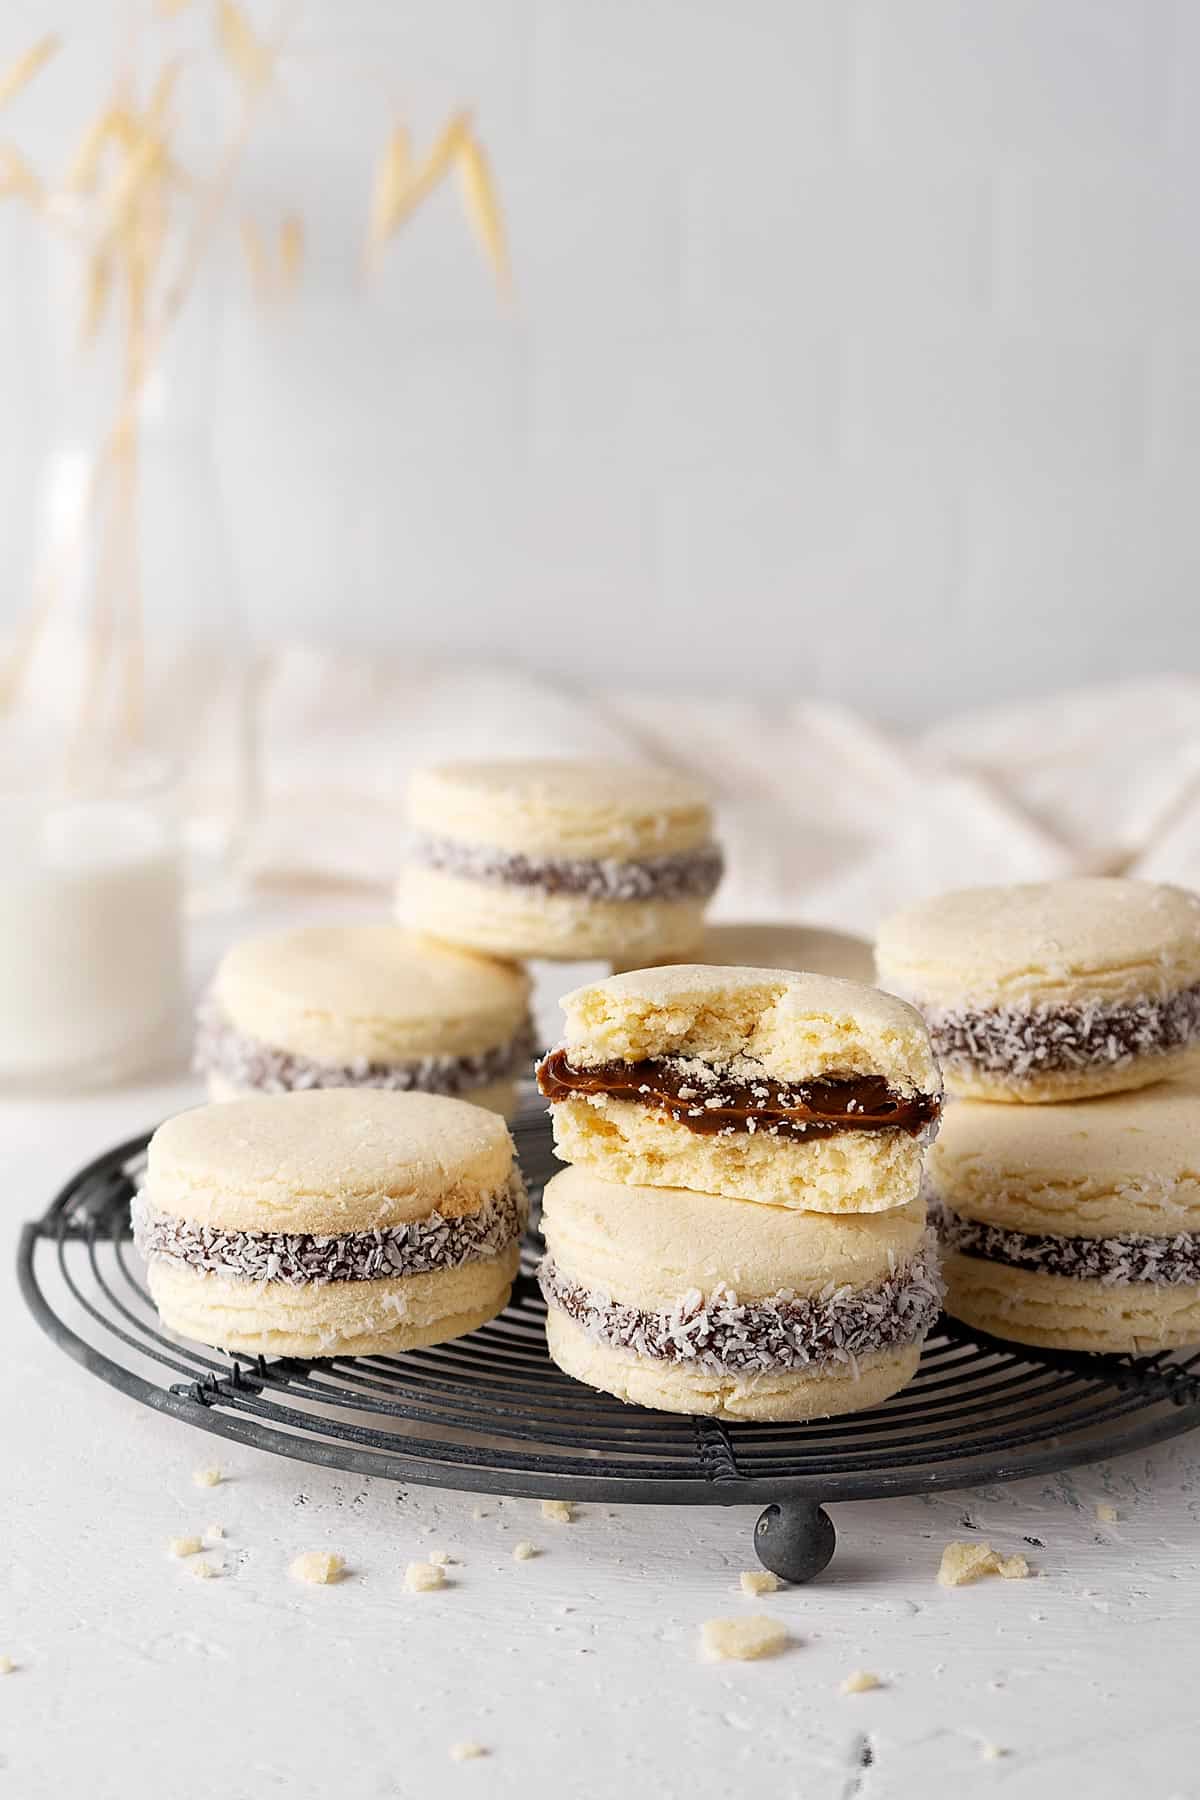
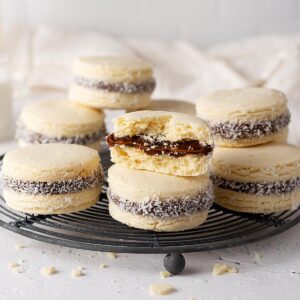
My husband, Marco, is an Argentine and from him and his family, I learn a lot about Argentine delicious and unique pastries, and one of my favorites are these classic Argentine alfajores. They're the best and the most light cookies, sandwiched together with thick caramelly dulce de leche.
📮 Save this recipe for later!
I say classic because these are also called cornstarch alfajores cookies since they are several types of alfajores. Some are coated in dark chocolate, white chocolate, or even meringue. But hey, classic always has a soft spot in my heart *wink!*.
Another classic is Marco's Argentine chimichurri recipe, which can be used as a marinade or a condiment. It's so versatile and delicious!
Jump to:
Recipe Highlights
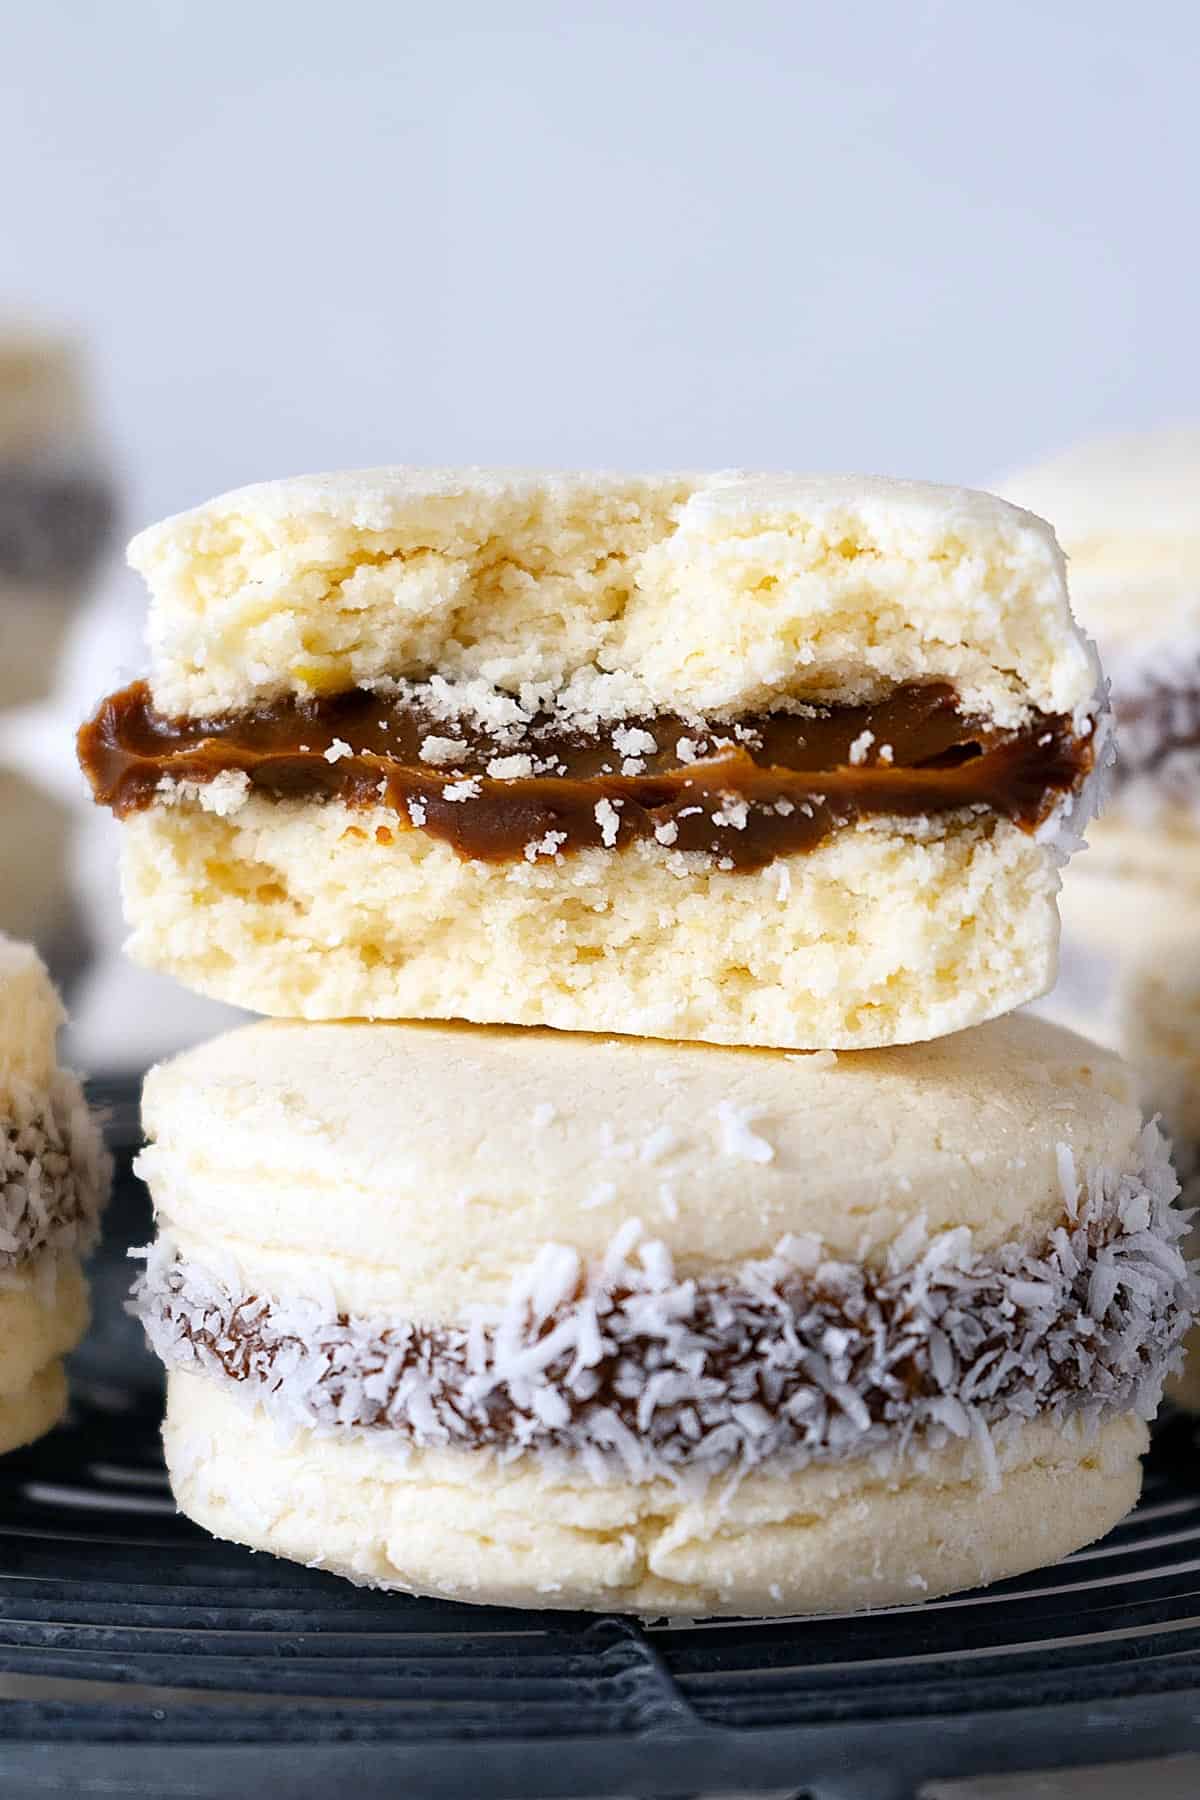
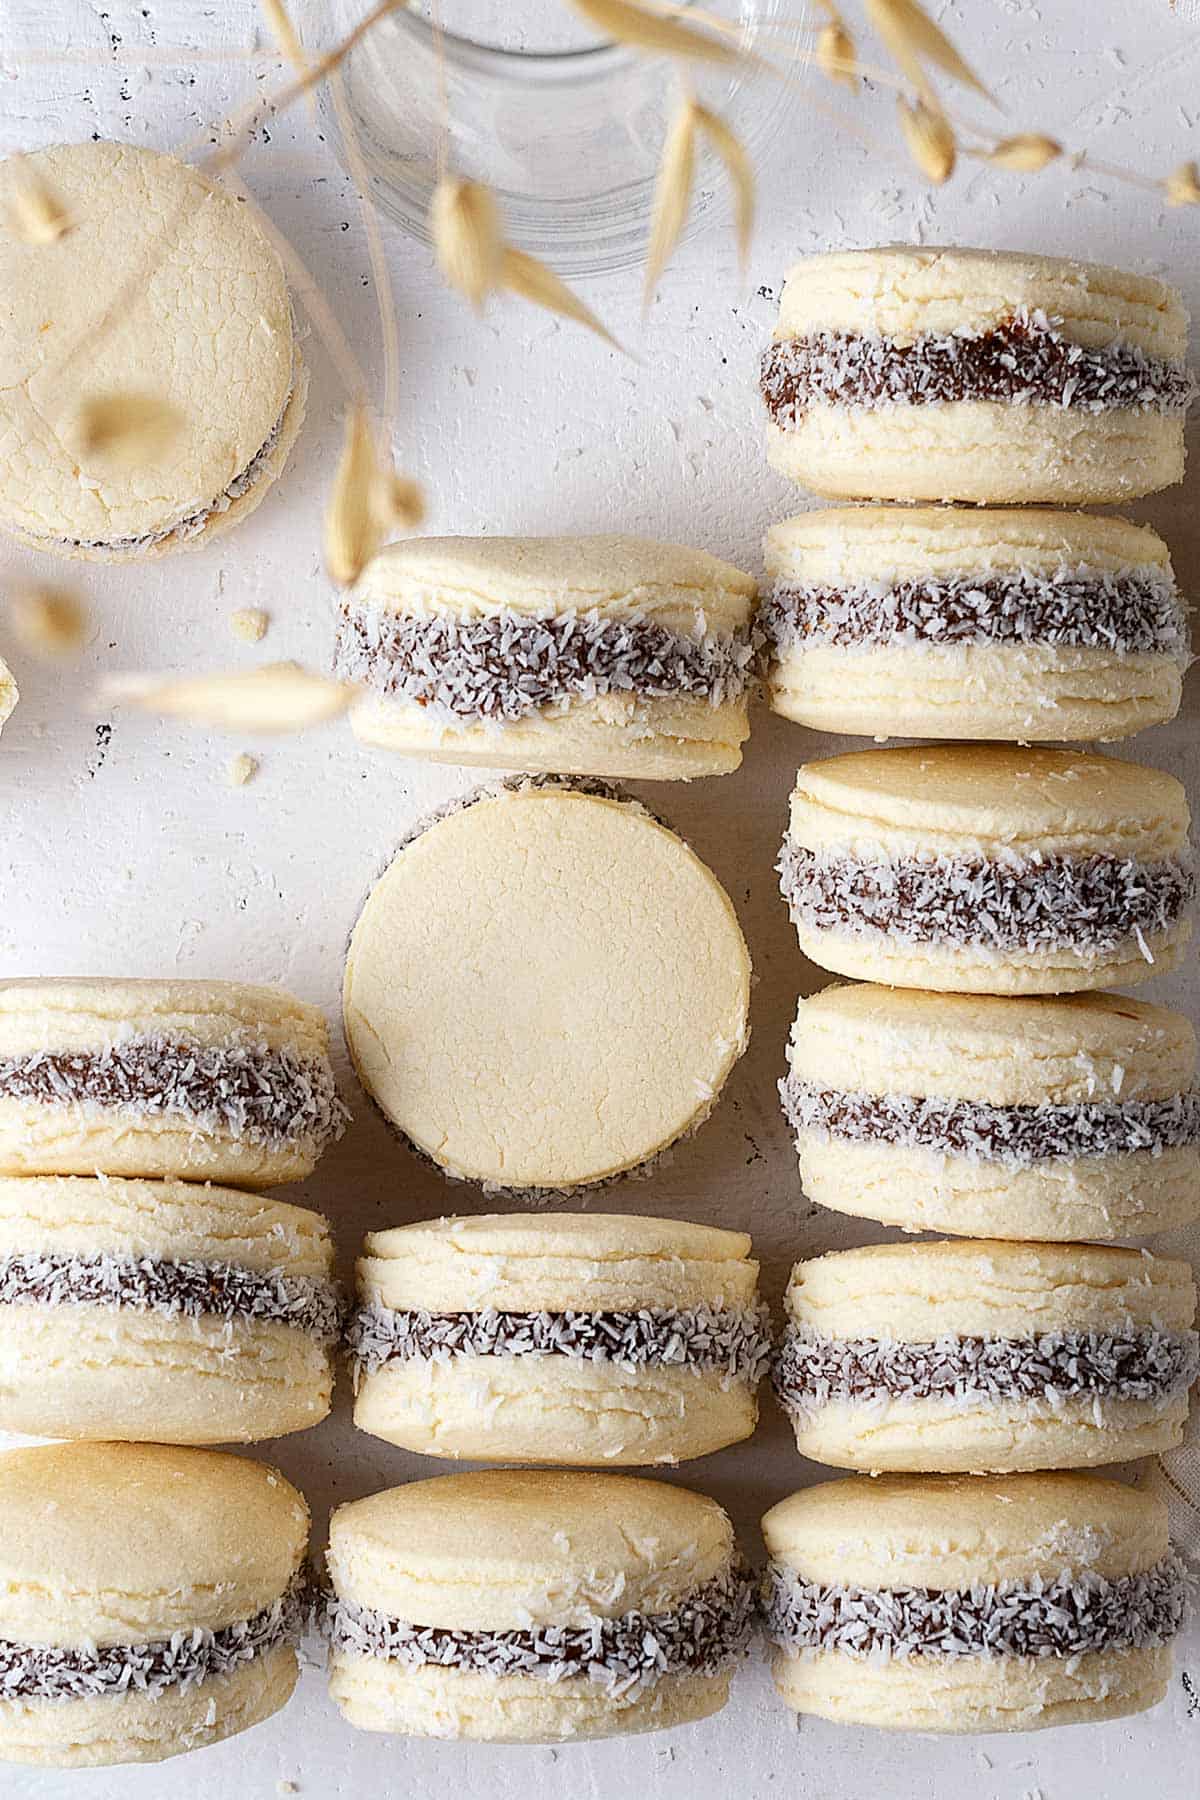
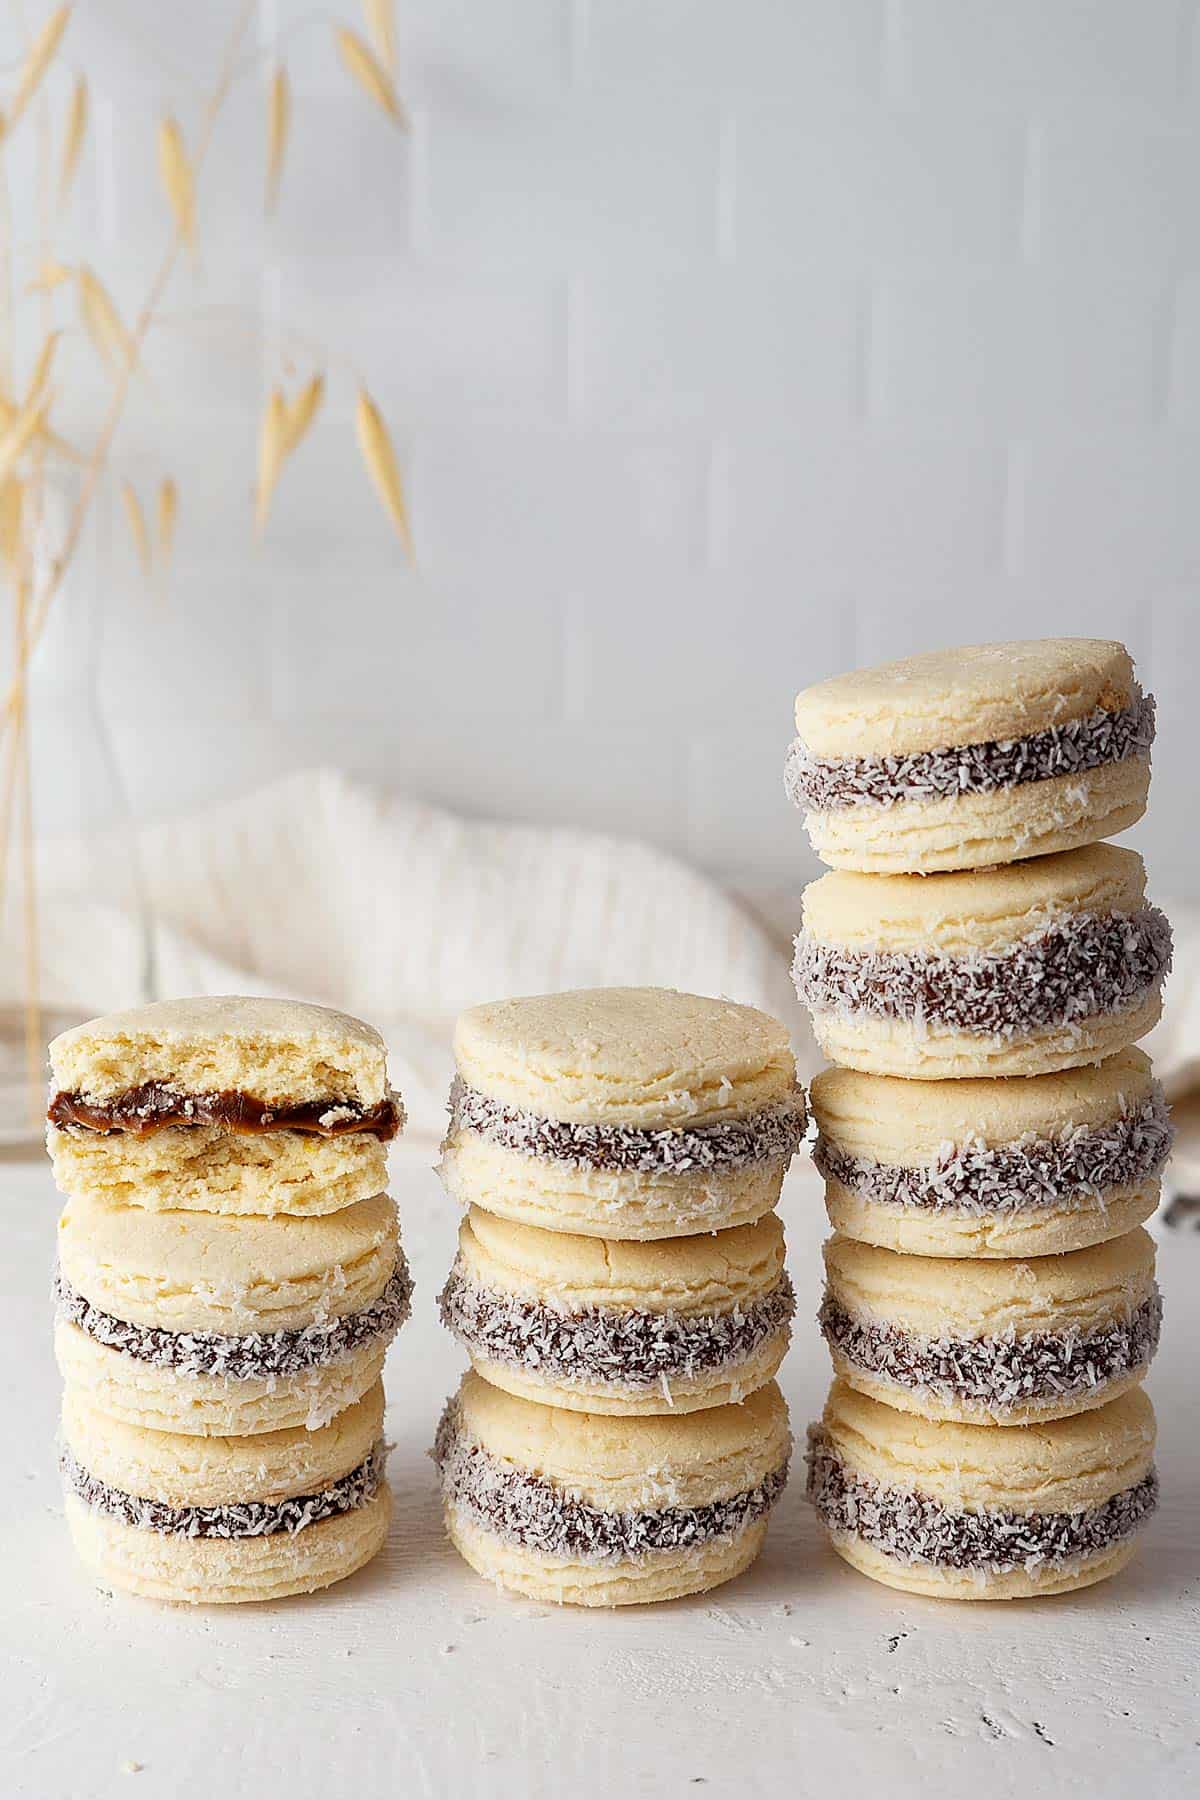
Texture and flavor - Soft crumbly melt-in-your-mouth cookies with a touch of lemon, similar to our Argentine thumbprint cookies with jam, sandwiched together with creamy dulce de leche and coated with desiccated coconut.
Size - 24 cookies (sandwiched).
Level - Easy but plan ahead. They taste better the next day.
Occasion - Oh anytime! Perfect to wow your guests and loved ones since these cookies are unique!
Lets Talk Ingredients
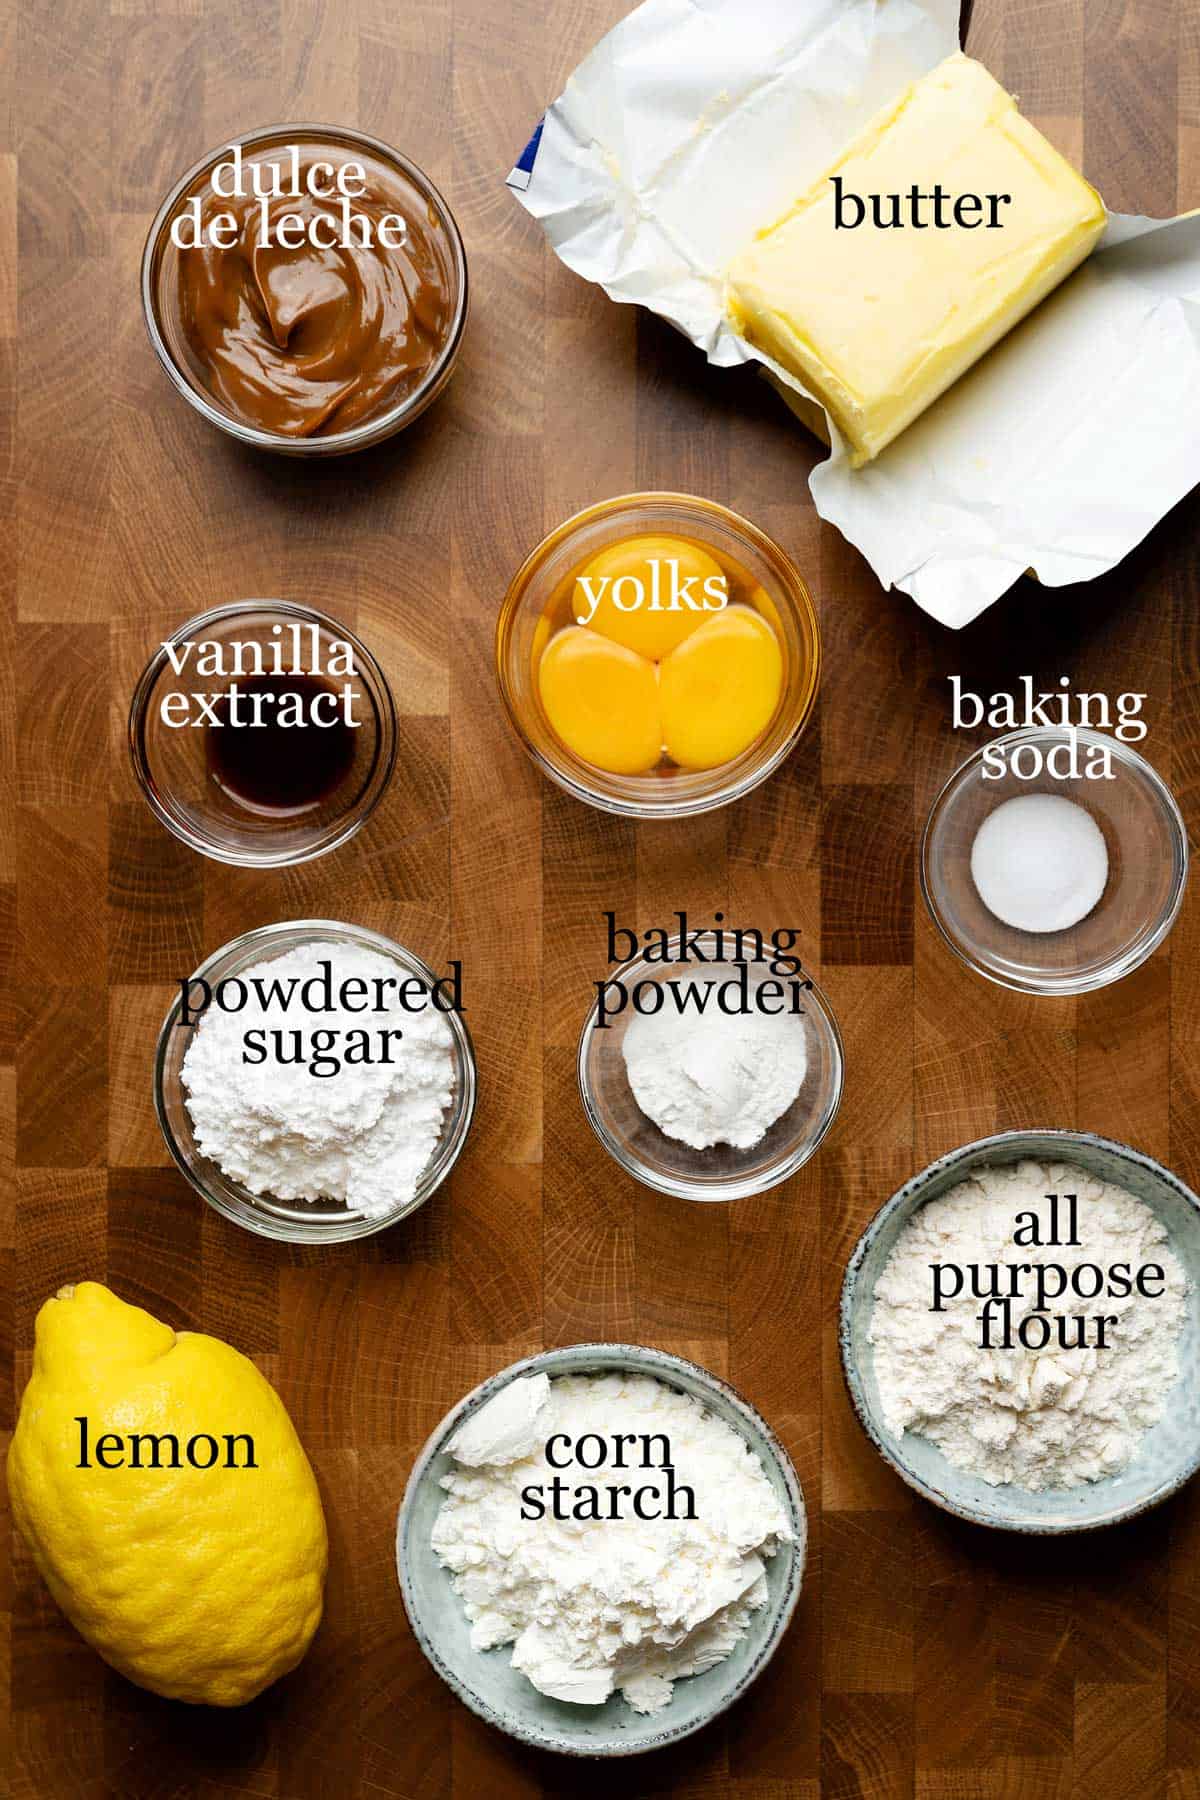
Cornstarch - A must as these are cornstarch cookies, to begin with. It's what creates the melt-in-your-mouth texture. I even use it in my amazing light and tender homemade crepes!
Butter - I use unsalted in all my bakings and add salt only if needed, which in this case, I don't.
Dulce de leche - Use baker's dulce de leche as it's firmer and holds better as the filling. If you don't have it, you can try making it yourself with my homemade dulce de leche recipe.
Powdered sugar - Makes the cookies softer and more delicate, which is what we're going for. Granulated sugar will result in a crunchier texture.
Tips To Perfect Alfajores
Everything that I know about making perfect alfajores is thanks to Marco and his parents. The experience of learning to make Argentine cookies from the Argentine themselves is really beyond measure.
I'm sharing with you all the tips so that you also can make these cookies with success and stress-free!
Plan ahead - The cookies taste better the next day as the flavors have time to blend. Make them 1 day ahead before serving, if you can.
Butter - Let it soften, which means that it's softer than room-temperature butter. When you poke into it, it shouldn't have any resistance at all. Although, you shouldn't let it be until it's starting to melt.
Less is more - Don't overwork the dough at any time in this recipe as we don't want to create any gluten (gluten = hard cookies). You won't be able to mix the dough well until the end using a handheld whisk (or any machine), so switch to using your hands. You'd think the dough will never come together, too much flour, but trust me, it will.
Use the palm of your hand and push the dough gently, bring everything back together, and repeat. The heat from your palm will help blend the butter into the dough.
Chill - Chill the dough in the fridge until it's manageable to handle. 30 minutes work for me but depending on the coldness of your fridge, you might need less or longer time.
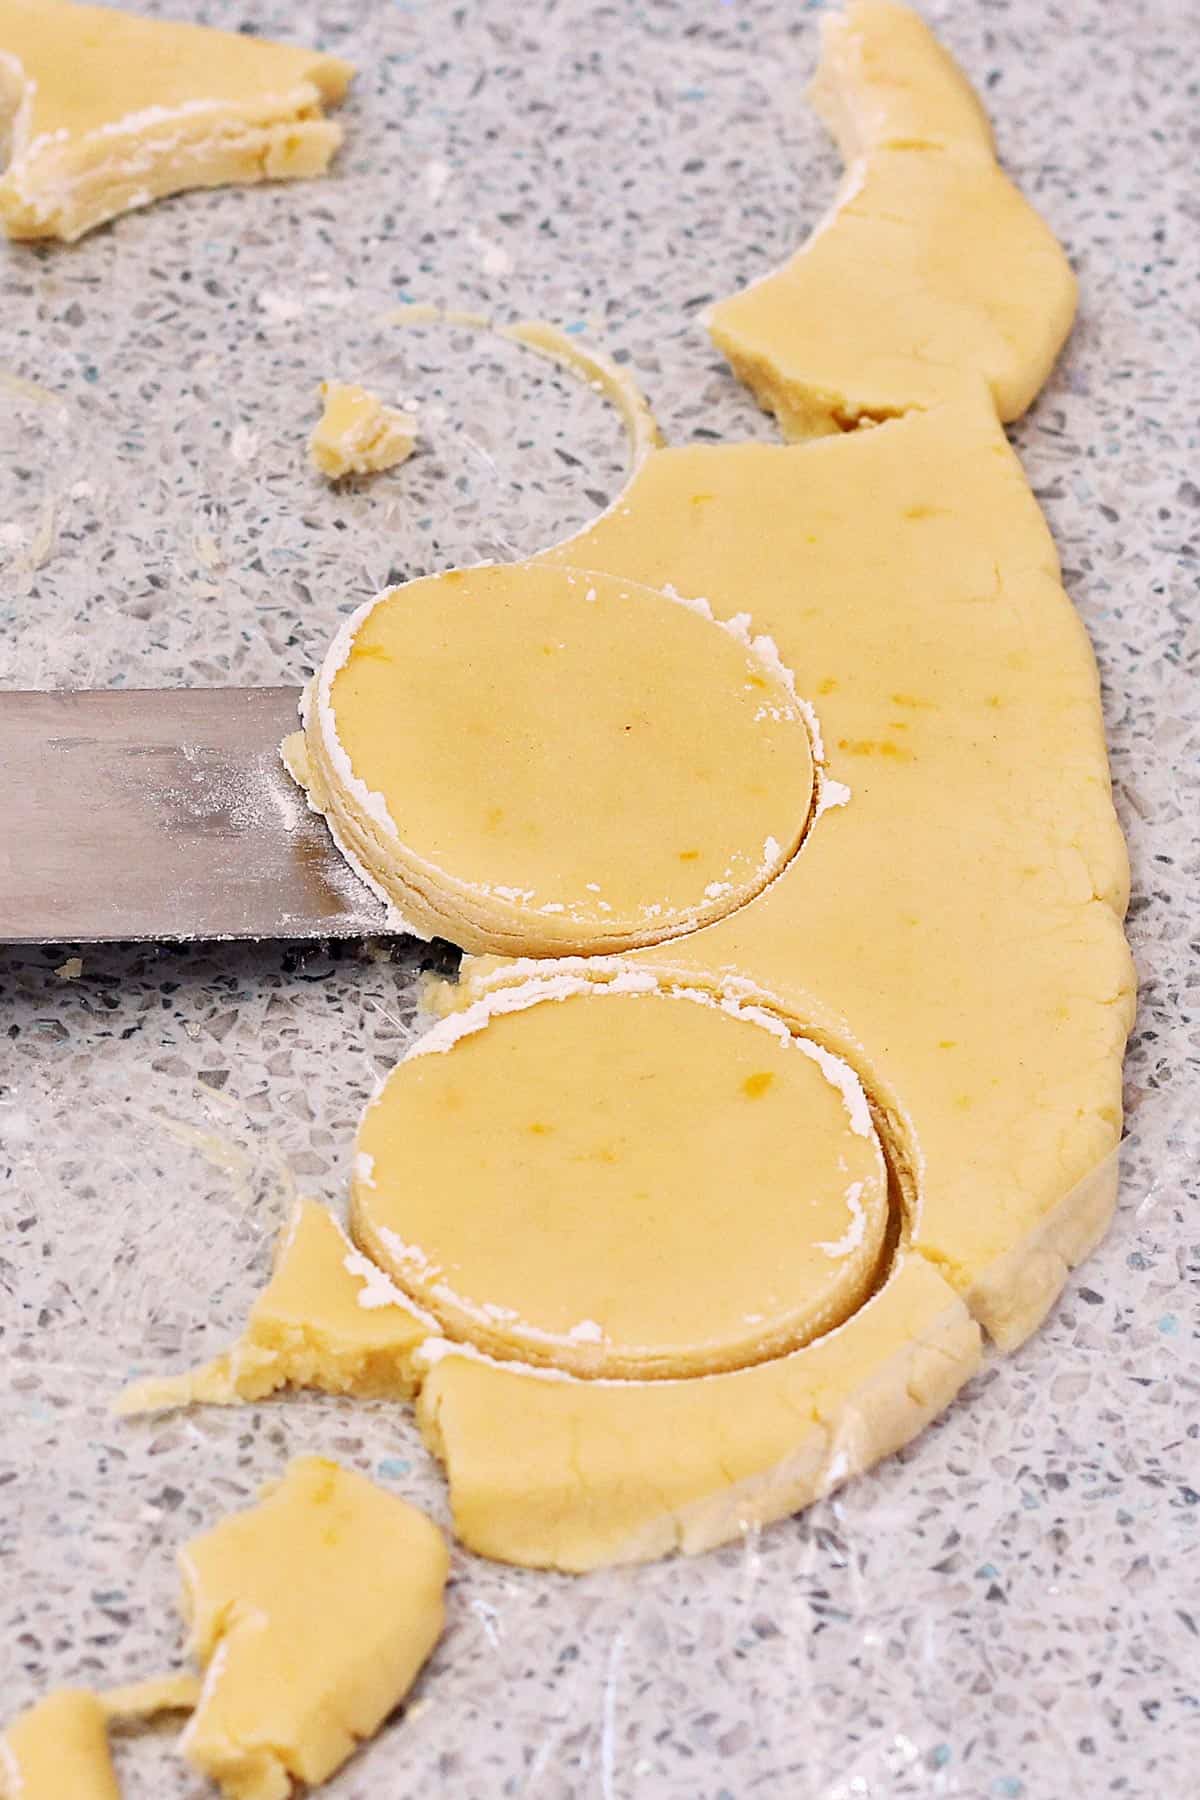
Right thickness - Cut out the dough around 8-10 mm. Too thin will risk the cookies breaking apart, and too thick will result in humungous sandwiched cookies.
Don't overbake - These cookies are supposed to be pale white, with no brown or toasted look, at all, not on top nor the bottom of the cookies. So make sure to get the temperature right. I use a portable thermometer in all my baking and never have to guess if my oven is too hot or cold.
Bakers' dulce de leche - Use it because it's firmer and holds up better compared to the normal one.
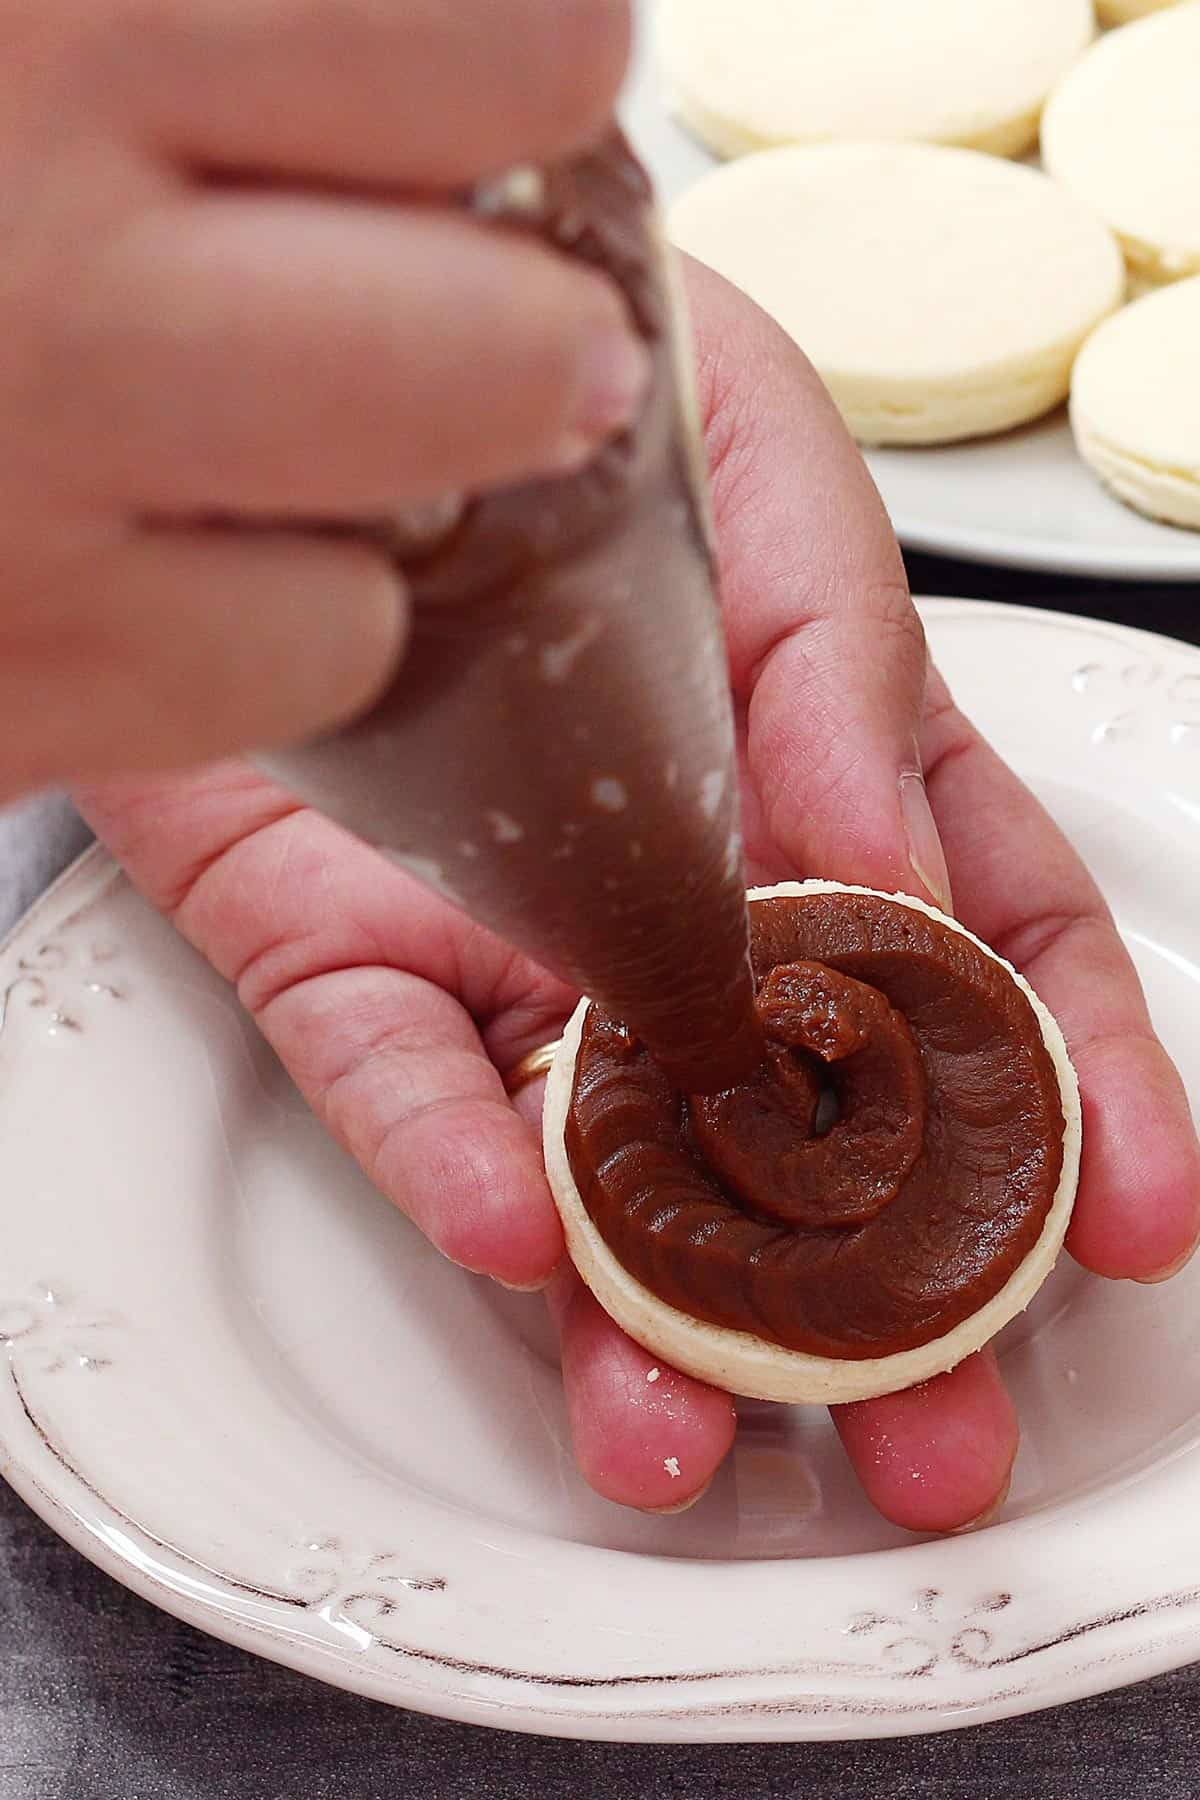
Fill it right - Pipe dulce de leche the same thickness as the cookies. It'll look better and the ratio is just perfect.
More Dulce de Leche Recipes
- Dulce de leche cones
- Coconut & dulce de leche tart
- Ricotta pie with dulce de leche
- Churros filled with dulce de leche
Watch How To Make It
📖 Recipe
Classic Argentine Alfajores
Video
Ingredients
Dry Ingredients
- 2 ½ cup (300 g) corn starch , use spoon and level method
- 1 ½ cup (200 g) all purpose flour , use spoon and level method
- ½ teaspoon baking soda
- 2 teaspoon baking powder
Wet Ingredients
- 1 ¼ cup (150 g) icing sugar , sifted
- 7 oz (200 g) unsalted butter , soften
- 3 large egg yolks , room temperature
- 1 teaspoon vanilla extract
- zest of 1 medium sized lemon
Filling
- bakery dulce de leche , as needed
Instructions
Dry Ingredients
- Sift everything into a bowl, set aside.
Wet Ingredients
- In another bowl, mix powdered sugar and butter until creamy using a handheld whisk. Add in egg yolk one by one, mixing well to combine after each addition. Add in vanilla extract, lemon zest and mix to combine.
- Add in dry ingredients in 3 additions, mixing just enough after each addition. Don't over mix. For the 3rd addition, you will not be able to mix everything to combine using hand held mixer. When it's half mixed, pour everything onto the working surface.
- Start folding the mixture onto itself and gently push with your palm until you get a ball. Do not knead. Refer to tutorial video above for better understanding.
- Wrap with cling film and chill in the fridge for 30 minutes or until manageable.
Shape & Bake
- Put ⅓ of dough on a cling film and cover it with another. Gently roll it into 8-10mm thickness. If the dough breaks, just gently push it back together. Chill in the fridge for 10 minutes while you continue rolling the rest.
- Take 1 rolled dough from the fridge and place it on the working surface. Remove the top cling film. Cut out 1.7 inch (4.5 cm) circles using floured cutter/glass. Place on parchment paper on baking tray. Place in the fridge if you're not baking them immediately.
- Bake at 360F (180ºC) in a preheated oven, conventional mode, on middle rack for 10-12 minutes or until fully cooked without having any toasted colour. Cool completely before using.
Assemble
- Pipe dulce de leche on the bottom side of a cookie, more or less the same thickness of the cookie itself. Take another cookie and place it on top and lightly press. Roll in desiccated coconut. Enjoy!
How To Store
- Place in air tight container, at room temperature. Best consumed the next day. Last good for 1 week at room temperature, 2 weeks in the fridge.
Notes
- Make sure to use softened butter.
- Don't over work the dough at any time, have patience, pressing and pushing it gently with your palm will bring everything together.
- Always keep the dough/cut out circles chill in the fridge when you're not working with them.
- Use bakers' dulce de leche, not the normal one.
- Use portable oven thermometer to get the accurate temperature (I use it in all my bakings).
Nutrition Facts
The nutrition facts provided are an estimate per serving. Accuracy is not guaranteed.
Originally published on Oct 25, 2017. Updated with improved text, recipe and pictures on Jul 7, 2021.

u says
yummy in my tummy
Bea & Marco says
Haha! That’s exactly what we feel, too. Thanks for your feedback!
u says
its yummy
Natalia says
Me encantan! The masa turns out so delicate and melts in your mouth. I'll reduce the lemon peel depending on who I'm making them for, but I keep coming back to this recipe.
Bea & Marco says
We're thrilled to hear that, Natalia! Yes, adjust the zest as needed, no problem at all. Thank you so much for leaving your feedback here!
Sam says
Made these today and they are delicious! My dough was too dry even thought I did the spoon & level method. Had to add a couple ounces of butter and that worked well. My homemade dulce de leche is delicious, but much lighter in color than the pictures. Not sure why. Thank you!
Bea & Marco says
Hi, Sam! So glad to hear you enjoyed them! The dough can seem dry initially, but once you start bringing it together, the warmth from your hands softens the butter and helps it form a smooth dough. But we're happy that it worked out great for you anyways! As for the dulce de leche, a lighter color often just means it wasn’t cooked as long or was made with a milk brand that yields a paler result. Hope it helps and thank you for your feedback!