


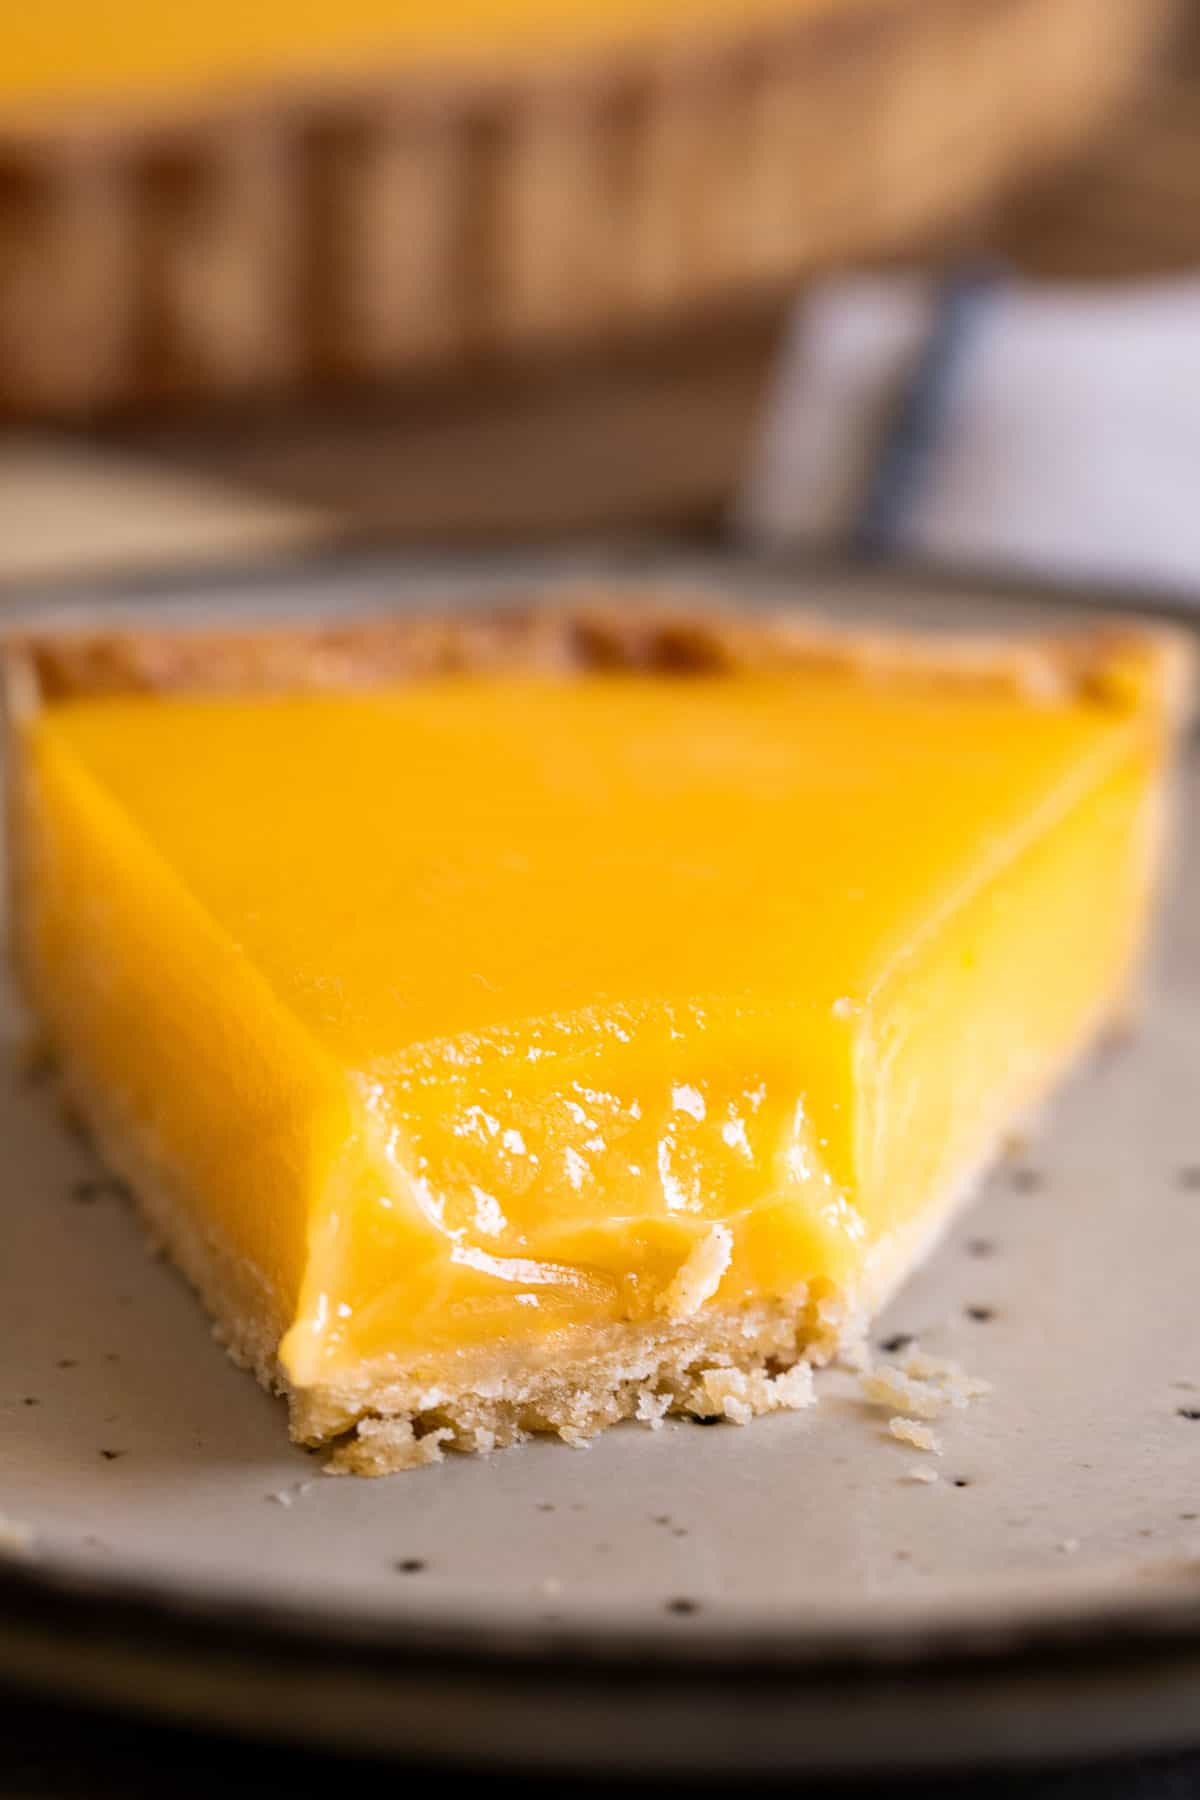
This lemon tart recipe is silky, bright, and perfectly balanced, with a crisp buttery crust and a smooth, glossy lemon filling that melts on your tongue. Each bite is bright and zesty without being sharp, and sweet without feeling heavy, leaving a clean, refreshing finish that keeps you coming back for more.

📮 Save this recipe for later!
Jump to:
- Why this lemon tart recipe works
- Ingredients you'll need
- Substitutions and variations for lemon tart
- Watch the video
- How to make this lemon tart recipe (step-by-step)
- Tips for the best lemon tart recipe
- Common mistakes in lemon tart (and how to avoid them)
- Troubleshooting lemon tart issues
- How to know when a lemon tart is set
- How to store, freeze, and make ahead
- Frequently asked questions
- More tart and lemon desserts
- 📖 Recipe
- 💬 Comments
Marco has always loved lemon desserts; he's been making his lemon meringue pie since he was a teenager, so the bar for this lemon tart recipe was pretty high!
We tested and adjusted it in our small motorhome kitchen until the flavor felt just right, bright, zesty, and clean without being too sharp or heavy. At one point, Bilbo smelled like fresh lemons all day, and honestly, we loved it!
The best part of this lemon tart recipe is that it's simple enough to make even in a tiny space like ours, and when we shared it with our camping neighbors, they completely loved it. If you enjoy desserts like this, you can explore more in our Tart and Pie Recipes.
Why this lemon tart recipe works
This easy lemon tart recipe works because it delivers a smooth, creamy filling and a crisp, buttery crust with simple, reliable steps. Clear visual cues help you get consistent, bright, zesty results every time.
That silky, glossy filling: The lemon mixture is cooked gently and finished with butter in stages, giving you a smooth, creamy texture that feels rich but still light and fresh.
A crust that stays crisp: The tart shell is fully blind baked until lightly golden, so it holds the filling without turning soft or soggy.
Bright, balanced lemon flavor: Fresh lemon juice and zest bring a clean, zesty taste that's tangy without being harsh, and sweet without feeling heavy.
Visual cues you can trust: Look for signs like a matte crust and a slight jiggle in the center, so you always know when each step is ready.
Designed to work in real kitchens: This easy lemon tart recipe was tested in our small motorhome setup, so the steps are practical, forgiving, and realistic for home cooks.
Ingredients you'll need
This lemon tart recipe uses simple ingredients, but each one is chosen to help you make a homemade lemon tart with a crisp, buttery crust and a silky, bright lemon filling that tastes clean and balanced.
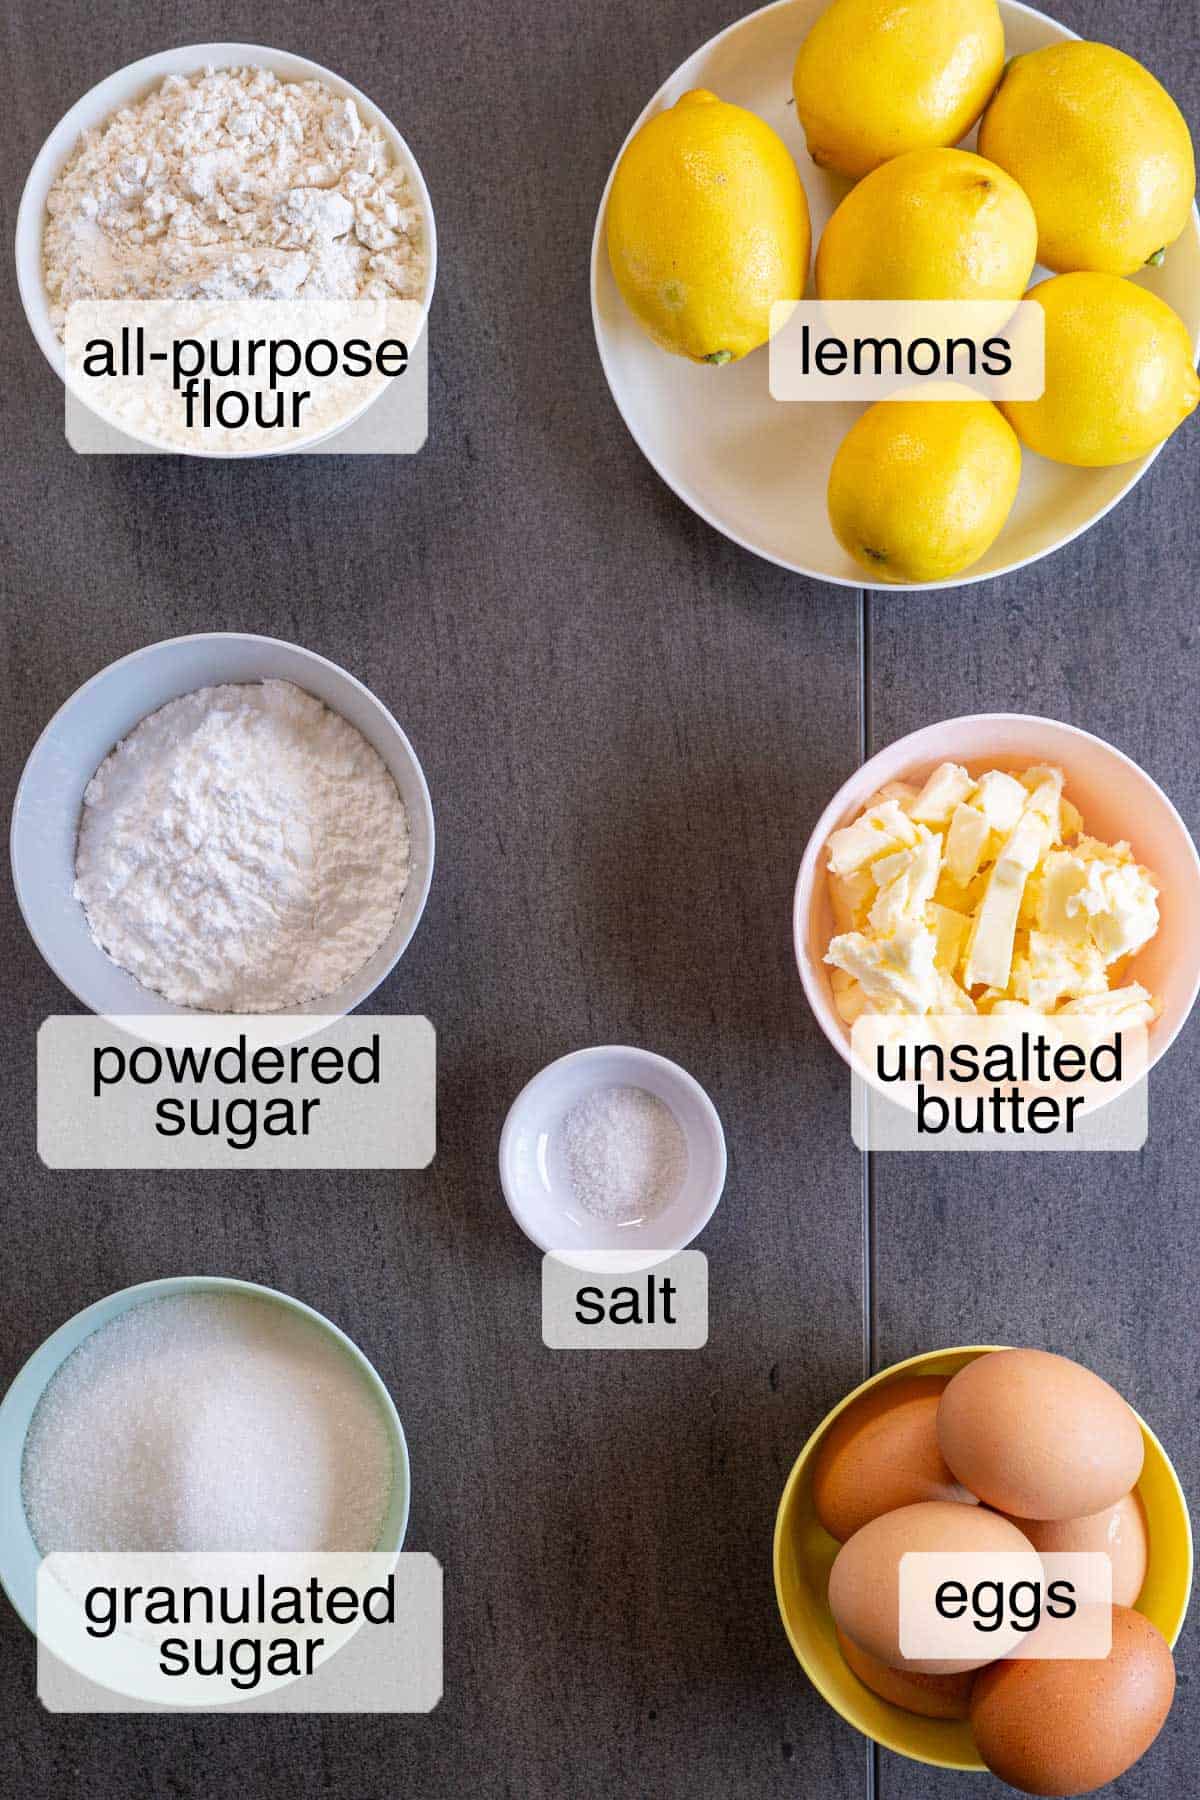
Key ingredient notes:
For the crust
Powdered sugar: Dissolves smoothly into the dough, giving the crust a finer, more delicate texture without graininess.
Lemon zest: Adds a subtle citrus aroma that ties the crust and filling together beautifully.
For the filling
Fresh lemon juice: Brings a bright, zesty flavor that makes this lemon tart recipe taste fresh and vibrant.
Lemon zest: Adds depth and aroma, giving the filling a fuller, more rounded lemon flavor.
Eggs and yolks: Create a richer, silkier texture and help the filling set smoothly without becoming too firm.
Butter: Gives the filling its glossy finish and rich, smooth mouthfeel.
You'll find all the exact measurements in the recipe card below.
Substitutions and variations for lemon tart
This lemon tart recipe is flexible, so you can adjust it without losing its smooth, creamy texture and bright, zesty flavor.
- Use store-bought crust if needed: If you're short on time, you can use a pre-made tart shell, but blind baking it first still helps keep it crisp and prevents sogginess.
- Graham-style crust: You can swap the classic tart shell for a graham cracker crust for a softer, more familiar flavor. It works well, but the texture will be less crisp and the slices less clean compared to a traditional tart.
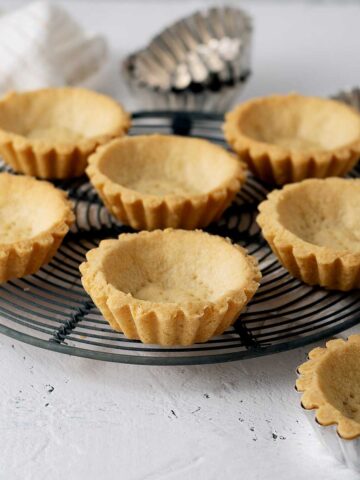
- Make mini lemon tarts: Turn this into a lemon tarts recipe by dividing the dough into smaller tart pans and reducing the bake time. Great for serving guests or portioning ahead, especially if you already love our Mini Salted Chocolate Tarts.
- Adjust the sweetness level: If you prefer a sharper, more classic tarte citron flavor, slightly reduce the sugar. For a softer, more dessert-style balance, keep it as written.
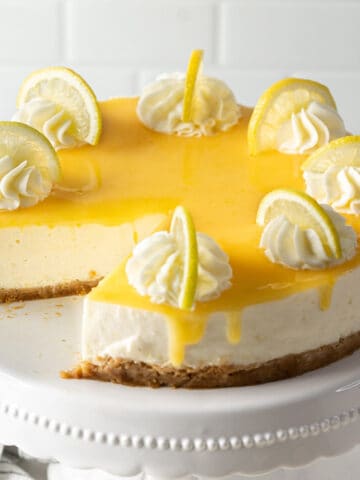
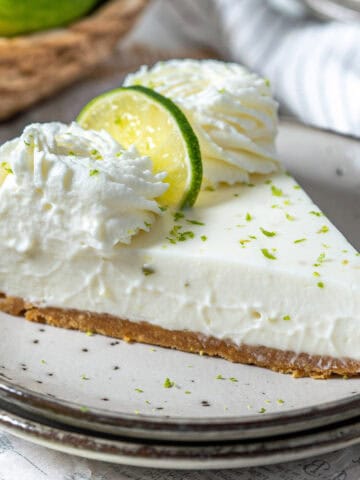
- Try an easier lemon dessert: If you want something even simpler with a similar flavor profile, you might enjoy our creamy No-Bake Lemon Cheesecake.
Watch the video
If you want to see how this easy lemon tart recipe comes together, watch the step-by-step video below to see the dough texture, glossy filling, and how the tart should look at each stage.
How to make this lemon tart recipe (step-by-step)
This lemon tart recipe comes together in two simple parts: the crust and the filling. Follow the short visual cues below so you know exactly what each stage should look like. If you're new and want to make smaller versions, you can also check our How To Make Mini Tart Shells recipe.
Crust

Make the dough
Mix the butter, powdered sugar, lemon zest, and salt until smooth and creamy. Add the egg and mix until fully combined, then add the flour and mix just until a soft dough forms.
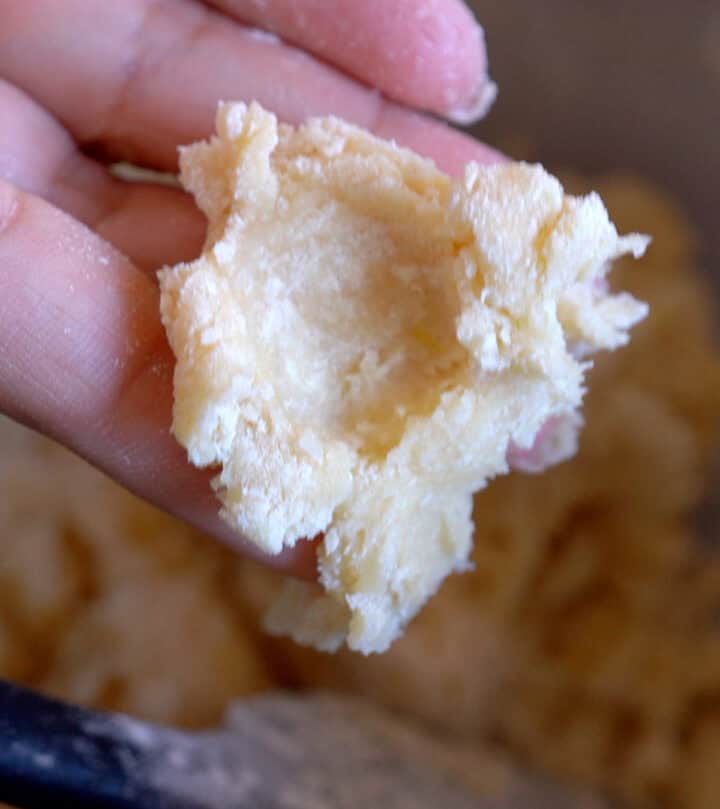
Check texture
It should look slightly crumbly but hold together when pressed, soft and smooth, not sticky or greasy.
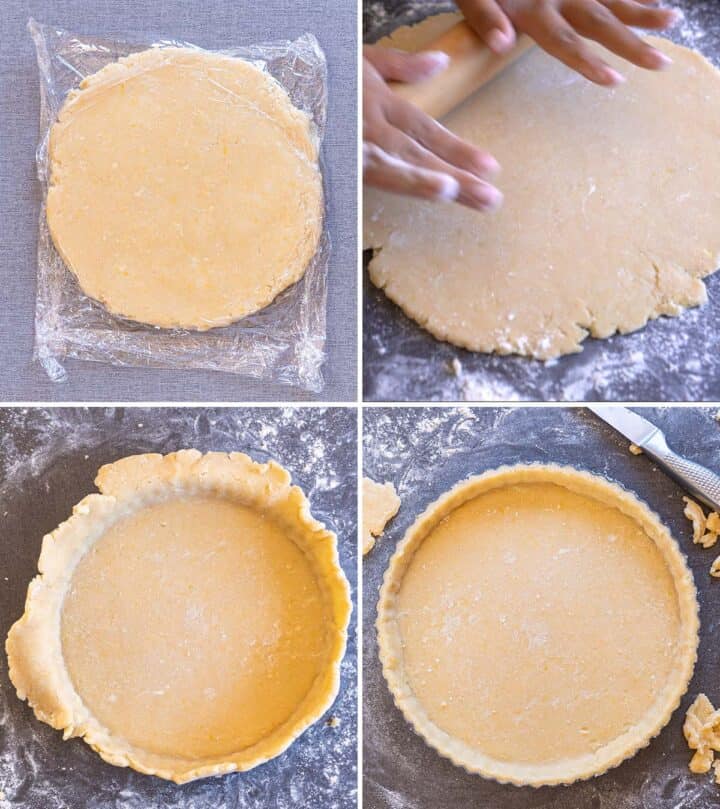
Chill and roll
Shape into a thick disc, wrap, and chill until firm. Roll evenly, line a 9-inch removable bottom tart pan, and trim the edges. Freeze until the shell feels very firm and cold.
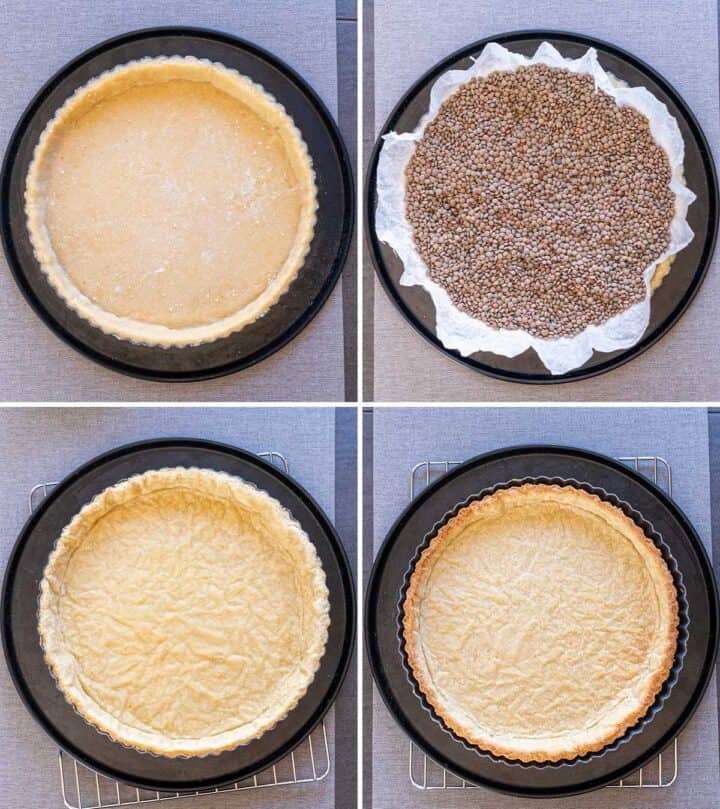
Blind bake the crust
Bake with weights until the edges look lightly golden and set. Remove the weights, then bake again until the base looks dry, matte, and lightly golden.
Filling

Make the lemon mixture
Rub the lemon zest and sugar together until fragrant, then whisk in the eggs, yolks, and lemon juice until smooth (a simple hand whisk works best here for control).
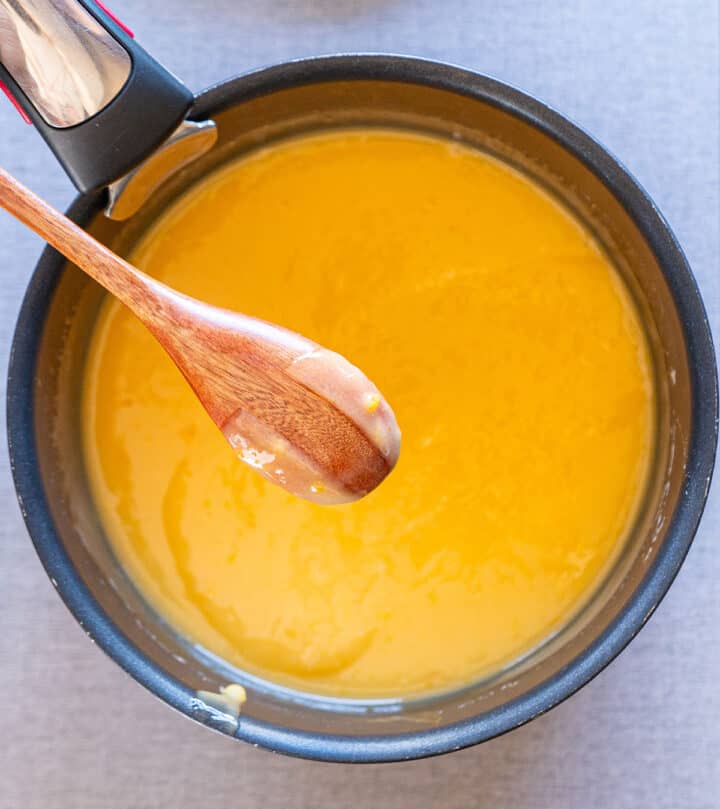
Cook
Cook over low heat, stirring constantly, until it thickens slightly and looks glossy. Run your finger through it; it should leave a clean line that holds.
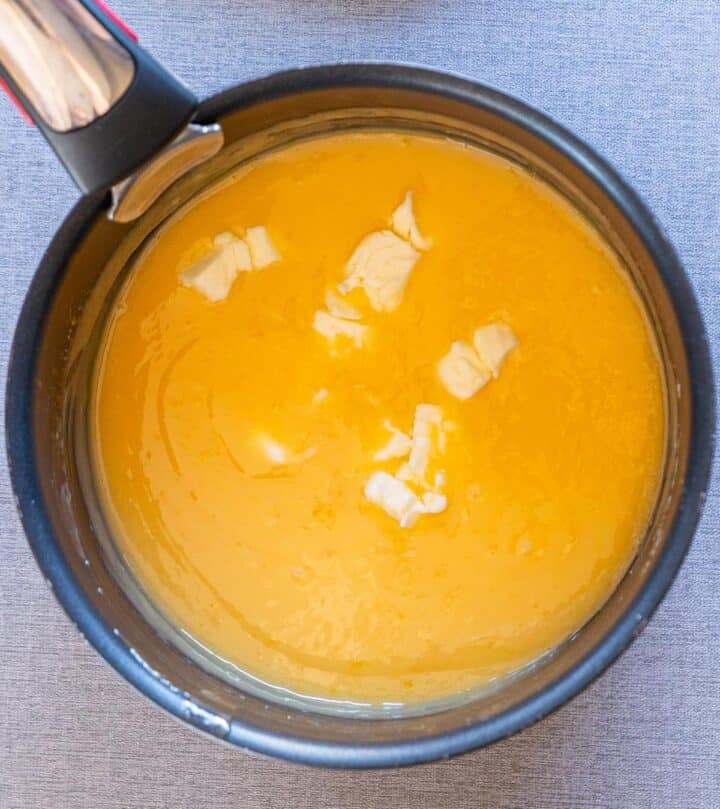
Add butter
Remove from the heat, then add the butter in 2 to 3 additions, mixing until fully melted and smooth.
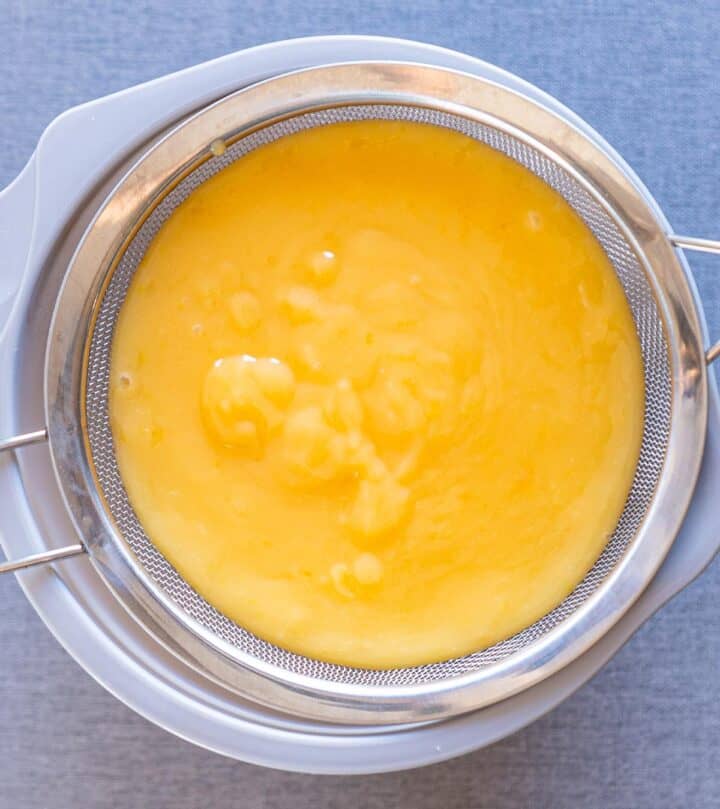
Strain
Pour the filling through a sieve into a jug or bowl, so it stays smooth and easy to pour.
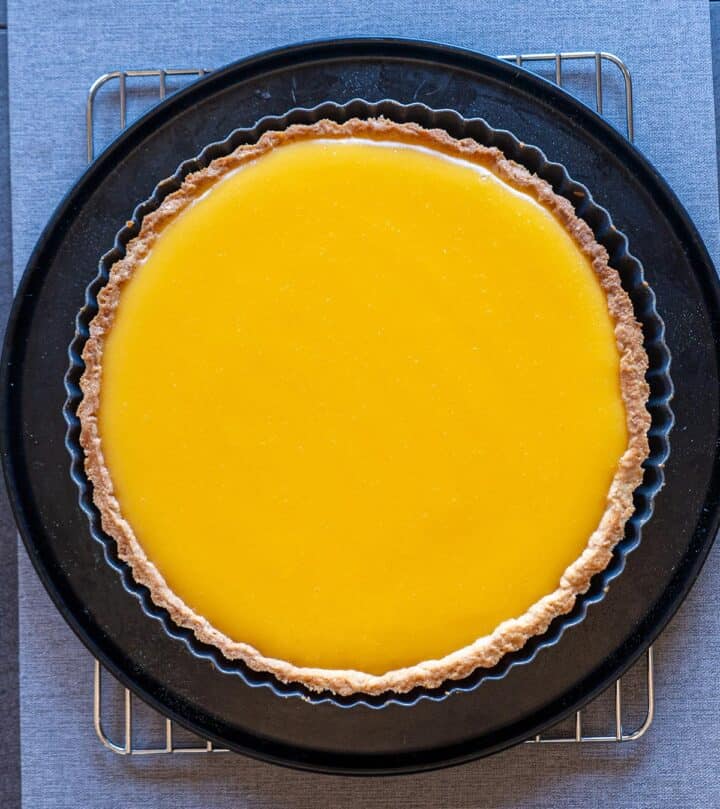
Bake and chill
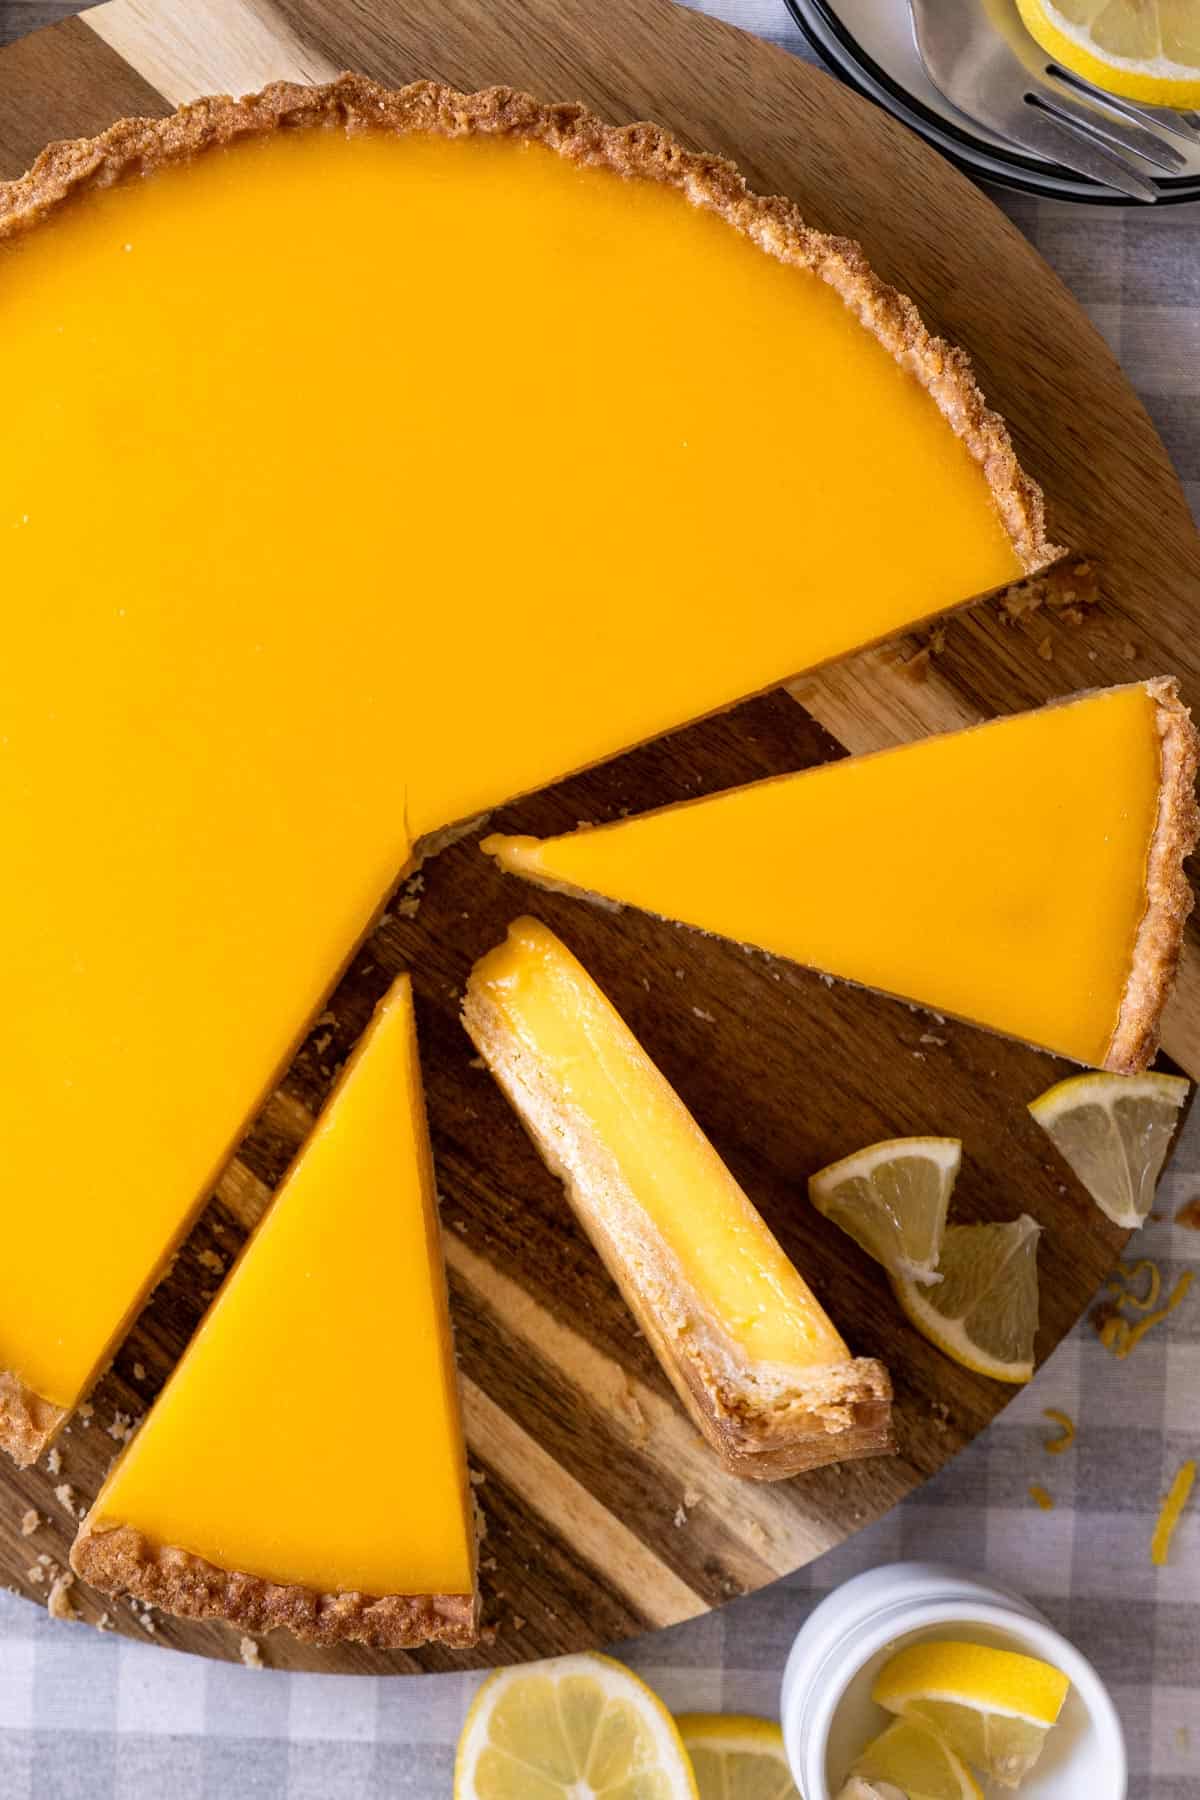
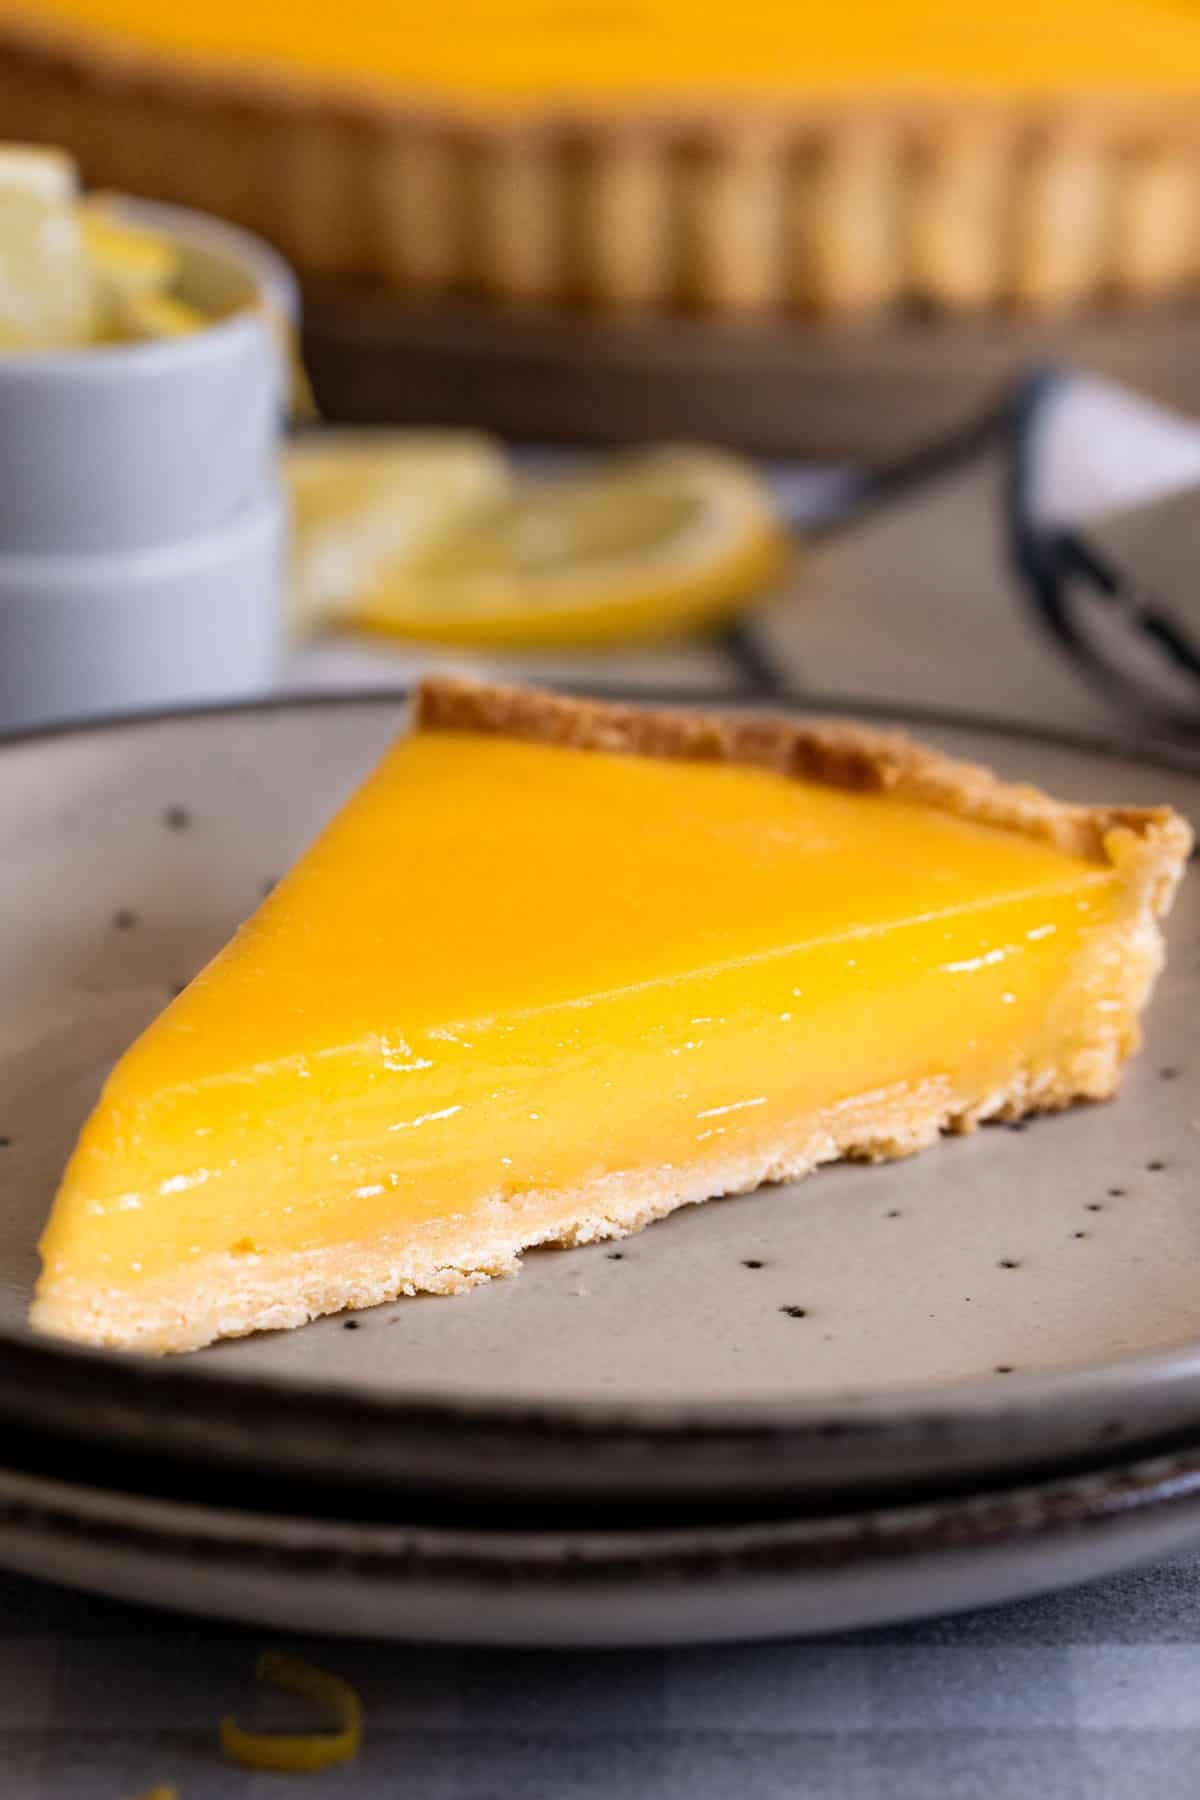
Pour the warm lemon mixture into the crust. Bake until the edges are set, and the center still jiggles slightly. Cool completely, then chill for at least 4 hours before slicing.
Tips for the best lemon tart recipe
This lemon tart recipe is simple to follow, but a few small details can make a big difference in getting that smooth, creamy filling and crisp, buttery crust every time.
- Don't rush the dough: Chilling the dough properly makes it easier to roll and helps the crust hold its shape without shrinking.
- Bake the crust until fully dry: A pale crust will turn soggy once filled, so look for a dry, matte surface with a light golden color.
- Cook the lemon mixture gently: Keep the heat low and stir constantly so the eggs don't scramble and the texture stays smooth and silky.
- Strain for a smoother finish: Running the mixture through a sieve removes zest bits and gives you a clean, glossy filling.
- Don't overbake the tart: The center should still jiggle slightly; it will continue to set as it cools.
- Chill before slicing: Letting the tart fully chill helps the filling firm up so you get clean, neat slices.
Common mistakes in lemon tart (and how to avoid them)
Even with a reliable lemon tart recipe, a few small missteps can affect the texture and finish. These are the most common mistakes and how you can avoid them.
- Undercooking the lemon mixture: If it doesn't thicken enough on the stove, the filling may not set properly and can turn out too soft.
- Cooking over high heat: Too much heat can scramble the eggs, giving the filling a grainy texture instead of smooth and silky.
- Skipping the second bake of the crust: If the base isn't fully dry and lightly golden, it can become soggy once the filling is added.
- Overbaking the tart: Baking until fully set will make the filling lose its creamy texture and can cause cracks.
- Pouring into a hot shell: A very hot crust can affect how the filling sets and lead to uneven texture.
Troubleshooting lemon tart issues
If something doesn't turn out quite right, don't worry. These are the most common lemon tart recipe issues and how to fix them.
- Runny filling: The mixture likely didn't cook long enough on the stove, or the tart was underbaked. It should thicken slightly on the stove, and the baked tart should still have a slight jiggle in the center, not a liquid ripple.
- Grainy texture: The heat was too high when cooking, causing the eggs to scramble. Keep the heat low and stir constantly for a smooth, silky finish.
- Cracks on top: This happens when the tart is overbaked. The center should still have a slight jiggle when you take it out.
- Soggy crust: The shell wasn't baked long enough before adding the filling. It should look dry, matte, and lightly golden.
- Shrinking crust: The dough wasn't chilled enough before baking. Proper chilling helps it hold its shape.
How to know when a lemon tart is set
Knowing when your lemon tart recipe is done is key to getting that smooth, silky texture without overbaking.
- Set edges, soft center: The edges should look firm and set, while the center still has a slight jiggle when you gently move the pan.
- Jiggle, not liquid: The center should move like a soft gel, not ripple like liquid. If it looks runny, it needs more time.
- It finishes setting as it cools: The tart will continue to firm up as it cools and chills, so it's better to slightly underbake than overbake.
How to store, freeze, and make ahead
This lemon tart stores well and is perfect for making ahead. Here's how to keep it fresh, slice cleanly, and plan ahead without losing that silky texture.
Serve
- For the best texture, let the tart sit at room temperature for about 20 to 30 minutes before serving so the filling softens slightly.
Store
- Keep the tart covered in the fridge for up to 3 days.
- The filling will stay smooth and set, and the flavor actually deepens over time.
Freezer
- Wrap slices tightly and freeze for up to 1 month.
- Thaw in the fridge overnight before serving.
Make ahead
- You can prepare the crust up to 2 days ahead and keep it chilled in the pan before baking, or fully bake the shell and store it at room temperature, covered.
- The lemon mixture can be made ahead and kept in the fridge for up to 2 days for the best texture and flavor, then brought back to room temperature before using.
- Bake the complete tart a day in advance and chill overnight. It will set more cleanly and slice the next day beautifully.
Frequently asked questions
We suggest using fresh lemon juice for a bright, zesty flavor. Bottled juice tends to taste flat and less vibrant.
Yes. Cooking it first helps it thicken and ensures a smooth, silky texture, then baking finishes setting it gently in the crust.
Yes. Because of the egg-based filling, it should be stored in the fridge once cooled. It also helps you get clean, neat slices.
Yes, you can freeze lemon tart. Wrap it tightly and freeze for up to 1 month, then thaw it overnight in the fridge before serving for the best texture.
A runny lemon tart usually means it was undercooked. The filling should thicken on the stove and bake until the center jiggles slightly, not look liquid.
A lemon tart is done when the edges are set, and the center still jiggles slightly. It will finish setting as it cools.

This lemon tart recipe is all about balance, giving you a classic lemon tart with a crisp buttery crust, a silky, bright filling, and that fresh, zesty flavor that keeps you coming back for another bite.
We tested it thoroughly in our small motorhome kitchen until we nailed it, and if it works here, it will absolutely work for you at home!
Once you make this lemon tart recipe, it will quickly become one of those desserts you feel confident making anytime. If you try it, tell us how it went. We'd especially love to hear if it's your first time making it or who you shared it with.


Did you try this Lemon Tart Recipe?
We'd love to hear from you! Please leave us a ★★★★★ rating and share your thoughts in the comments. If you post on Instagram, tag us, we'd love to see it!
Thank you! - Bea and Marco
📖 Recipe

Lemon Tart Recipe
Video
Equipment
Ingredients
Crust
- ½ cup (113 g) unsalted butter softened
- ½ cup (60 g) powdered sugar sifted
- 1 teaspoon lemon zest
- ¼ teaspoon fine salt
- 1 large egg room temperature
- 1½ cup (195 g) all-purpose flour
Filling
- 1 cup granulated sugar
- 2 tablespoon lemon zest from about 2 lemons
- 4 large egg yolks room temperature
- 3 large egg room temperature
- ⅔ cup fresh lemon juice from about 3-4 lemons
- ¼ teaspoon fine salt
- 6 tablespoon unsalted butter small cubes, room temperature
Instructions
Prepare the crust
- Grease a 9-inch tart pan with removable bottom. Set aside.
- 👉 Tip: since we're using a spatula, press the mixture against the bowl as you mix to help everything combine smoothly.
- In a bowl, mix butter, powdered sugar, salt, and lemon zest until smooth. Mix in the egg until fully incorporated. It will look separated and curdled, don't worry.½ cup unsalted butter, ½ cup powdered sugar, 1 teaspoon lemon zest, ¼ teaspoon fine salt, 1 large egg
- Add flour and mix just until a dough forms. Do not overmix.👉 Cue: pinch and if it stays then it's good.1½ cup all-purpose flour
Chill and roll
- Place on a cling film, shape into a ½-inch disk, wrap, and refrigerate for 1 hour.
- Roll to a 11-inch circle on a lightly floured surface. 👉 Tip: leave dough at room temperature for 5-8 minutes if it's rock hard. start rolling from the center outward, rotate the dough ¼ turn every few rolls
- Roll the dough onto your rolling pin, unroll over the tart pan with removable bottom, then press into the corners. Flatten the base, trim edges, and don't stretch the dough.
- Place the tart pan on a baking tray to keep the base steady, then freeze for 30-45 minutes to prevent shrinking.👉 Cue: when you touch it before baking, it should feel very firm, cold like fridge butter, not bendy, and not sticky at all, but it should not be solid frozen.
Bake
- Preheat the oven to 375°F (190°C), no fan. Place the rack to lower-middle position.
- Crumple a piece of parchment paper larger than the pan, then flatten it. Line the crust with it and fill with baking weights such as dried beans, lentils, or rice.👉 Tip: this makes the crust holds its shape and prevents it from puffing up
- Bake for 20-24 minutes.👉 Cue: look for these before removing weights: edges light golden, crust looks set, not raw, parchment lifts away easilyIf the edges are still pale → give 2-3 more minutes.
- Carefully lift the parchment paper with the weights out of the crust.👉 Cue: you want: bottom light golden, crust dry and matte, edges slightly deeper golden
- Return to the oven and bake for another 10-14 minutes until medium golden. Remove from the oven and set aside while continuing with the filling.
Filling
- Reduce oven to 325°F (160°C).
- Rub lemon zest into sugar until fragrant. Whisk in egg yolks and whole egg until smooth. Whisk in lemon juice and salt.1 cup granulated sugar, 2 tablespoon lemon zest, 4 large egg yolks, 3 large egg, ⅔ cup fresh lemon juice, ¼ teaspoon fine salt
- Cook over medium-low heat, whisking constantly, for more or less 5 minutes. The mixture will slowly thicken. Cook until it reaches thick custard consistency and coats the back of a spoon.👉 Tip: start with whisk, once it warms and slightly thickens → switch to spatula. this gives you the smoothest custard
- Remove from heat and mix in butter in three additions until smooth. Strain through a fine sieve, pressing the zest through. Pour filling into the crust.6 tablespoon unsalted butter
- Bake for another 20-24 minutes.👉 Cue: the surface should look set but still slightly soft in the center
- Cool to room temperature. Refrigerate a minimum of 4 hours before slicing.
Notes
- Use fresh lemon juice for the best bright, zesty flavor. Bottled juice can taste flat.
- Cook the filling gently over low heat and stir constantly to keep it smooth and prevent curdling.
- Don't overbake. The center should still jiggle slightly and will finish setting as it cools.
- Chill the tart fully before slicing for clean, neat cuts.
Nutrition Facts
The nutrition facts provided are an estimate per serving. Accuracy is not guaranteed.


Bea & Marco says
We shared this with our camping neighbors and it was gone in minutes… we're curious how long it lasts in your kitchen. We always love hearing your stories!