
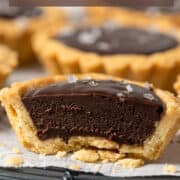
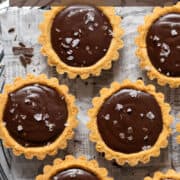
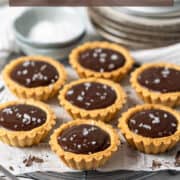
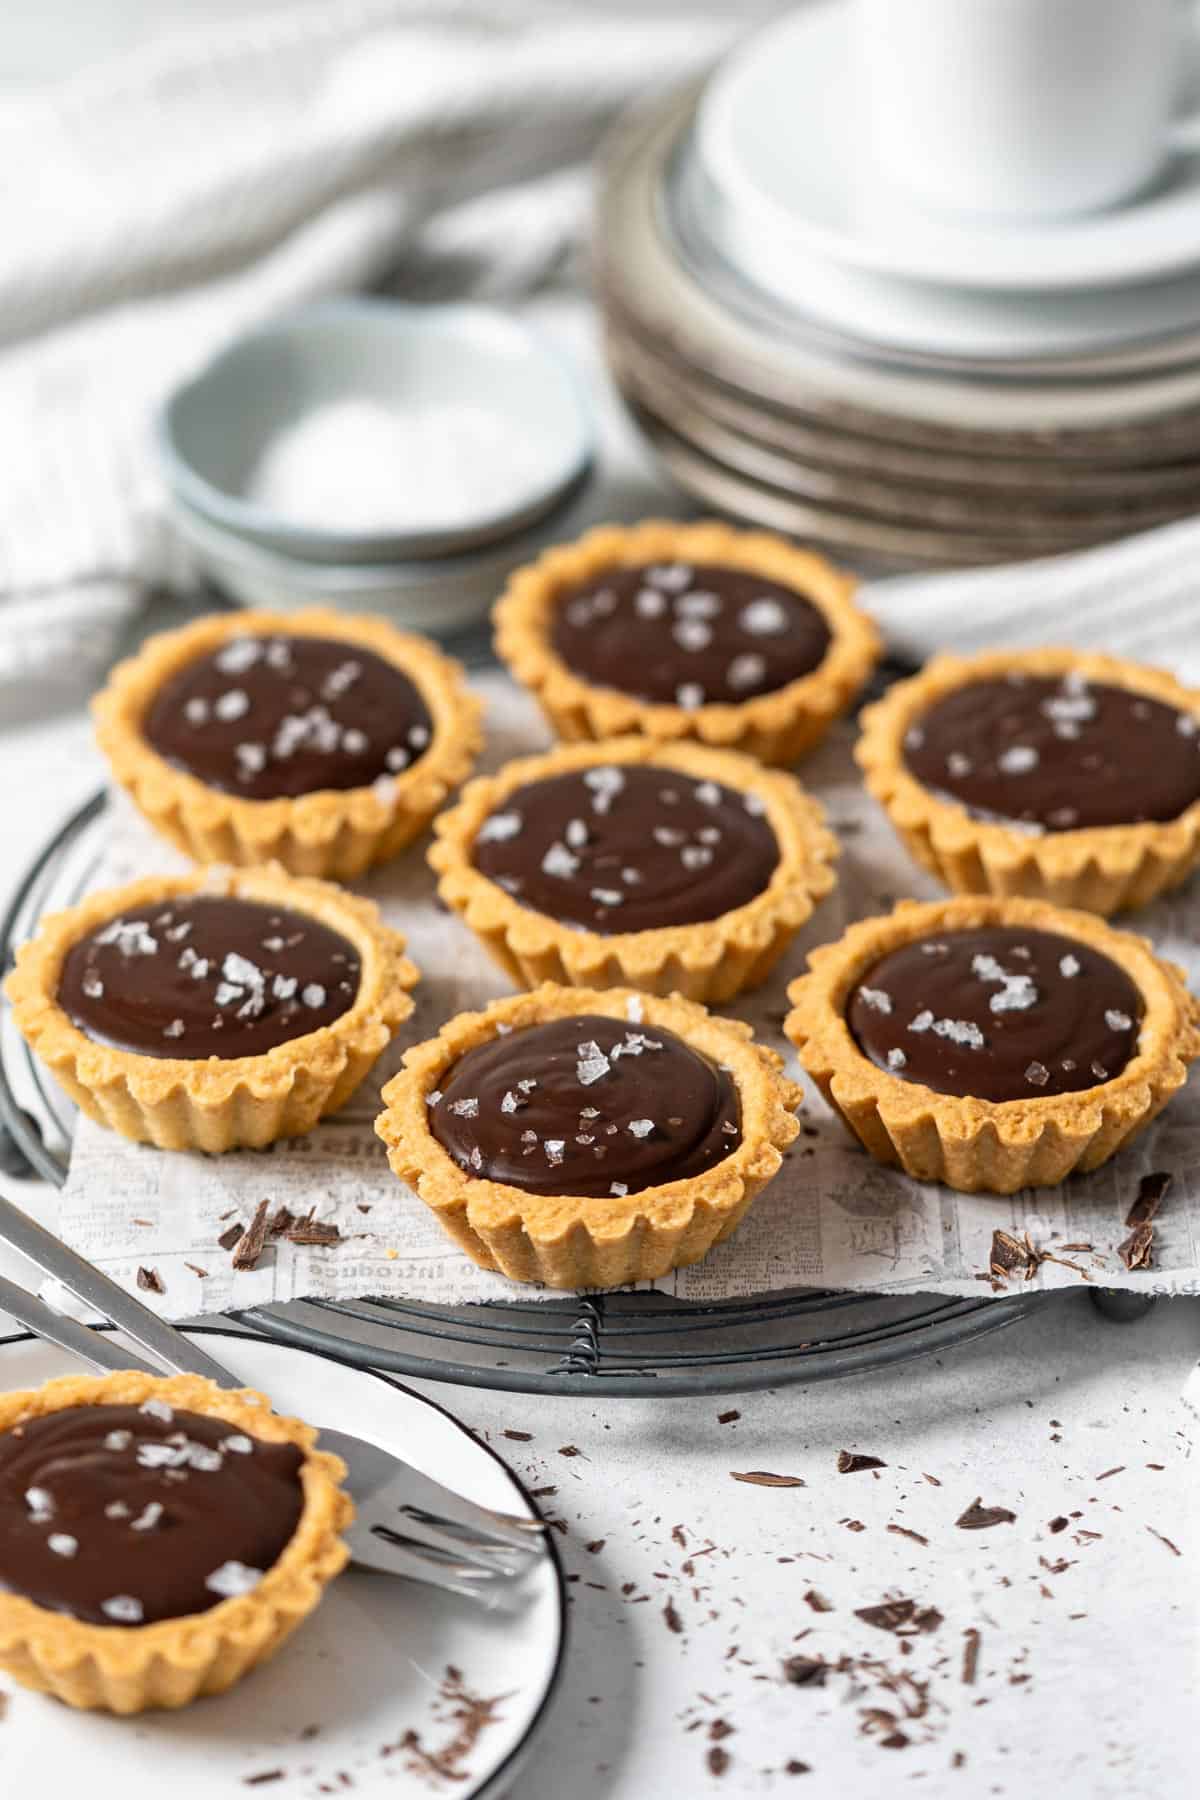
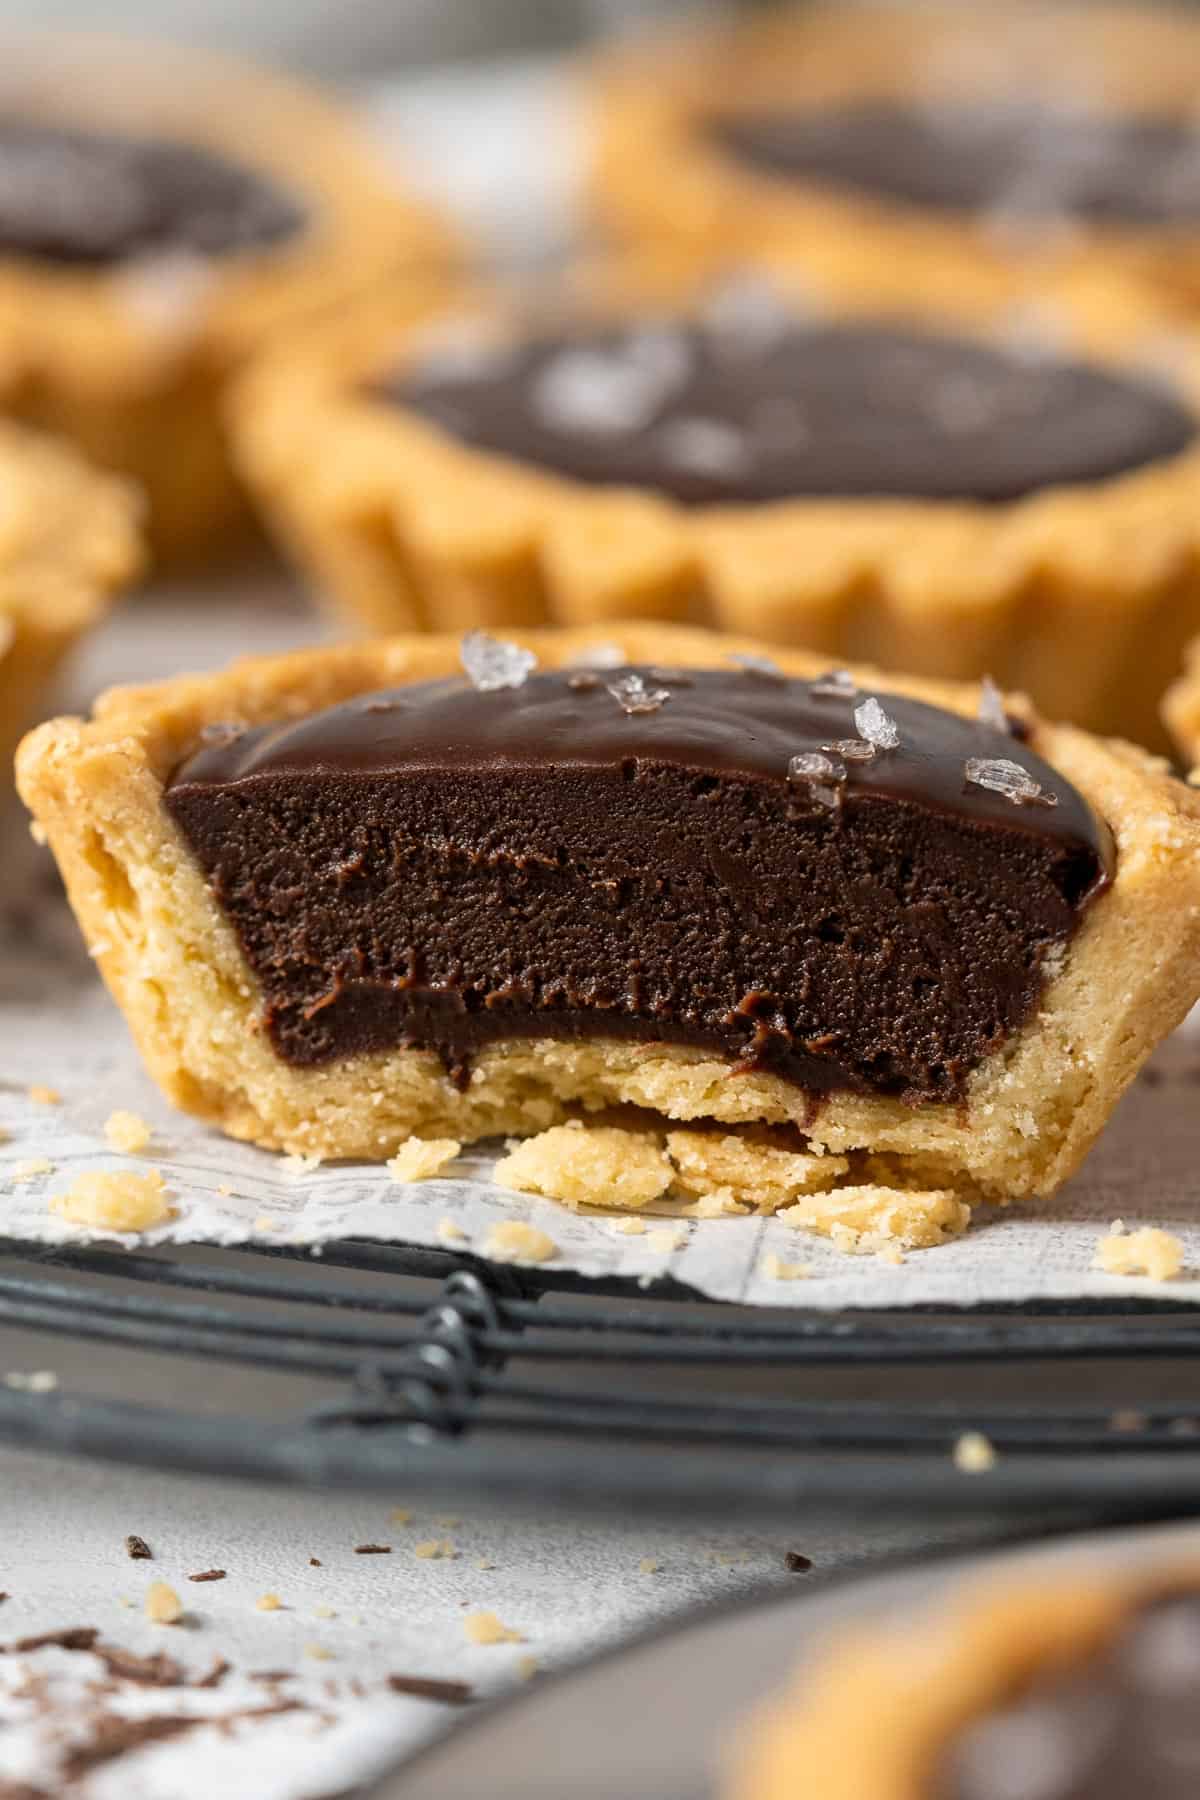
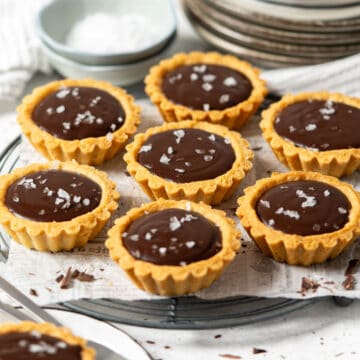
These mini chocolate tarts are elegant little chocolate tartlets with buttery crisp tart shells, smooth chocolate ganache filling, and a sprinkle of flaky salt on top. They're rich, easy to make, and perfect for parties, holidays, or anytime you want a beautiful chocolate dessert that feels special!
★★★★★
Making another double batch for Easter. My grandkids and friends love these so much! Big hit. Love the touch of salt.
- Kaylynn
📮 Save this recipe for later!
Jump to:
This is one of those recipes that our readers keep coming back to, and honestly, we get it. Marco loves chocolate, and these mini salted chocolate tarts are like little bites of heaven for him. Rich, elegant, chocolatey, and tiny enough to convince yourself that having two is completely reasonable. No judgment here.
We also love that these are individual chocolate tarts, so they feel extra special without the drama of slicing a full tart. They're perfect for parties, holidays, or anytime you want easy chocolate tarts that look fancy but are actually very doable at home. You've got this!
If you love desserts with crisp crusts and creamy fillings, you can also browse our tart and pie recipes for more ideas.
Why this recipe works
These mini chocolate tarts work because every bite gives you contrast: crisp tart shells, creamy chocolate filling, and a little flaky salt to balance the richness. They look fancy, but the process is very doable. We love a dessert that shows up looking expensive but didn't emotionally destroy us in the kitchen!
Buttery tart shells: The shells give each mini tart a delicate crunch that holds up beautifully with the filling.
Smooth chocolate ganache filling: The filling is rich, creamy, and simple to make with just chocolate and cream. No complicated pastry drama here!
Flaky salt finish: A tiny sprinkle of salt makes the chocolate taste even better and keeps the tarts from feeling too sweet or heavy.
Make-ahead friendly: This is one of those chocolate tartlet recipes that chills well, so you can prepare the tartlets before serving and still have them looking gorgeous.
Ingredients you'll need
You only need a few basic ingredients to make these tarts, which is always good news! The recipe has two simple parts: buttery tart shells and a rich chocolate filling made with smooth ganache.
Need more help with the base? Our how to make tart shells guide walks you through sweet and savory tart shells in more detail.
Key ingredients notes:
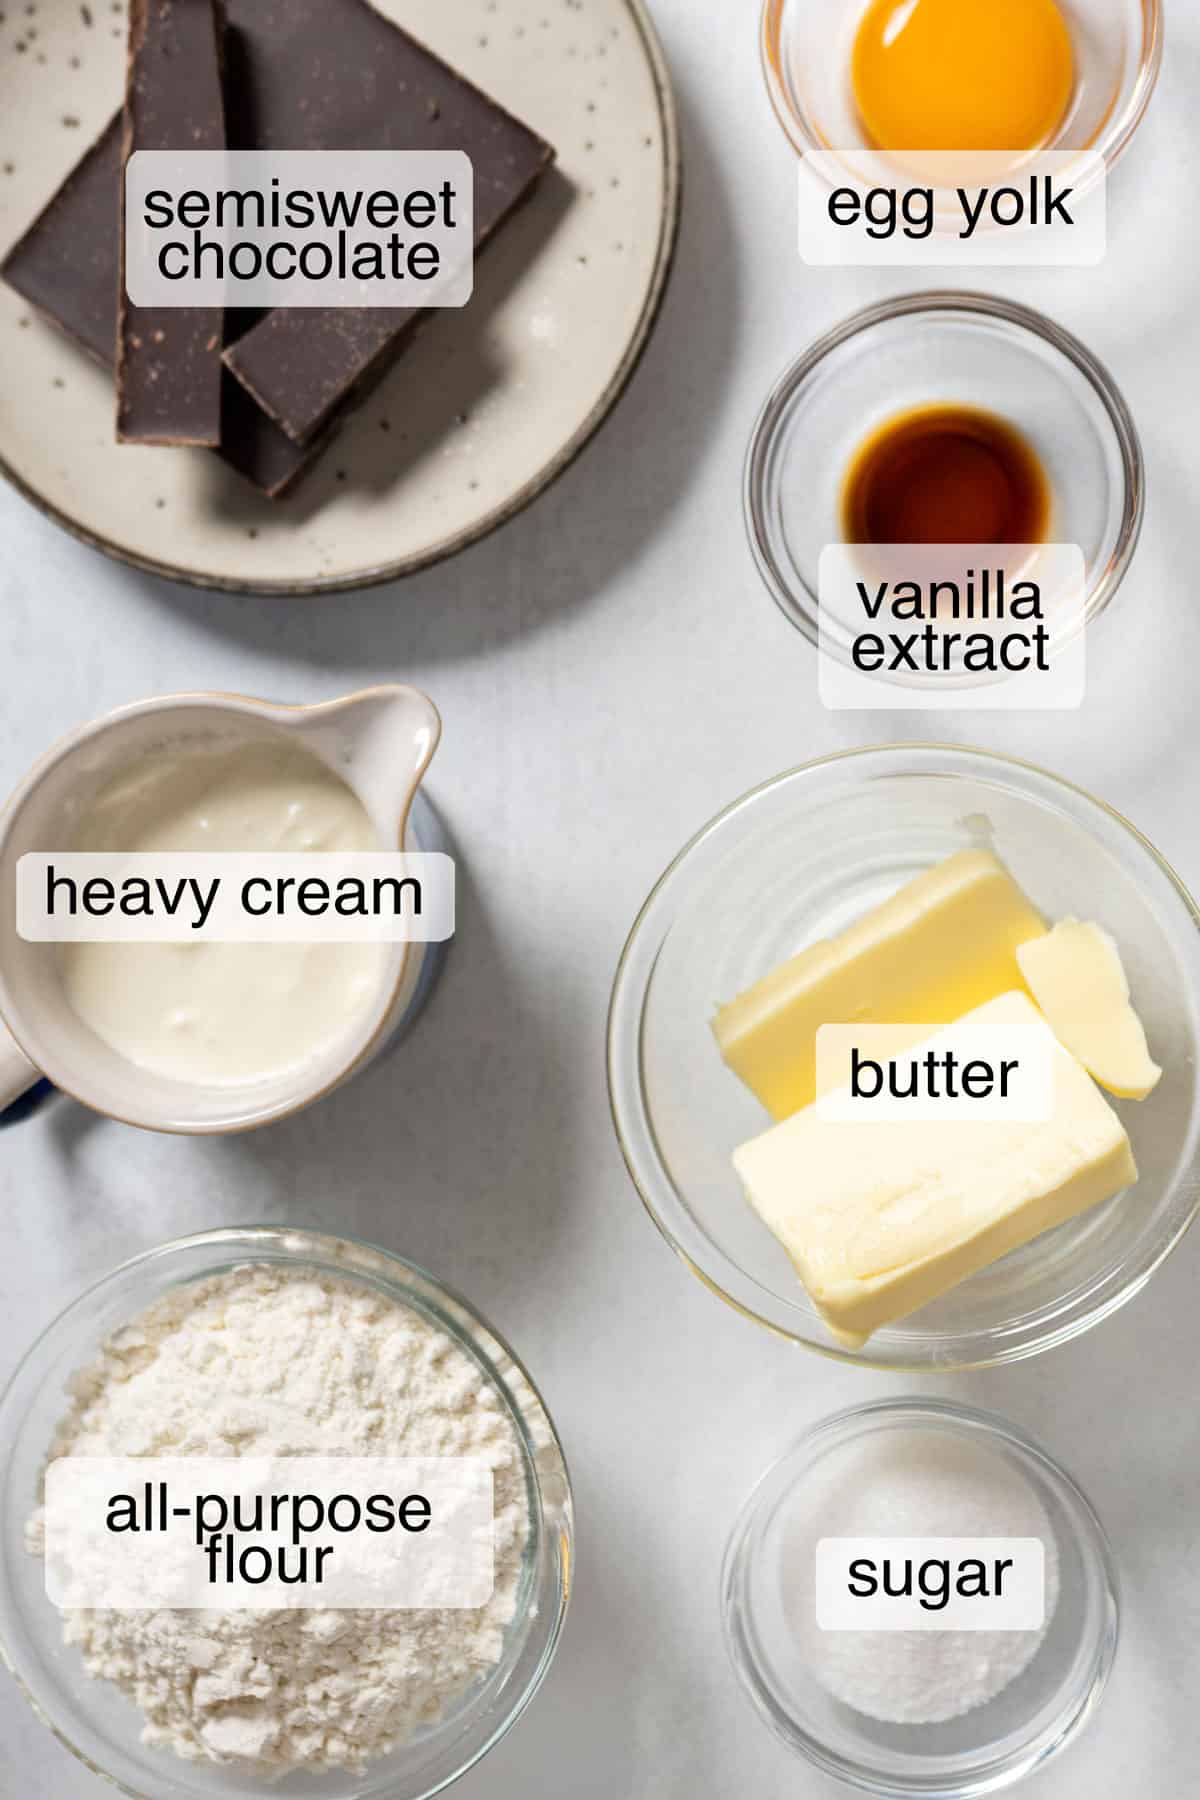
Shells
Unsalted butter: Gives the tart shells their buttery flavor and tender texture. Use softened butter so it mixes easily with the sugar.
Egg yolk: Helps bring the dough together and gives the shells a delicate, tender bite.
Filling
Semisweet chocolate: The star of the filling, and we use 55% cacao. It gives the tarts a rich chocolate flavor without being overly sweet.
Heavy cream: With minimum 35% fat content. It melts with the chocolate to make a smooth, silky chocolate ganache. This is what gives the filling that luscious texture.
Sea salt flakes: The final touch that makes the chocolate flavor pop and balances the richness. Don't skip it, friend. It's small but mighty!
You'll find all the exact measurements in the recipe card below.
Substitutions and variations
These mini chocolate tarts are easy to adapt while keeping that rich, elegant chocolate bite. You can change the chocolate, toppings, or use store-bought tart shells, as long as the chocolate filling for tarts stays smooth and balanced.
Chocolate type: Semisweet chocolate gives the best balance, but you can use dark chocolate for a deeper flavor or milk chocolate for a sweeter chocolate filling for tarts. If using milk chocolate, the filling will taste softer and sweeter.
Salt options: Sea salt flakes are our favorite because they look pretty and give little pops of flavor. You can also use fleur de sel, but avoid fine table salt on top because it can taste too sharp.
Toppings: These mini tarts are lovely with fresh berries, chopped toasted nuts, chocolate curls, or a tiny dollop of whipped cream. Keep toppings light so the chocolate ganache still stays the star!
Tart shells: Homemade ones give the best buttery flavor and texture, but store-bought mini tart shells can work when you need a shortcut. No shame, friend. We all have those days!
Flavor twist: Add a little orange zest, espresso powder, or vanilla to the ganache if you want a different flavor. Keep it subtle so these still taste like classic mini chocolate tarts.
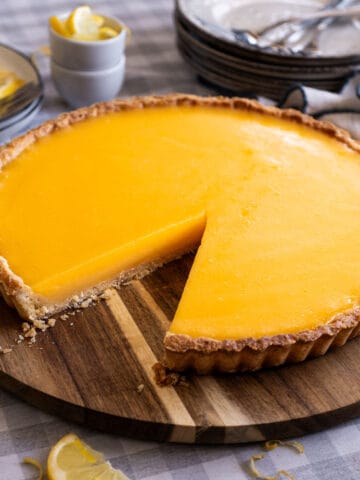
For a bright citrus dessert instead, try our Lemon Tart recipe with a crisp crust and silky lemon filling!
Watch the video recipe
Watch the video below to see how these mini chocolate tarts come together, from shaping the tart shells to adding the chocolate filling.
How to make mini chocolate tarts
Making these mini chocolate tarts is very doable, we promise. This is the main part of the mini chocolate tart recipe, and once the shells are baked, the filling is basically chocolate and cream doing their beautiful little thing.
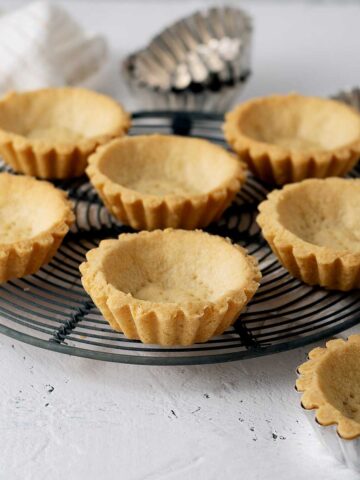
Making the tart shells
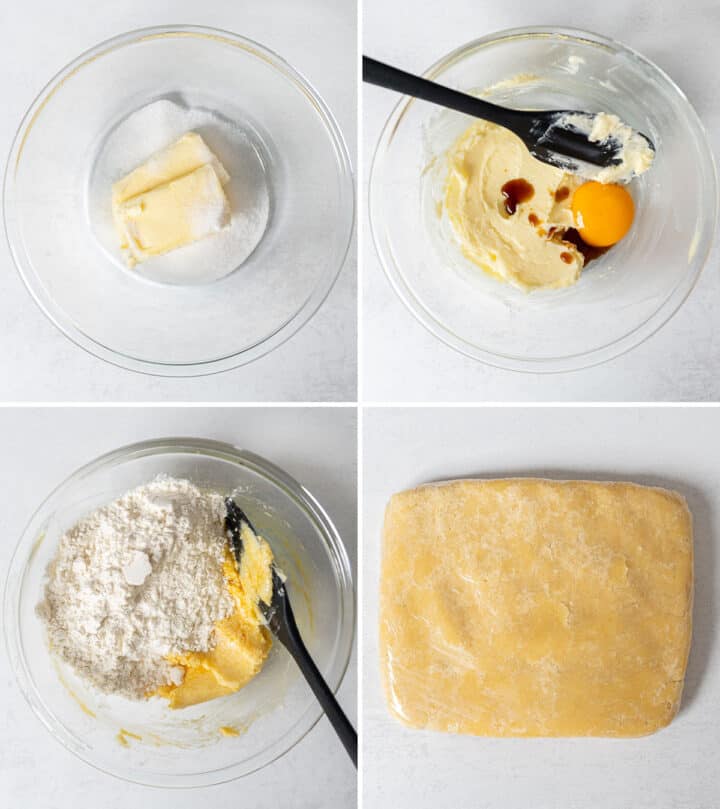
Make the dough
Mix softened butter and sugar, then add the egg yolk, vanilla, and flour. Bring it into a dough, flatten, wrap, and chill until firm.
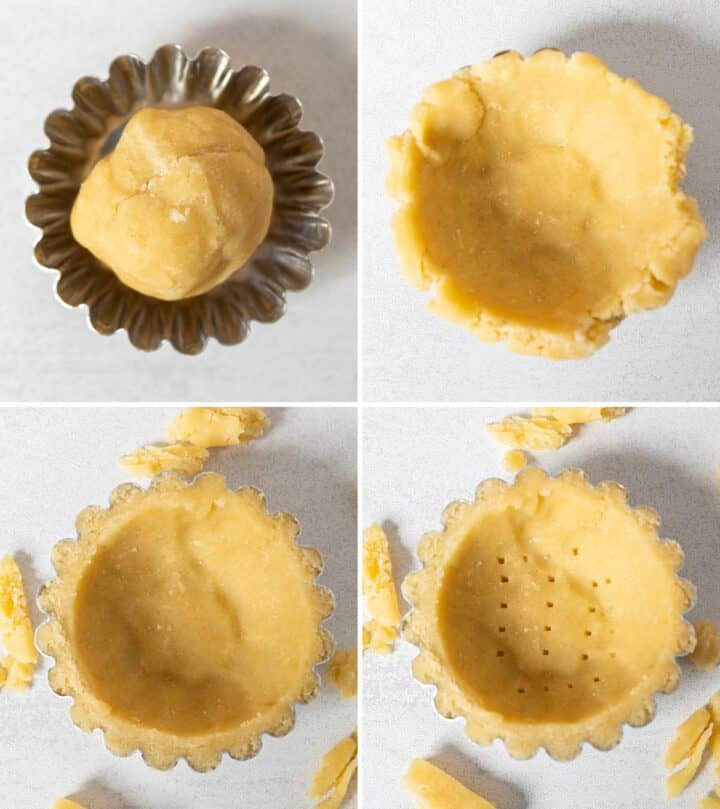
Press
Press the chilled dough into mini tart molds, trim the edges, prick the base, and freeze briefly before baking. This helps the shells hold their shape and avoid shrinkage.
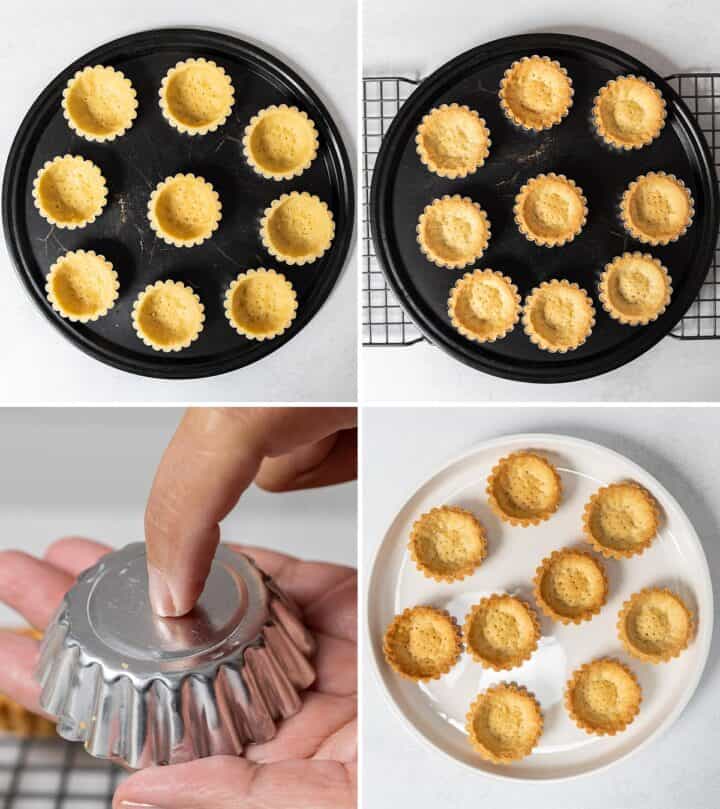
Bake
Bake until golden, then let the shells cool completely. To remove them, gently loosen the sides first, flip the mold upside down, and tap the bottom until the tart shells release.
Make the chocolate ganache filling
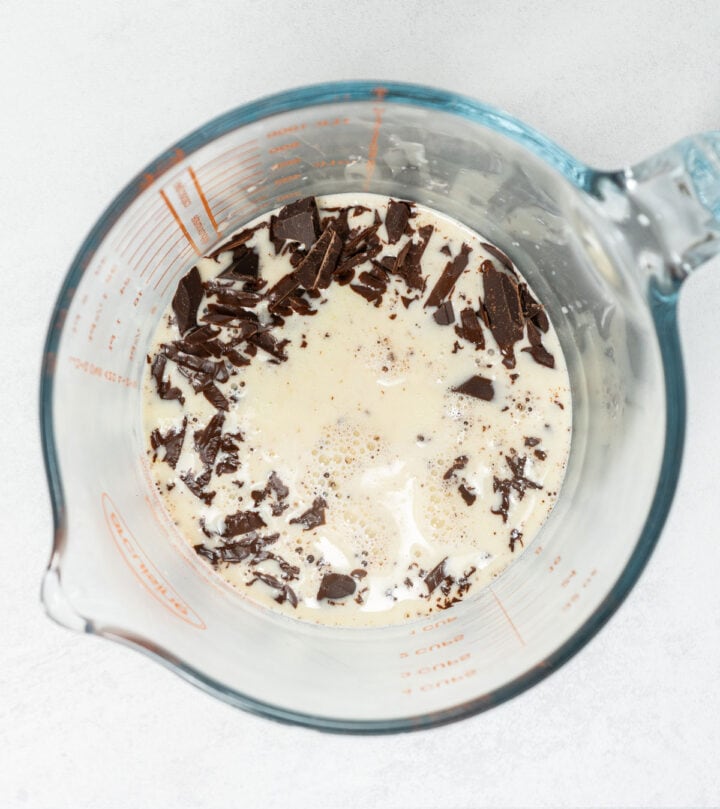
Heat and whisk
Add chopped chocolate to a jug. Heat the cream until small bubbles form around the edges, pour it over the chocolate, then let it sit for a few minutes. Whisk until smooth and glossy, and that's your chocolate ganache filling.
Fill and chill the tartlets
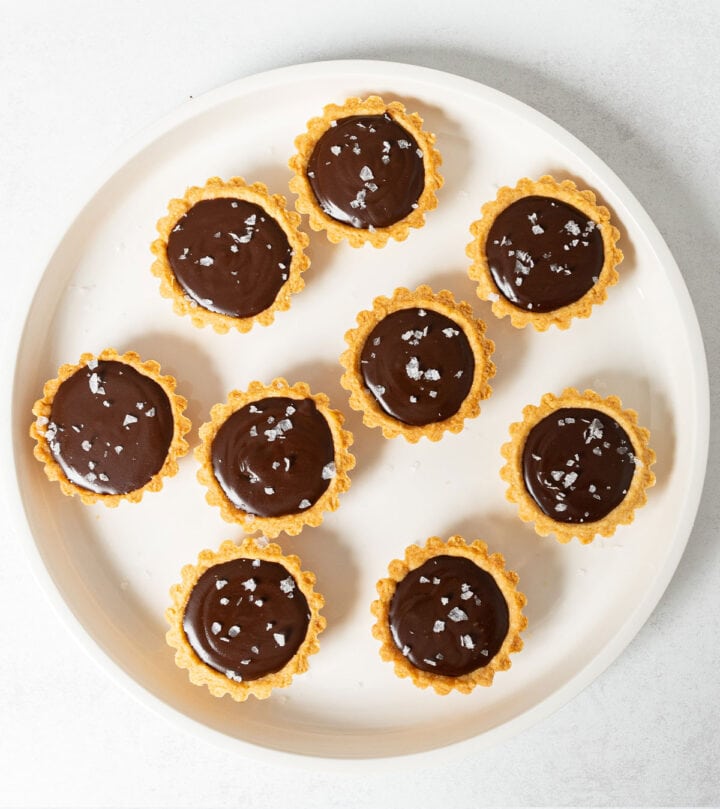
Add the ganache
Pour the chocolate ganache filling into the cooled shells, gently wiggle to smooth the tops, and chill until set. Right before serving, sprinkle with sea salt flakes for a flaky salt finish that balances the richness.
Tips for crisp tart shells and smooth chocolate filling
A few small details make a big difference with these mini chocolate tarts. The goal is simple: shells that stay crisp and a smooth chocolate ganache that sets beautifully without turning too hard.
- Chill the dough: Cold dough is easier to press into the molds and helps the tart shells keep their shape while baking.
- Freeze before baking: A short time in the freezer helps prevent the shells from shrinking too much in the oven.
- Let the shells cool completely: Warm shells can soften the chocolate tart filling and make the base lose its crisp texture.
- Use chopped chocolate: Smaller pieces melt faster and more evenly, giving you a glossy ganache without lumps.
- Do not boil the cream: Heat it just until small bubbles appear around the edges. If it's too hot, the ganache can split, and nobody needs that kind of drama.
- Chill until set: Give the filled tartlets enough time in the fridge so the filling firms up cleanly but still stays creamy when you bite into it.
How to serve and store chocolate tartlets
Serve
- Serve these mini chocolate tarts chilled for a firmer bite, or let them sit at room temperature for 5-10 minutes if you prefer a softer filling.
- For parties: Arrange the tarts on a serving platter and add the sea salt flakes just before guests arrive. Fancy dessert table, very little effort. We love that!
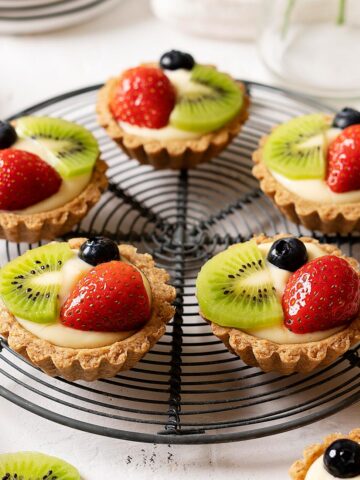
- For a colorful mini dessert platter, serve them with our healthier mini fruit tarts.
Store
- Keep the tarts in an airtight container in the fridge for up to 4-5 days.
Freezer
- Freeze the filled tarts in an airtight container for up to 1 month. Thaw them overnight in the fridge, then add the sea salt flakes before serving.
Make ahead
- Bake the tart shells and fill them the day before serving. This makes them a great make-ahead dessert for holidays, parties, or when you simply refuse to be stressed later!
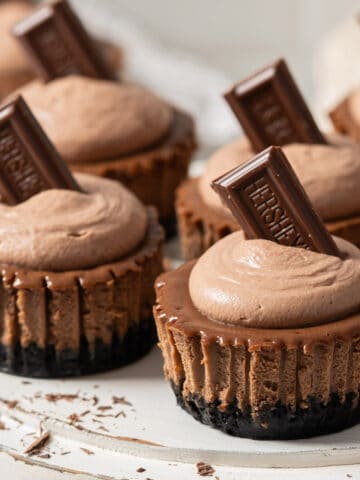
- For another make-ahead individual chocolate dessert, try our mini chocolate cheesecakes.
FAQs about mini chocolate tarts
Yes, store-bought ones work if you need a shortcut. Homemade shells have better flavor and texture, but store-bought ones are helpful when you want quick chocolate tartlets.
Semisweet chocolate works best for chocolate tart filling because it gives a rich flavor without being too sweet. You can also use dark chocolate for a deeper flavor or milk chocolate for a sweeter filling.
Let the them cool completely before adding the filling, and keep the tarts chilled in an airtight container. Adding filling to warm shells can make them soften faster.
Ganache texture depends on the chocolate-to-cream ratio and chilling time. If the chocolate tart filling is too firm, let the tartlets sit at room temperature for a few minutes; if it's too soft, chill them longer.
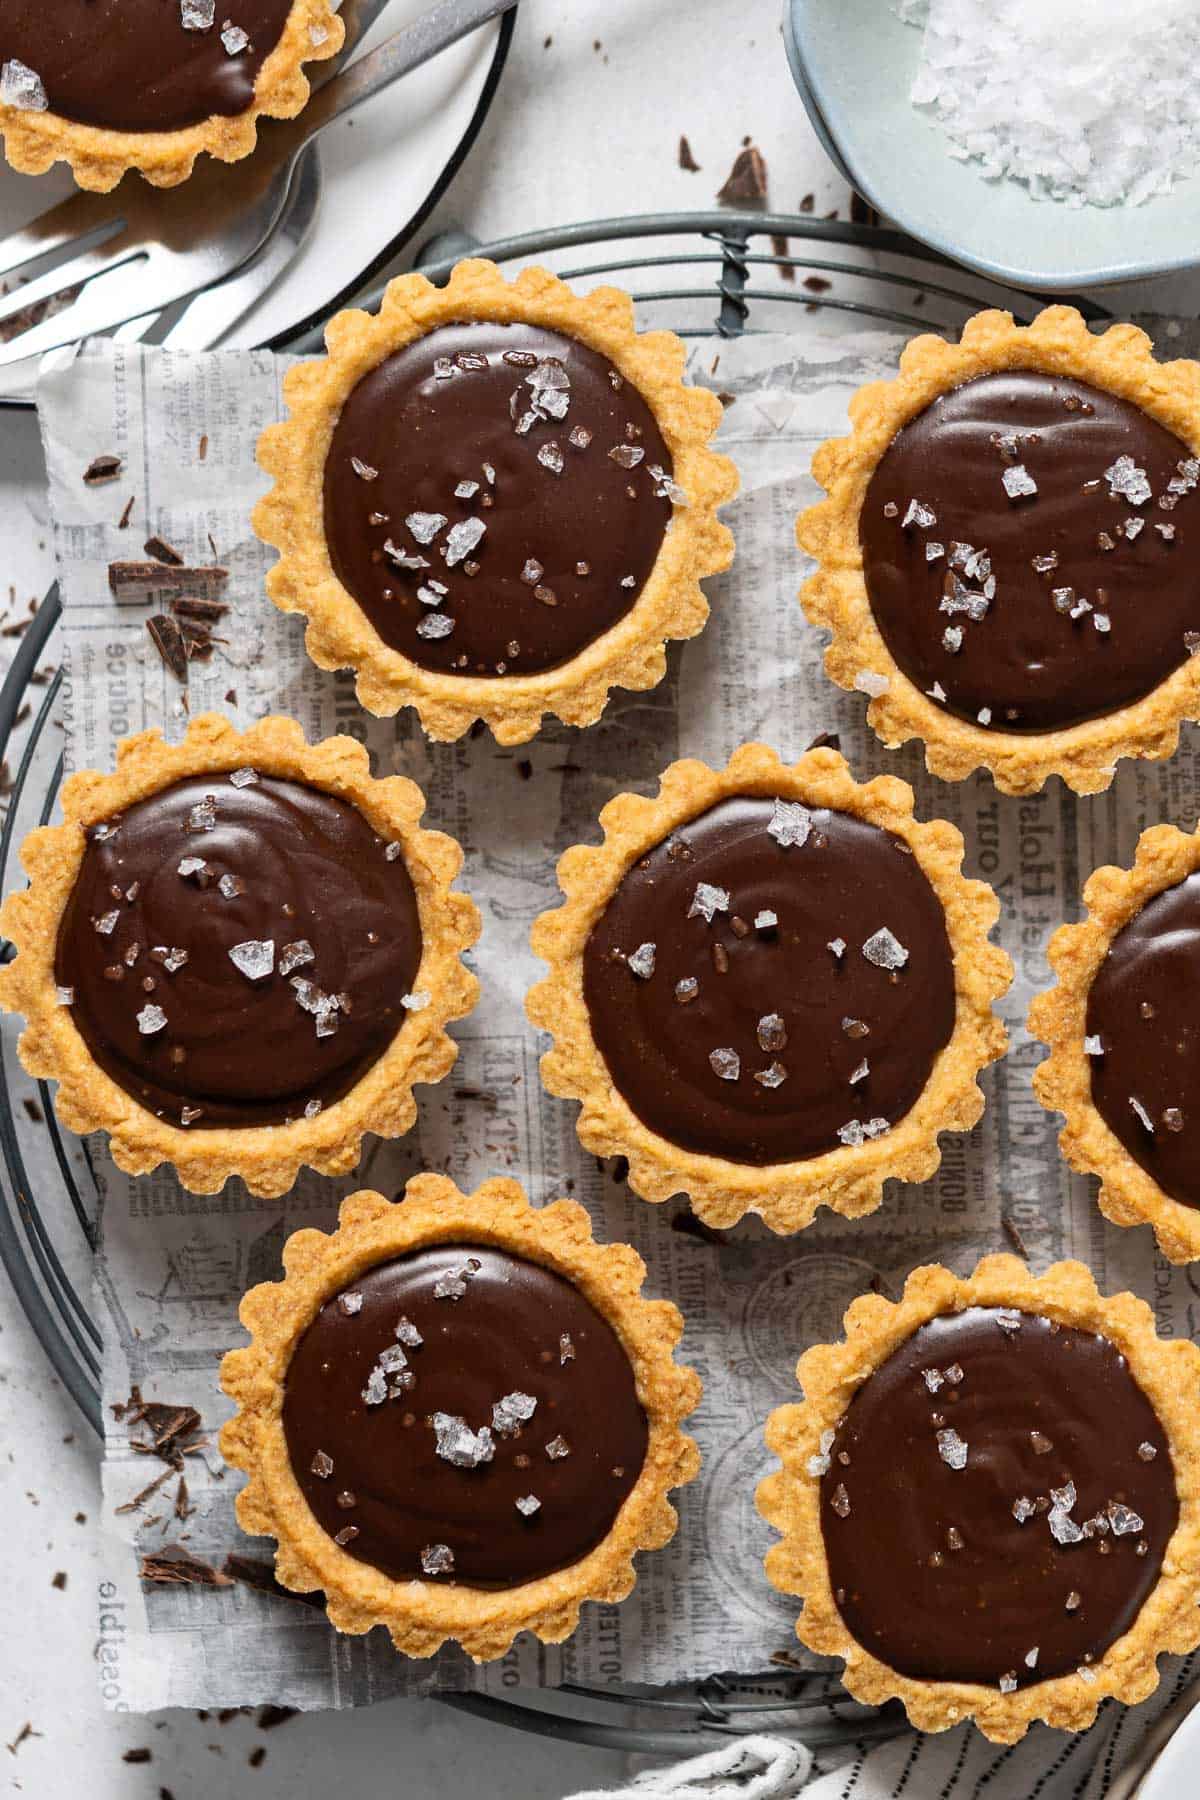
And that's it! These mini chocolate tarts are rich, elegant, and so satisfying without being complicated. They're the kind of little chocolate desserts that look fancy on a plate but are totally doable at home. Serve them chilled, add that flaky salt finish, and enjoy every bite!
Did you try these Mini Chocolate Tarts?
We'd love to hear from you! Please leave us a ★★★★★ rating and share your thoughts in the comments. If you post on Instagram, tag us, we'd love to see it!
Thank you! - Bea and Marco
📖 Recipe
Mini Chocolate Tarts
Video
Equipment
Ingredients
Tart Shells
- ⅓ cup (75 g) unsalted butter , softened
- 2 tablespoon granulated sugar
- 1 large egg yolk , room temperature
- 1 teaspoon vanilla extract
- 1 cup (130 g) all-purpose flour
Filling
- 4 oz (110 g) semisweet chocolate , chopped
- ½ cup (125 ml) heavy cream
Other
- some sea salt flakes
Instructions
Tart Shells
- Add butter and sugar into a bowl, and mix well using a spatula. Then add in yolk, and vanilla extract and continue mixing. Finally, add in all-purpose flour and bring everything together into a dough. Place and wrap it in a cling film, flattening it to a more or less 1-inch thickness. Chill in the fridge for 30 minutes to firm up.
- Preheat the oven to 340ºF (170ºC), using upper and lower heat.
- Once firmed, take a piece of dough, form it into a ball, and press it evenly into a 2.5-inch (6.5 cm) tart mold. Cut the excess dough with a knife. Prick the base with a fork. Repeat until you get 9 tart shells in total, and place them in the freezer for 10 minutes.
Bake
- Place the tart shells in a baking tray and bake them in a preheated oven on the lowest rack, for 20-25 minutes or until they're golden brown. Remove from the oven and leave for them to cool completely. Once cooled, flip and tap the bottom to release the shells from the molds. Gently squeezing the molds on the opposite sides also helps. Set aside.
Filling
- Add chopped chocolate into a peaked container, this will make it easier to fill the tart shells later. Add heavy cream into a pot and heat until bubbles are forming on the edges. Pour it into the chocolate container, making sure the chocolate is all submerged. Leave it for 3 minutes. Then using a hand whisk, mix everything until you get a homogenous chocolate ganache.
Assemble
- Pour and divide the chocolate ganache evenly into the tart shells. Wiggle them a bit to smoothen the tops. Place on a tray and chill in the fridge for 30 minutes before serving. Sprinkle with some coarse sea salt and enjoy your delicious mini chocolate tarts!
Notes
- Use the spoon and level method for the flour. This will prevent using excessive flour, making the dough dry and crumbly. We always believe using a kitchen scale to weigh solid ingredients like flour, sugar, cheese, chocolate, or nuts is the best option as it's more precise.
- Use a portable oven thermometer to get the accurate oven temperature. We use it every single time we bake.
- Use good material tart molds. This will make sure the tart shells will come out easily from the molds. We don't grease our tart molds and have no problems in taking the shells out. If yours have scratches and often stick from experience, do grease them first.
- These mini salted chocolate tarts are best served the day of making them. Do refer to my written tips above if you want to make them in advance.
Originally published on Mar 14, 202. Updated with improved text and pictures on Jul 13, 2024, and May 2, 2026.
Nila Ray says
All my friends and families were like this chocolate Tarts very much
Thank you for sharing the recipe.
Also your recipe of Tart shell is very good and easy to make recipe.
I really appreciate your awesome recipe.
Thank you
Bea & Marco says
Hi Nila! We're so happy to hear your friends and family enjoyed the chocolate tarts, and that the tart shell recipe was easy to make too 😊 Thank you for your kind words!
Agnes Lee says
What kind of chocolate to use for this? Normal eating chocolate? Or couverture chocolate? Will like to try.
Bea & Marco says
It's baking chocolate, hope it helps!
T says
Could a praline layer be added to the bottom of the crust before filling?
Bea & Marco says
Yes, you can absolutely add a praline layer at the bottom 😊. Hope it helps!
Rameen Naveed says
I have multiple heating options in my baking oven. So for the tarts when I place them on the lowest rack do they need to be baked from the bottom only? So that I can set the heating option of the 'bottom one' only or else my baking oven has options like heating from the top and the bottom both, top only, top and bottom with fan too. So please tell
Bea & Marco says
Hi, Rameen! For these tarts you should bake them on the lowest rack with top and bottom heat, no fan. Hope it helps!
Harriet Woolley says
Can the tart shells be kept with no filling? If so, how long for?
Bea & Marco says
Hi, Harriet! Sorry for the late response. The shells can last up to 3-4 days in an air-tight container, in the fridge. You can also fill them, freeze, and then thaw in the fridge (we've done it many times without any problems). Hope it helps!
Krista Harris says
Like a butter tart, are these able to be frozen for a month or so?
Bea & Marco says
Yes, they can be frozen. Hope it helps!
Maxx says
There are sooo good 😊
Bea & Marco says
Thanks!😊