
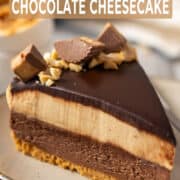
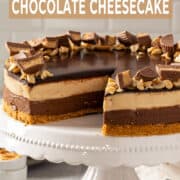
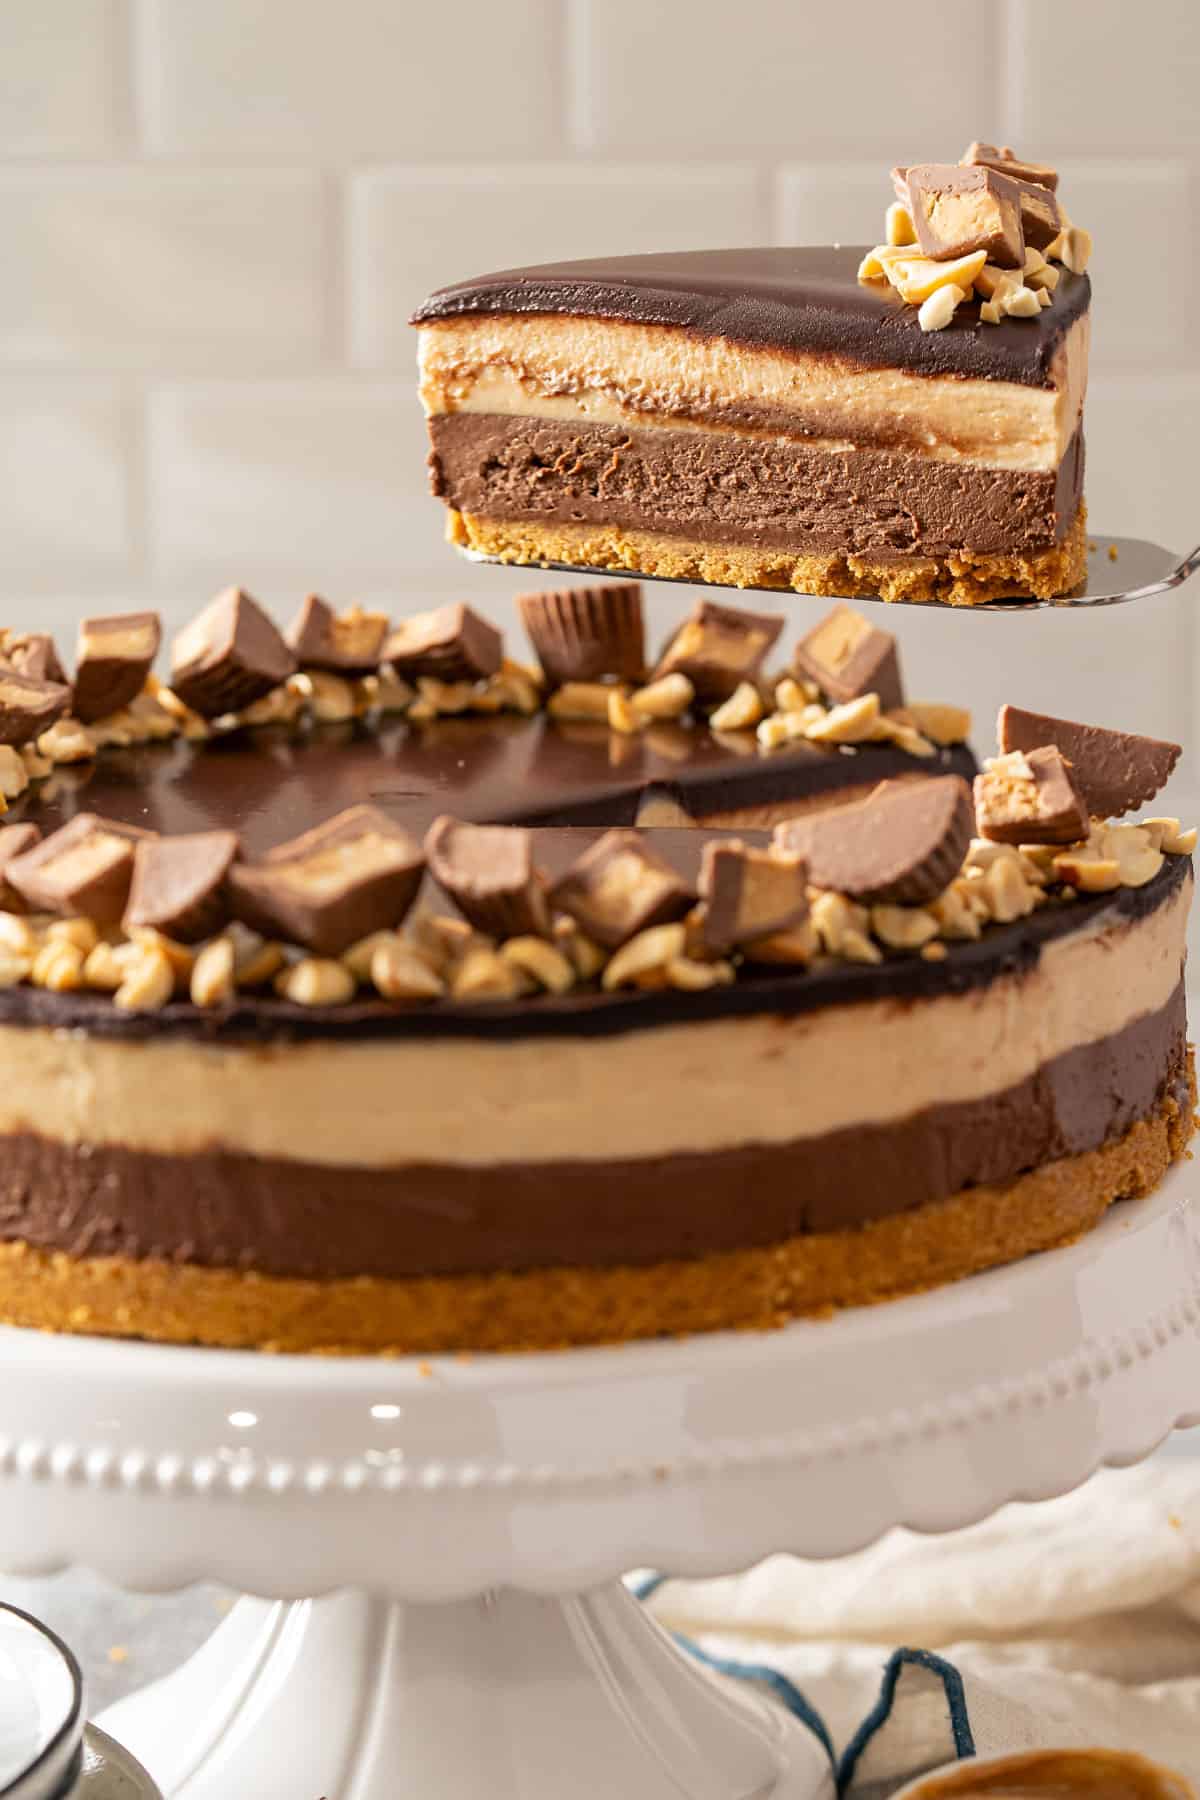
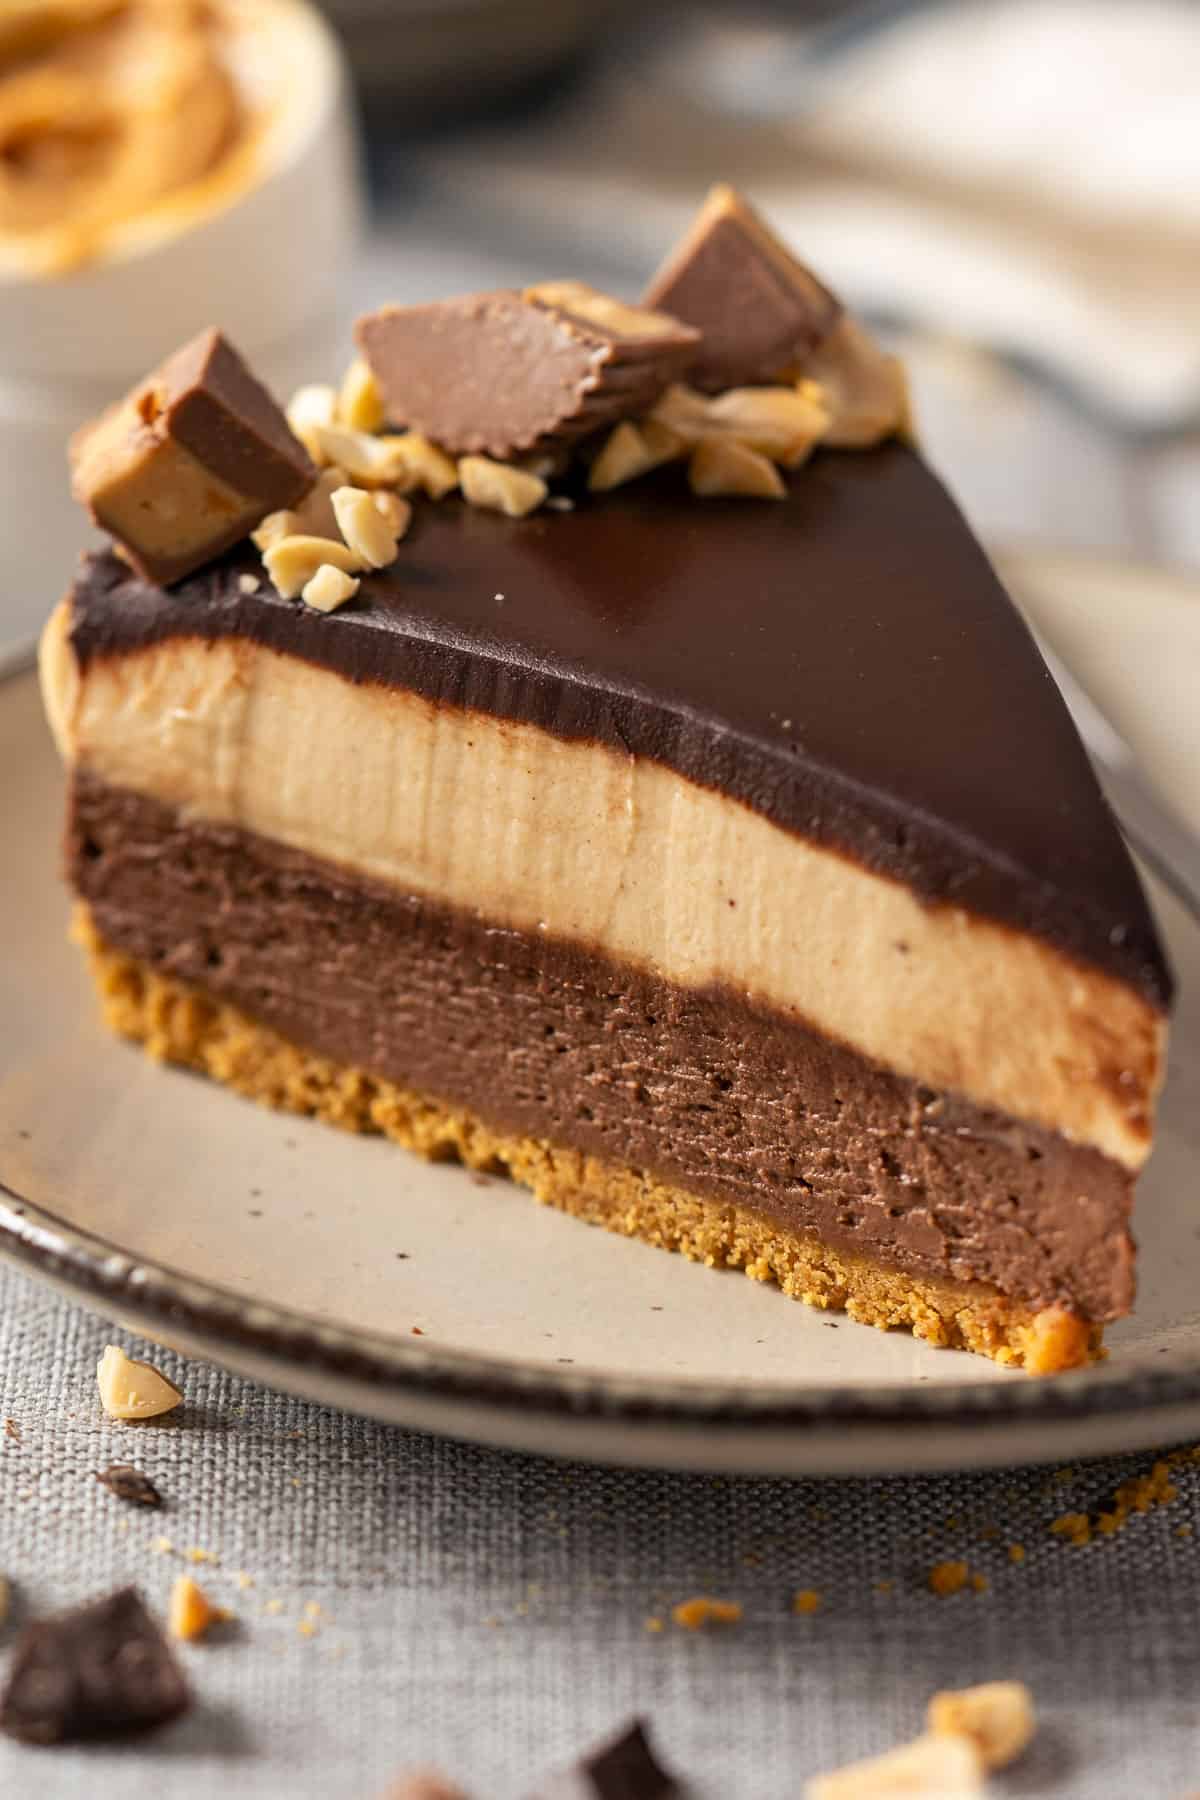
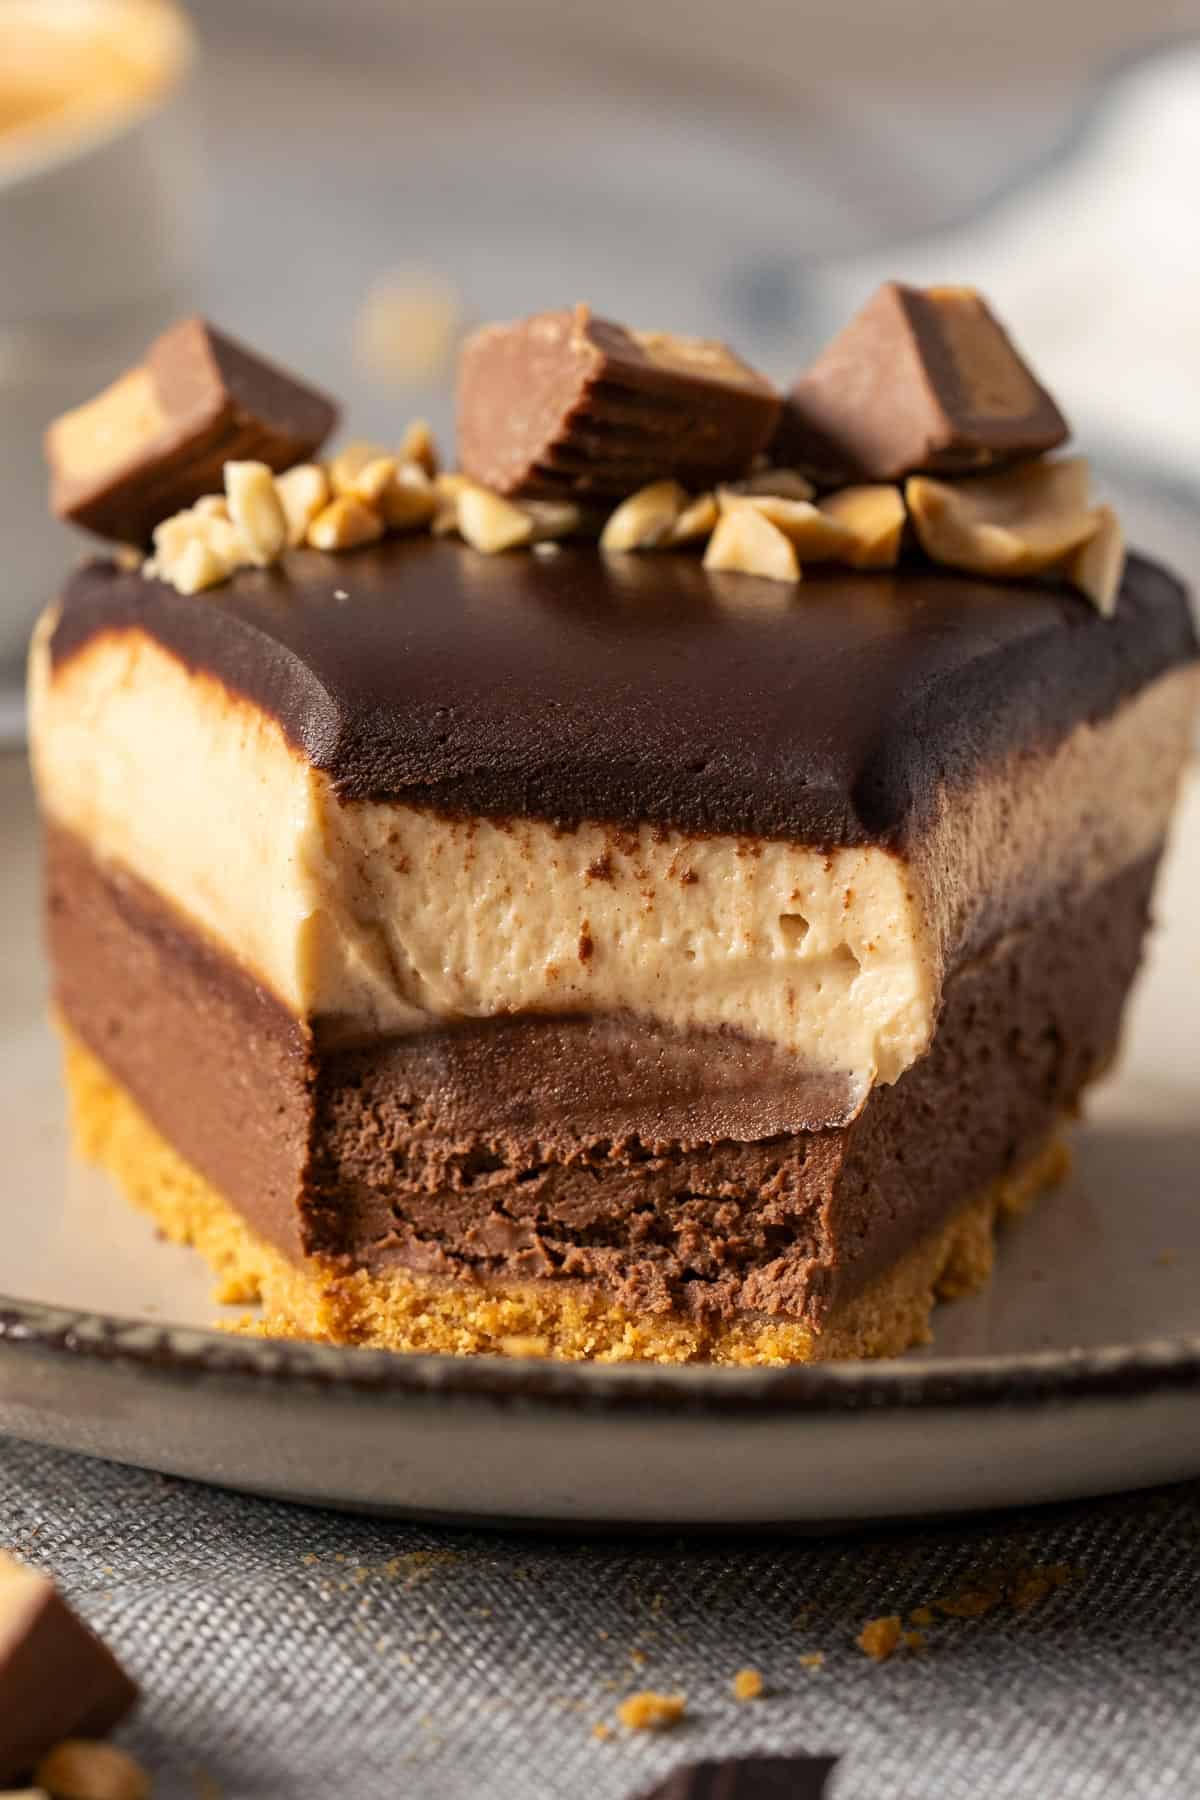
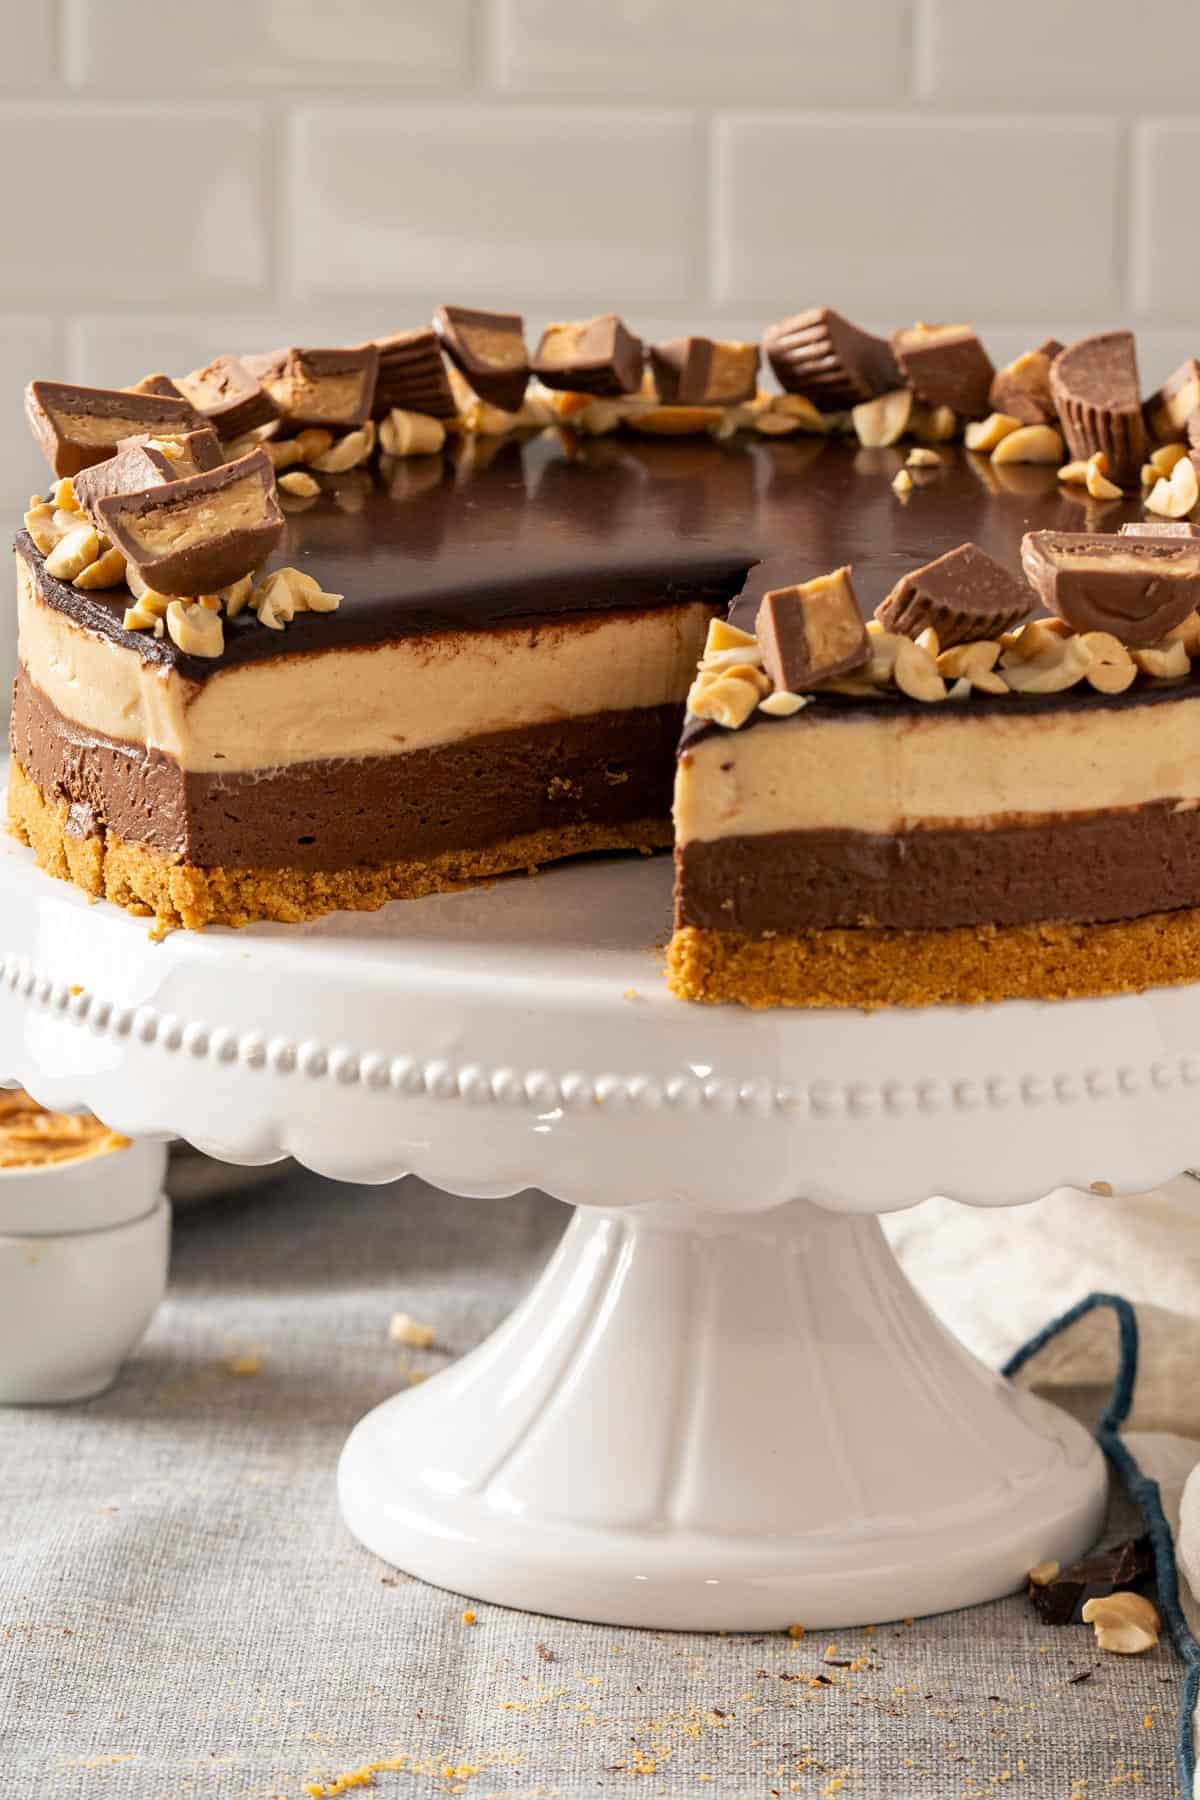
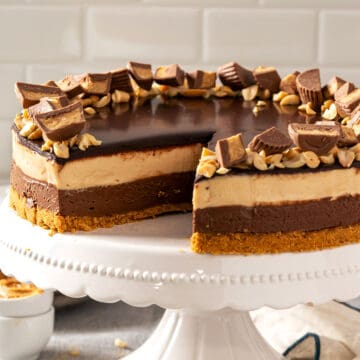
This no bake peanut butter chocolate cheesecake is rich, creamy, and layered with peanut butter and smooth chocolate filling over a buttery crust. Finished with glossy ganache, it tastes bakery-made yet comes together effortlessly at home.
★★★★★
Fantastic! just made it and it came out great. Easy to follow recipe. My wife said that it's so good, i could sell it!
Thank you!
- Mike
📮 Save this recipe for later!
Jump to:
- Why this no bake peanut butter chocolate cheesecake works
- Balancing chocolate and peanut butter flavor
- Ingredients you'll need
- Substitutions and variations
- Watch the video recipe
- Step-by-step instructions
- Pro tips for perfect results
- Serve and storage guide
- How to serve no bake peanut butter chocolate cheesecake beautifully
- Common no bake cheesecake mistakes and fixes
- Frequently asked questions
- More cheesecake recipes
- 📖 Recipe
- 💬 Comments
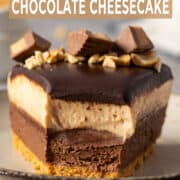
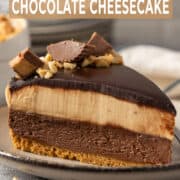
This no-bake peanut butter chocolate cheesecake started with Marco's love for that classic Reese's combo, rich chocolate, and creamy peanut butter. From the first bite, we knew it was special! Each layer complements the next: a smooth chocolate base, creamy peanut butter filling, and glossy ganache on top.
It quickly became one of our most loved chocolate and peanut butter cheesecake on the site and our YouTube channel. After several tests, we've perfected this delicious no bake chocolate peanut butter cheesecake recipe that sets beautifully every time!
Readers love how smooth and indulgent this no bake peanut butter chocolate cheesecake is; it delivers perfect texture and flavor, no oven or gelatin needed.
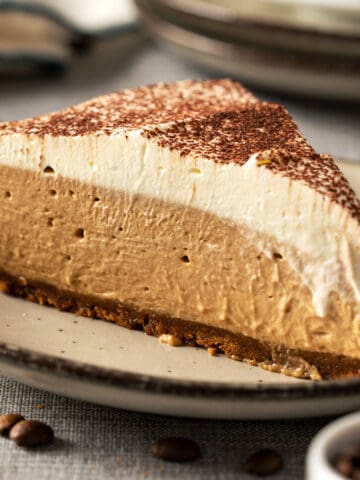
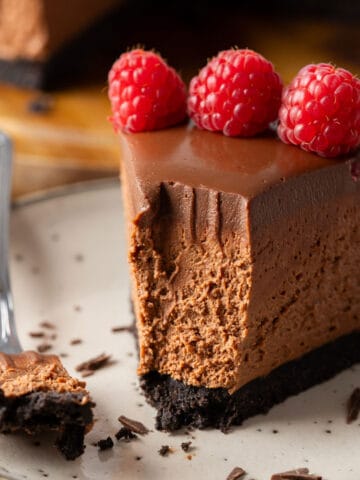
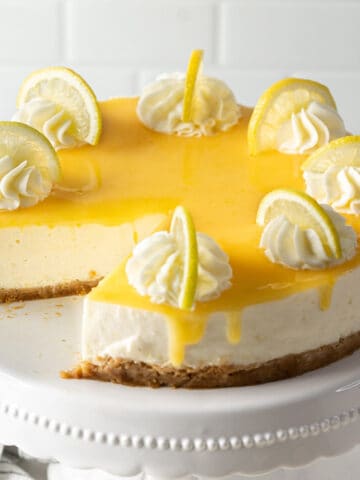
Love this flavor combo? Try our best no bake chocolate cheesecake for a pure chocolate fix.
Why this no bake peanut butter chocolate cheesecake works
There's a reason this cheesecake has become a reader favorite. It's rich, creamy, and perfectly balanced, the kind of dessert that keeps you coming back for another slice.
- Melt-in-your-mouth texture: Smooth and luxurious, just like a bakery dessert, no oven needed.
- Chocolate-peanut butter harmony: Deep chocolate meets nutty peanut butter in perfect balance, just what you crave in a no bake chocolate peanut butter cheesecake!
- Simple, no-fail method: No water baths or gelatin, just easy steps that set perfectly every time.
- Glossy ganache finish: Adds shine and elegance without overpowering the layers.
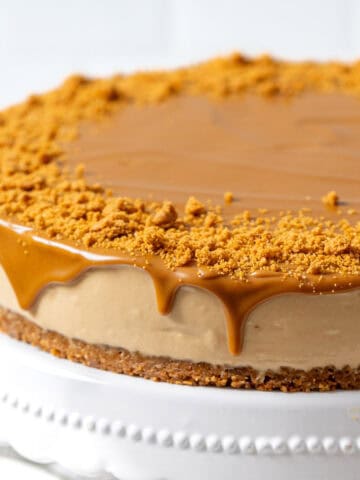
Craving something spiced? Try our reader favorite no bake Biscoff cheesecake.
Balancing chocolate and peanut butter flavor
Chocolate and peanut butter were made for each other, but the secret lies in how they're layered. This peanut butter chocolate cheesecake no bake version nails the balance, rich, creamy, and never too sweet.
- The right chocolate: Semisweet keeps the flavor deep and bold without overwhelming the peanut butter.
- Creamy peanut butter: Smooth and nutty, it pairs perfectly with the chocolate instead of competing with it.
- A touch of salt: Brightens both flavors and keeps the filling from tasting flat.
- Glossy ganache: Brings the layers together for a clean, elegant finish.
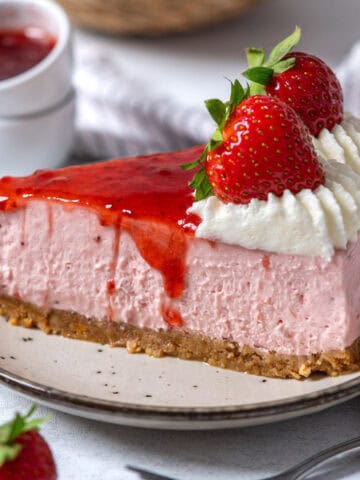
Love fruitier desserts? Try our no bake strawberry cheesecake for a lighter twist.
Ingredients you'll need
You don't need anything fancy to make this delicious cheesecake, just a few everyday ingredients. For the smoothest texture, be sure your cream cheese is fully softened before starting.
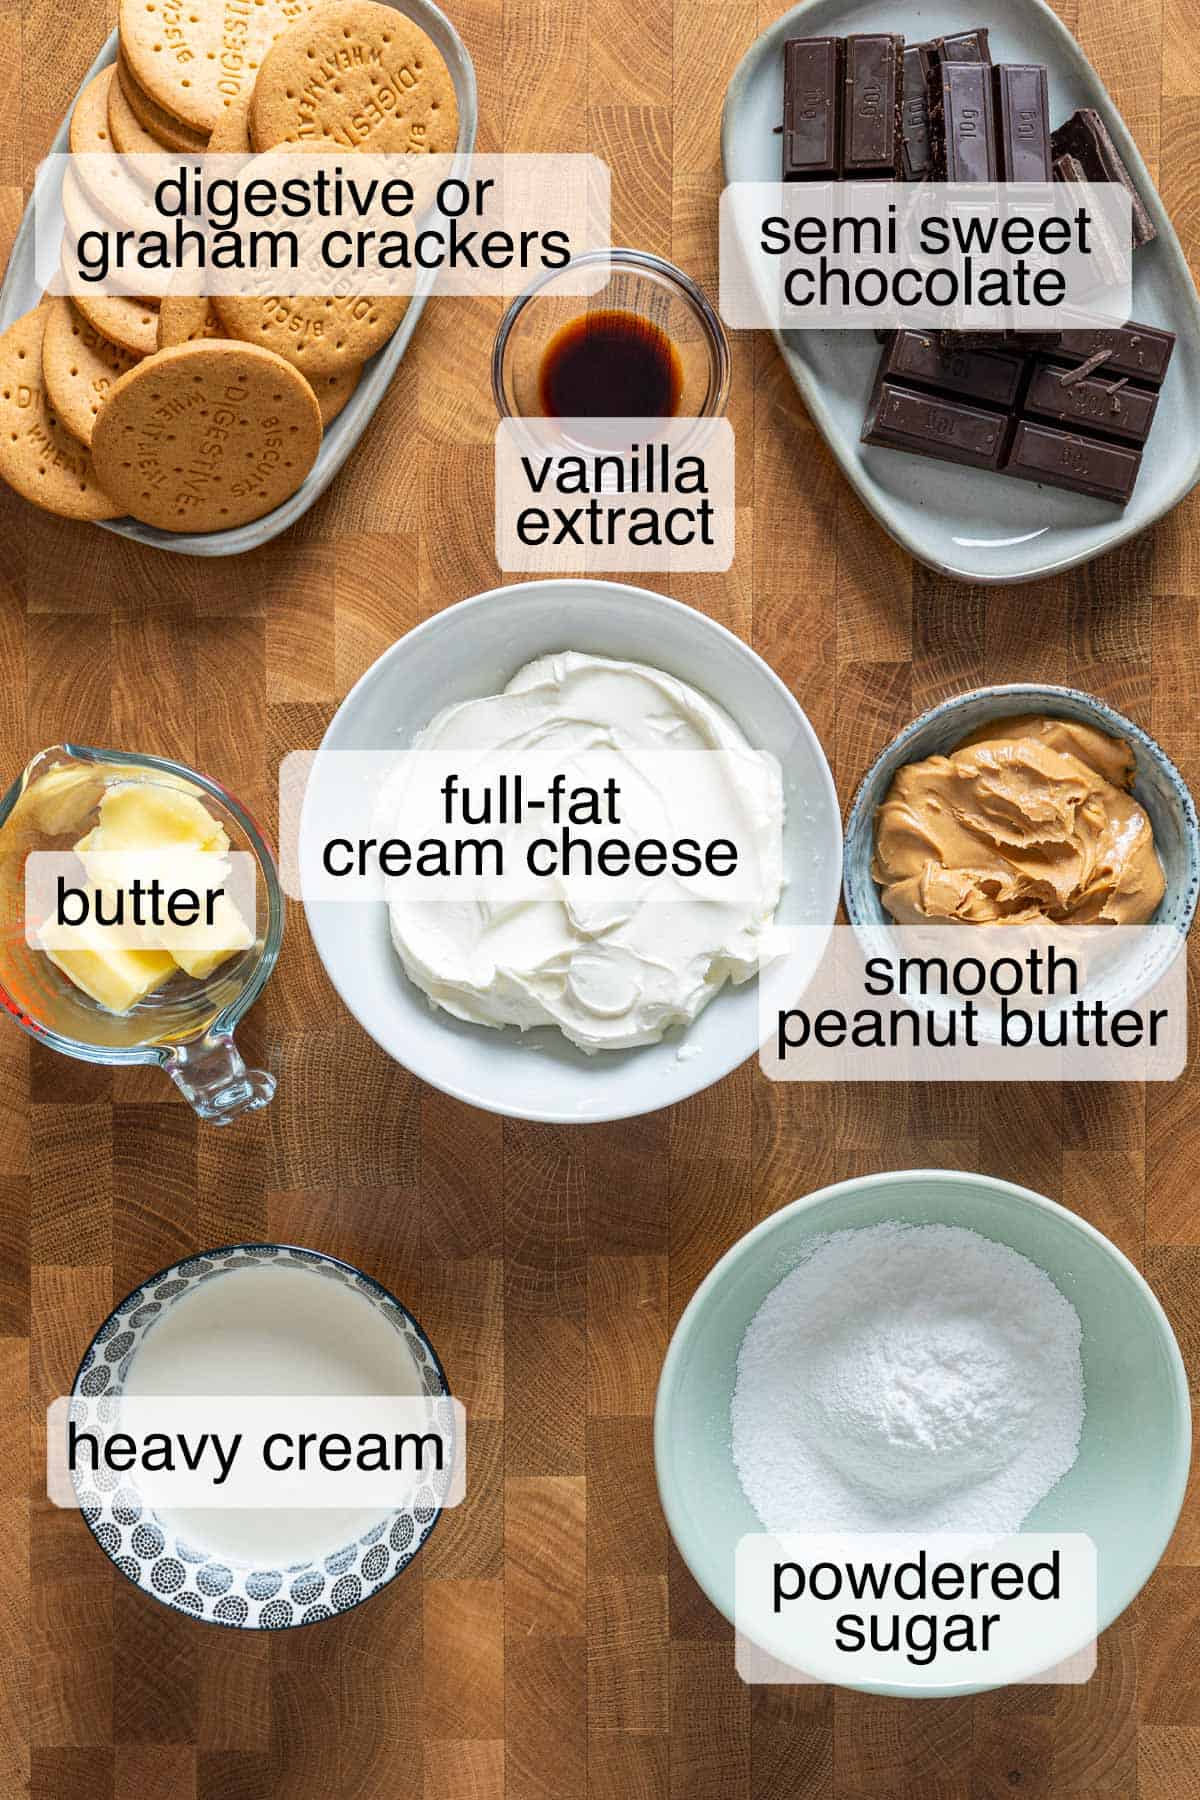
Key ingredients notes for this no bake peanut butter chocolate cheesecake:
- Full-fat brick-style cream cheese: Gives structure and that classic creamy texture. Avoid spreadable or light versions.
- Creamy no-stir peanut butter: Keeps the filling smooth without oil separation.
- Cold heavy cream (35% fat): Whipped and folded in for a light, stable texture.
- Semisweet chocolate (around 55-60%): Adds rich flavor without overpowering the peanut butter.
- Digestive biscuits (or graham crackers): Create a buttery base that stays crisp.
- Salted butter: Binds the crust and adds a subtle savory note.
- Salt: The quiet hero that enhances both chocolate and peanut butter flavors in this no bake peanut butter chocolate cheesecake recipe.
You'll find all the exact measurements in the recipe card below.
Substitutions and variations
One of the best things about this amazing cheesecake is its flexibility. You can tweak it to your taste, and it'll still set perfectly every time.
- Peanut butter swap: Use smooth almond or cashew butter (no-stir types only) for a different flavor.
- Biscuit base twist: Try Oreos for extra chocolate or graham crackers for a classic no bake peanut butter cheesecake base.
- Chocolate style: Semisweet is balanced; dark chocolate makes it bolder, just add a touch more sugar.
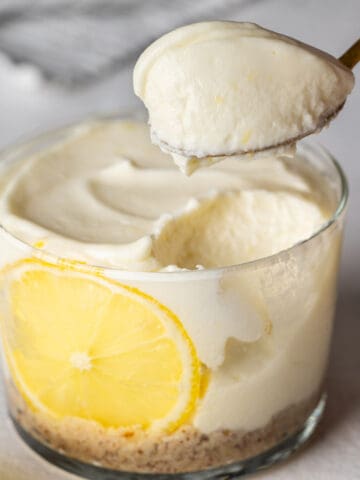
- Mini cheesecakes: Divide into cups or ramekins for quick, individual portions.
- Toppings: Crushed pretzels or caramel drizzle add a fun, salty-sweet twist.
Watch the video recipe
If you're a visual learner, watch the full video to see how this recipe comes together; layering, texture, and that satisfying ganache pour included.
Step-by-step instructions
Here's how this no bake peanut butter chocolate cheesecake comes together: simple layers, smooth texture, and that glossy finish!
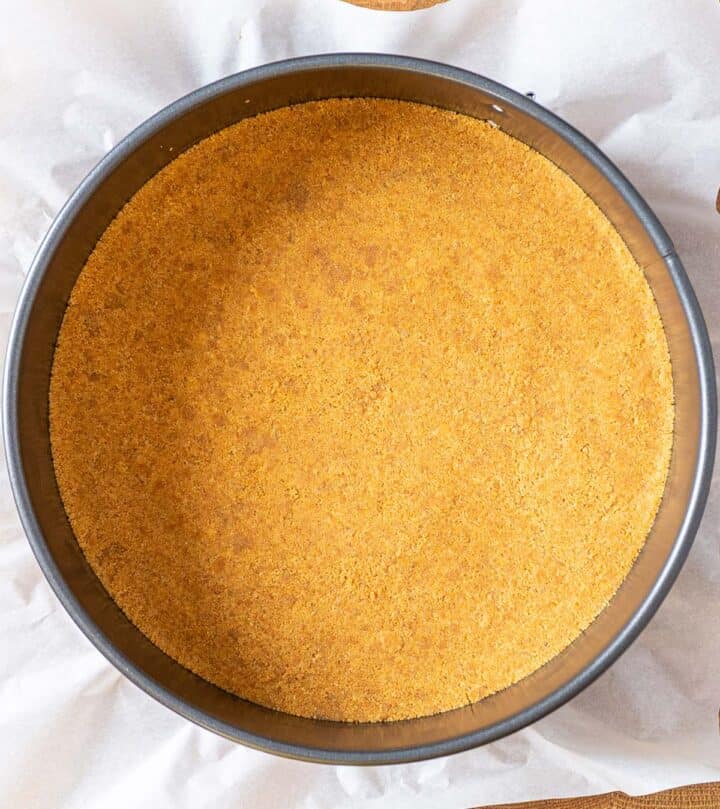
Make the crust
Mix crushed biscuits with melted butter until sandy. Press into the pan and chill.
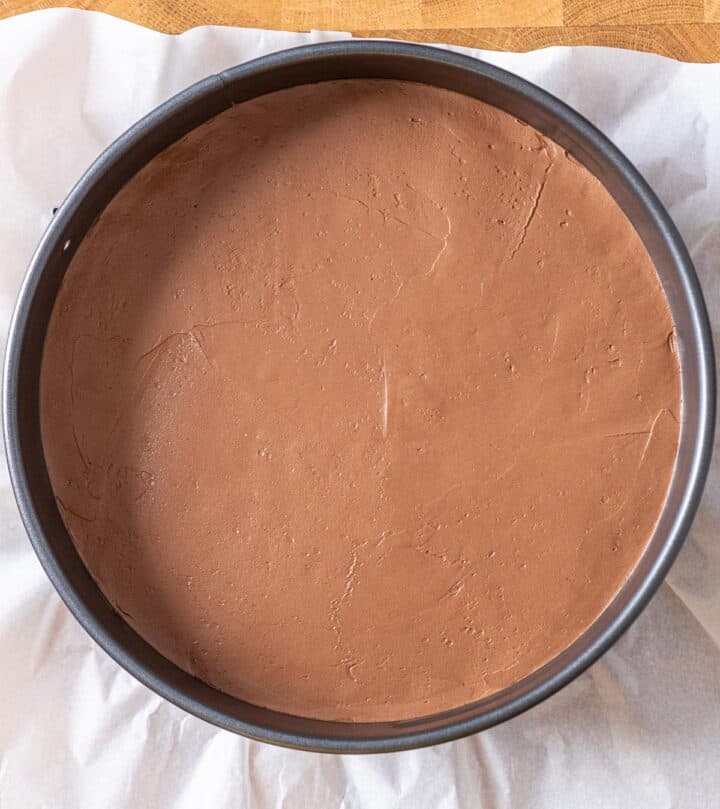
Chocolate layer
Beat softened cream cheese, sugar, vanilla, and salt. Add cooled melted chocolate, fold in whipped cream, and spread over the crust. Chill 1 hour.
Peanut butter layer
Beat cream cheese, sugar, vanilla, salt, and peanut butter. Fold in whipped cream, spread over the chocolate layer, and chill overnight.
Ganache
Heat cream until steaming, pour over chopped chocolate, and stir smooth. Let thicken slightly, then spread a thin glossy layer over the cheesecake. Chill briefly to set.
Final touch
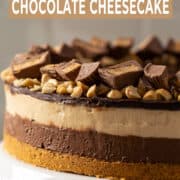
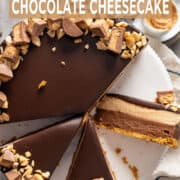
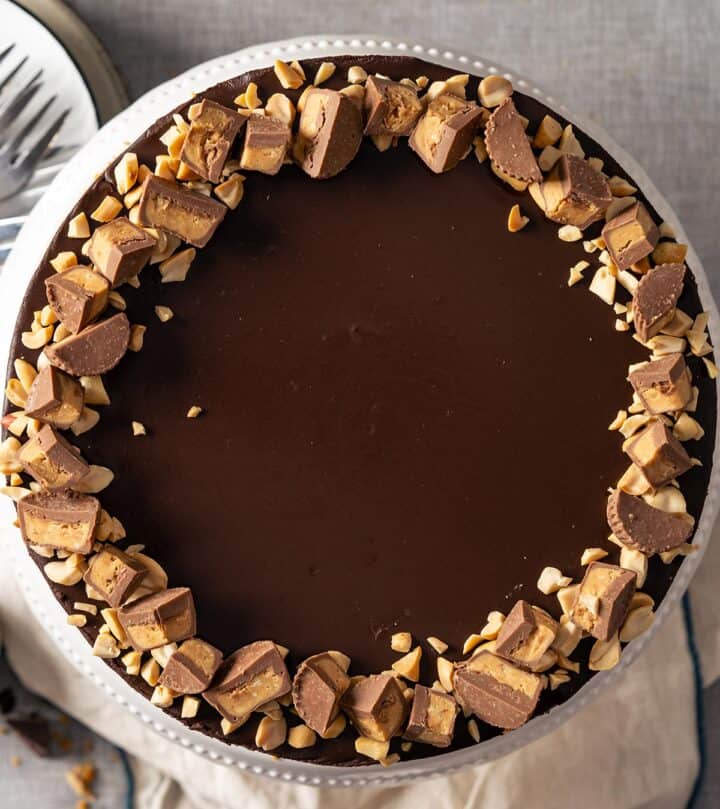
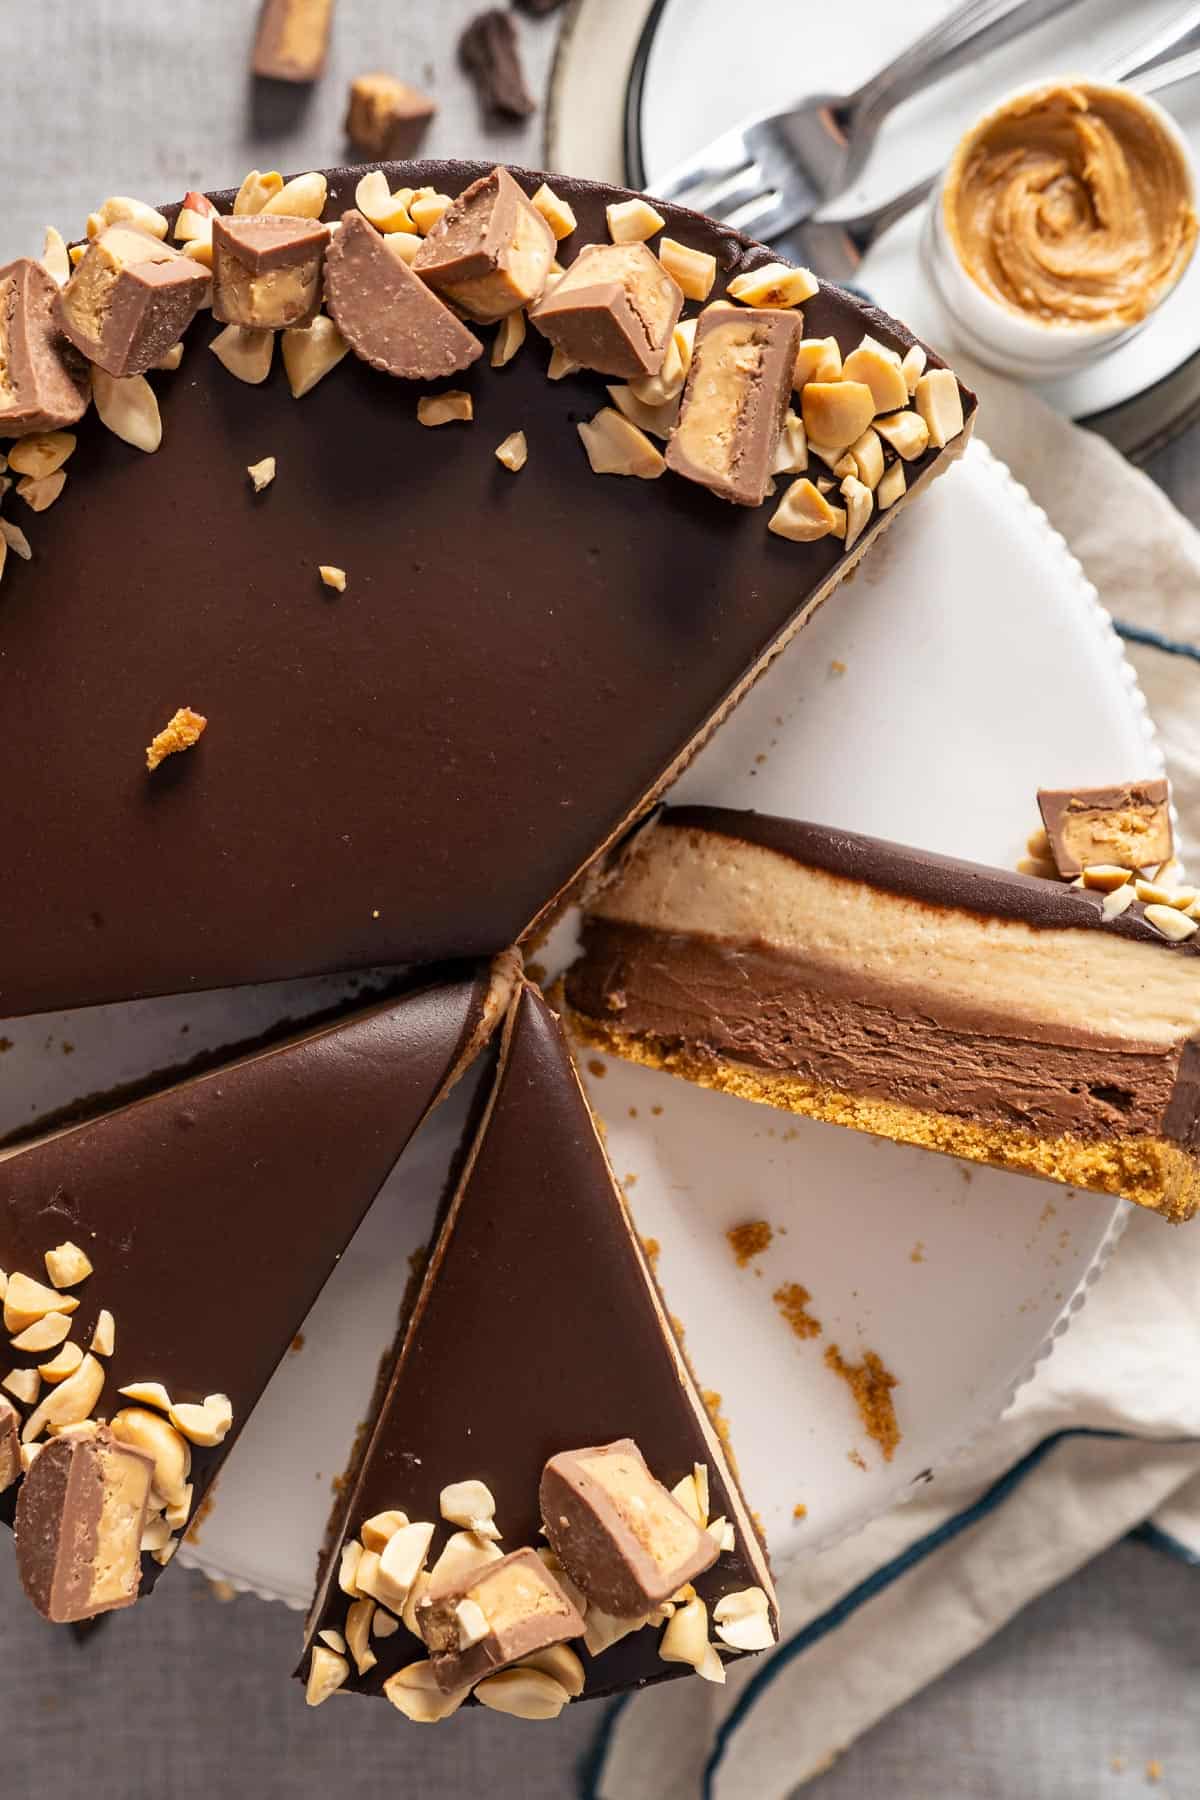
Top with chopped peanuts and quartered Reese's cups for that classic peanut butter-chocolate look.
Find more creamy inspiration in our cheesecake recipes collection, all tested to be creamy and foolproof!
Pro tips for perfect results
After testing countless cheesecakes, we've learned that small details make all the difference. Follow these for a bakery-style results, every time:
- Use full-fat brick-style cream cheese. Light or spreadable versions stay too soft.
- Soften the cream cheese fully. Cold blocks cause lumps that won't smooth out later.
- Whip the cream to medium peaks. It should hold shape but stay soft for a stable, airy filling.
- Cool the melted chocolate before mixing. Warm chocolate softens the filling and blurs layer definition.
- Chill each layer separately. Cool the chocolate layer for 1 hour before adding the peanut butter layer, then chill our no bake peanut butter chocolate cheesecake overnight for perfect layers.
Serve and storage guide
After years of making and testing, this cheesecake holds up beautifully, whether served tomorrow or later.
Serve
- Keep chilled until 30 minutes before serving for the creamiest texture.
- Since it's gelatin-free, it softens if left out too long.
- Serve cold, it's meant to stay cool and luscious.
Store
- Cover this no bake peanut butter chocolate cheesecake tightly and refrigerate up to 5 days.
- The layers stay smooth, the flavor deepens, and the ganache keeps its shine.
Freezer
- Freezes perfectly, ganache and all. Slice and freeze on a lined tray until firm, then wrap and store up to 3 months.
- Thaw overnight in the fridge, this no bake peanut butter chocolate cheesecake tastes just as creamy as day one.
You'll find more ideas like this in our no bake cheesecakes collection.
How to serve no bake peanut butter chocolate cheesecake beautifully
After pouring the ganache, chill the cheesecake until it just sets. When ready to serve, release it from the pan and place it on a cake stand or serving plate.
Top with chopped nuts and quartered Reese's cups for that signature peanut butter-chocolate look. Let our no bake peanut butter chocolate cheesecake rest at room temperature for about 30 minutes; this gives the creamiest texture.
For clean slices, skip the hot knife. Wipe the blade after each cut, press straight down, and pull out once it reaches the crust for sharp, bakery-style edges.
Common no bake cheesecake mistakes and fixes
This no bake peanut butter chocolate cheesecake is simple to make and always a hit, but if your layers ever look a little off, these quick fixes will help you get that perfect texture every time.
- Lumpy filling: The cream cheese wasn't soft enough. Always let it come fully to room temperature before beating.
- Runny or soft layers: Cream under-whipped or not chilled long enough. Aim for medium peaks and chill overnight.
- Chocolate seized or thickened too fast: It was too hot when mixed. Cool until fluid but no longer warm.
- Layers blending together: Chill the chocolate layer for about 1 hour before adding the peanut butter layer.
- Cheesecake softened too much while serving: Keep this no bake peanut butter chocolate cheesecake refrigerated until 30 minutes before serving for the best texture.
Frequently asked questions
No. Natural peanut butter separates and makes the filling for our no bake peanut butter chocolate cheesecake too soft. Always use creamy, no-stir peanut butter for the smooth, stable texture this recipe was tested with.
It usually happens if the cream cheese wasn't full-fat, the whipped cream was under-whipped, or it didn't chill long enough. Give it at least 8 hours, preferably overnight.
Yes, but you'll lose that signature peanut butter-chocolate balance. Double the peanut butter filling and skip the chocolate layer; it still sets beautifully.
While we always recommend using freshly whipped heavy cream for the best flavor and texture, you can use Cool Whip. Double the amount of Cool Whip as the heavy cream in the recipe. It'll be lighter and sweeter but will still set nicely.
Stored tightly covered, it keeps 4-5 days in the fridge. Always serve chilled for the creamiest texture.
We've made countless cheesecakes over the years, but this no bake peanut butter chocolate cheesecake always has a spot on our table.
The chocolate-peanut butter combo never fails to impress, and it's the kind of dessert everyone asks for again and again!
Did you try this no bake peanut butter chocolate cheesecake?
We'd love to hear from you! Please leave us a ★★★★★ rating and share your thoughts in the comments; it helps more home cooks find and trust our recipes. If you post on Instagram, tag us, we'd love to see it!
Thank you! - Bea and Marco
This no bake peanut butter chocolate cheesecake recipe makes a rich, layered dessert with creamy peanut butter, smooth chocolate, and glossy ganache, no baking or gelatin required.
📖 Recipe
No Bake Peanut Butter Chocolate Cheesecake
Video
Ingredients
Crust
- 2 cups (200 g) crushed cookies (like graham crackers or Digestive)
- ¼ cup (60 g) salted butter
Chocolate layer
- 8 oz (226 g) semisweet baking chocolate chopped
- 12 oz (340 g) full-fat cream cheese (1½ block) room temperature
- ½ cup (60 g) powdered sugar
- 1 teaspoon vanilla extract
- pinch of salt
- ½ cup (125 ml) cold heavy cream
Peanut butter layer
- 12 oz (340 g) full-fat cream cheese (1½ block) room temperature
- 1 cup (120 g) powdered sugar
- 1 teaspoon vanilla extract
- ⅔ cup (150 g) smooth peanut butter
- pinch of salt
- ½ cup (125 ml) cold heavy cream
Ganache topping
- 4 oz (112 g) semisweet baking chocolate chopped
- ½ cup (125 ml) heavy cream
Instructions
- Flip the base of a 9-inch (23 cm) springform pan upside down (this helps with easy sliding onto a serving plate later). Line the base with parchment paper, then lock it into place. Set aside.
Crust
- Mix crushed biscuits with melted butter until evenly coated. Press firmly into the bottom of the pan. Chill in the fridge while you prepare the filling.
Chocolate layer
- Melt the chocolate and let it cool to room temperature before using.👉 Cue: it should feel fluid but no longer warm to the touch.
- In a large bowl, beat the cream cheese using a handheld whisk until completely smooth and fluffy. Scrape the bowl well.
- Add powdered sugar, vanilla, and salt. Beat again until fully combined. Mix in the cooled chocolate until the color is uniform and glossy.
- In a separate bowl, whip the heavy cream to medium peaks.👉 Cue: the cream holds its shape but the tip gently folds over.
- Fold whipped cream into the chocolate mixture, just until no white streaks remain. Spread evenly over the chilled base. Smooth the top. Chill for at least 1 hour, or until the layer is set enough that the next layer won't sink in.
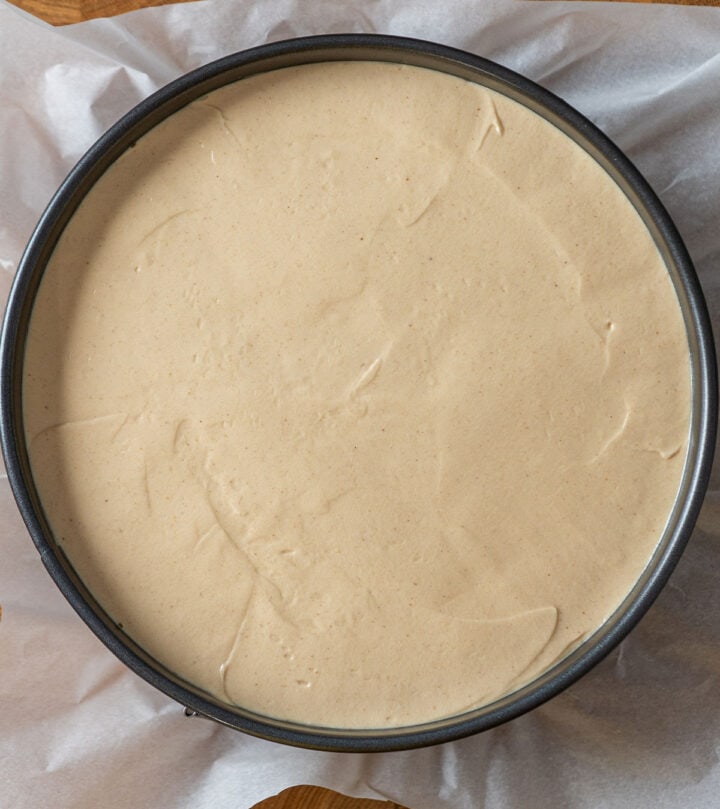
Peanut butter layer
- In a large bowl, beat the cream cheese until smooth and fluffy . Scrape the bowl.
- Add powdered sugar, vanilla, and a pinch of salt. Beat until combined. Mix in the peanut butter until the mixture is uniform tan, pale, and creamy.
- In a separate bowl, whip the heavy cream to medium peaks. Fold whipped cream into the peanut butter mixture, just until no white streaks remain. Spread evenly on top of the chocolate layer. Smooth the surface and chill for 8 hours, preferably overnight.
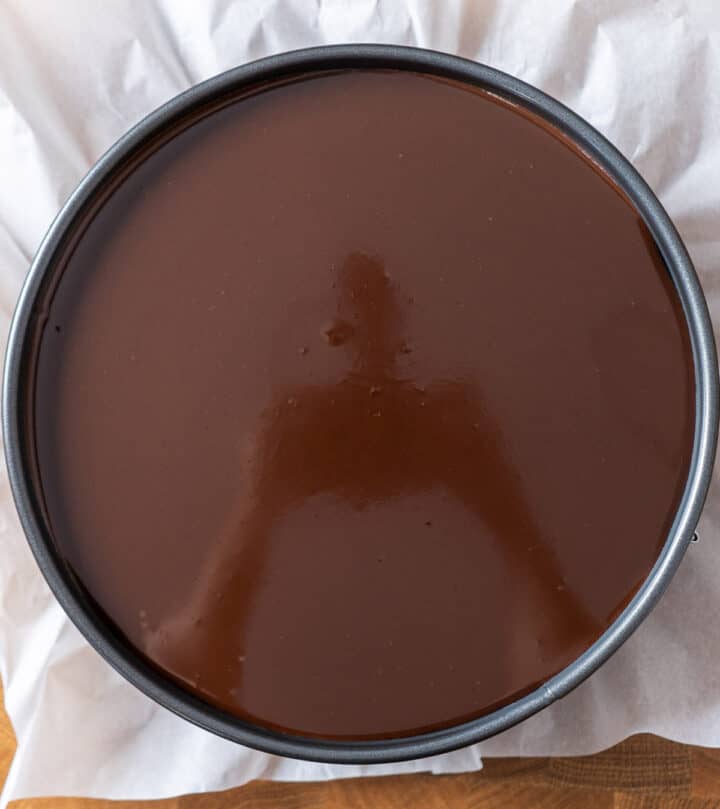
Ganache topping
- Place chopped chocolate in a heatproof bowl. Heat cream until steaming with small bubbles at the edges (do not boil). Pour hot cream over chocolate. Let sit for 2-3 minutes.👉 Cue: the chocolate will look softened and glossy at the edges.
- Stir gently from the center outward until smooth and silky. Let cool slightly until it thickens just enough to coat a spoon but is still pourable. Pour over the peanut butter layer, swirling the pan to cover the surface. Chill until softly set.
- Before serving, sprinkle with chopped peanuts and quartered Reese's cups.
Notes
- Use brick-style full-fat cream cheese: Not spreadable or low-fat. It's the key to a firm, creamy set.
- Soften the cream cheese fully before mixing: Cold cheese creates lumps that won't smooth out later.
- Make ahead: This cheesecake keeps perfectly for up to 5 days in the fridge or 3 months in the freezer.
- Serving tip: Let it sit at room temperature for 20-30 minutes before slicing for the creamiest texture.
Originally published on Sep 15, 2018. Updated with improved text, recipe, and pictures on Oct 18, 2025.
Carlene Mabey says
Delicious thank you - made it once and will make it again for Xmas
Bea & Marco says
That makes us so happy to hear, Carlene! 🥰 Thank you so much, and we're honored it’s making it onto your Christmas table. Enjoy!
Kristy says
I would love to make this for my Mom's birthday, however, I don't have a springform pan. Do you have any suggestions or tips? Maybe if I made it in a square pan? I will gladly update my review once I make this. It sounds delicious! Thanks in advance!
Bea & Marco says
That would be such a lovely birthday dessert for your mom! 😊 If you don’t have a springform pan, you can make it in an 8×8-inch square pan instead. Just line the pan with parchment paper and leave some overhang so you can lift the cheesecake out after it has chilled completely (overnight works best). It will slice nicely into squares and taste just as delicious! Hope it helps!
Kersten says
What would the conversion rate be for ingredients if I used a 9" springform pan instead of a 7"?
Bea & Marco says
Hi, Kersten! For a 9-inch springform pan, multiply all ingredients by 1.4 (1.5 works too). Hope it helps!
Mindy says
I made this for my sister's birthday last year and everyone loved it! I am planning on making a dessert for a family holiday party and wanted to know if this could be made as mini cheesecakes or maybe even bars. Would I need to adjust the recipe at all?
Bea & Marco says
Hi Mindy! I haven't tried making it into mini cheesecakes or bars but the only adjustment to the recipe would need to be in the amount you make. And it will depend on how many mini cheesecakes you want or what pan size and height for the bars you want. Depending on how tall you want the bars to be, without changing the amounts, I would use a 9" square pan so that they are not as tall. And for the mini cheesecakes, you would get about 10 mini cheesecakes with the recipe as is. Let me know how it went and happy holidays!
Daria says
Amazing!) Thank you ❤️
Lorrie says
Hi Bea,
I’m back after making these four layers of outstanding, scrumptious deliciousness! Since last night, after dinner, we have each had three pieces. Thank you for posting this keeper recipe! Is there anyway we can freeze this baby just in case we don’t finish it within the next few days?
By the way, the laundry did, finally, get finished. LOL
Happy New Year!
Lorrie
Bea says
Haha! Am I the only one whose laundry is still not done then. What I always do is slice the cheesecake in portions and freeze them (place on a tray with parchment paper, with some space between them). Once they're frozen (round 1 hour or so), then individually wrap them, place in a ziploc bag and back in the freezer. Hope it helps, thank you and happy new year to you Lorrie!
Lorrie Berntsen says
Hi, I just finished the last layer...The luscious ganache & is in the fridge waiting for tomorrow to come. With each layer, we got more anxious to try it! Your cake looks so decadent in the photos! It was quite time consuming so my laundry didn’t get multitasked with making this cake as I had planned...What a shame!
I will post again after we have tried a slice...Thank you for all the extra tips, they were really helpful.
Lorrie
Bea says
Hi Lorrie! Sorry about your laundry 🥲. But I think you will agree all the effort was worth it when you and your family try it tomorrow. Happy New Year!
Greg Hollingsworth says
An you use a 8 inch pan for this recipe?
Bea says
Yes, you can. You should multiply the ingredients by 1.2 if you want the same look (height).
Sigri says
Hello! I would like to ask what brand of peanut butter do you prefer? Thank you very much.
Mike says
Fantastic! just made it and it came out great. Easy to follow recipe. My wife said that it's so good, i could sell it!
Thank you!
Bea says
Haha! Well that's just awesome Mike, thank you!