


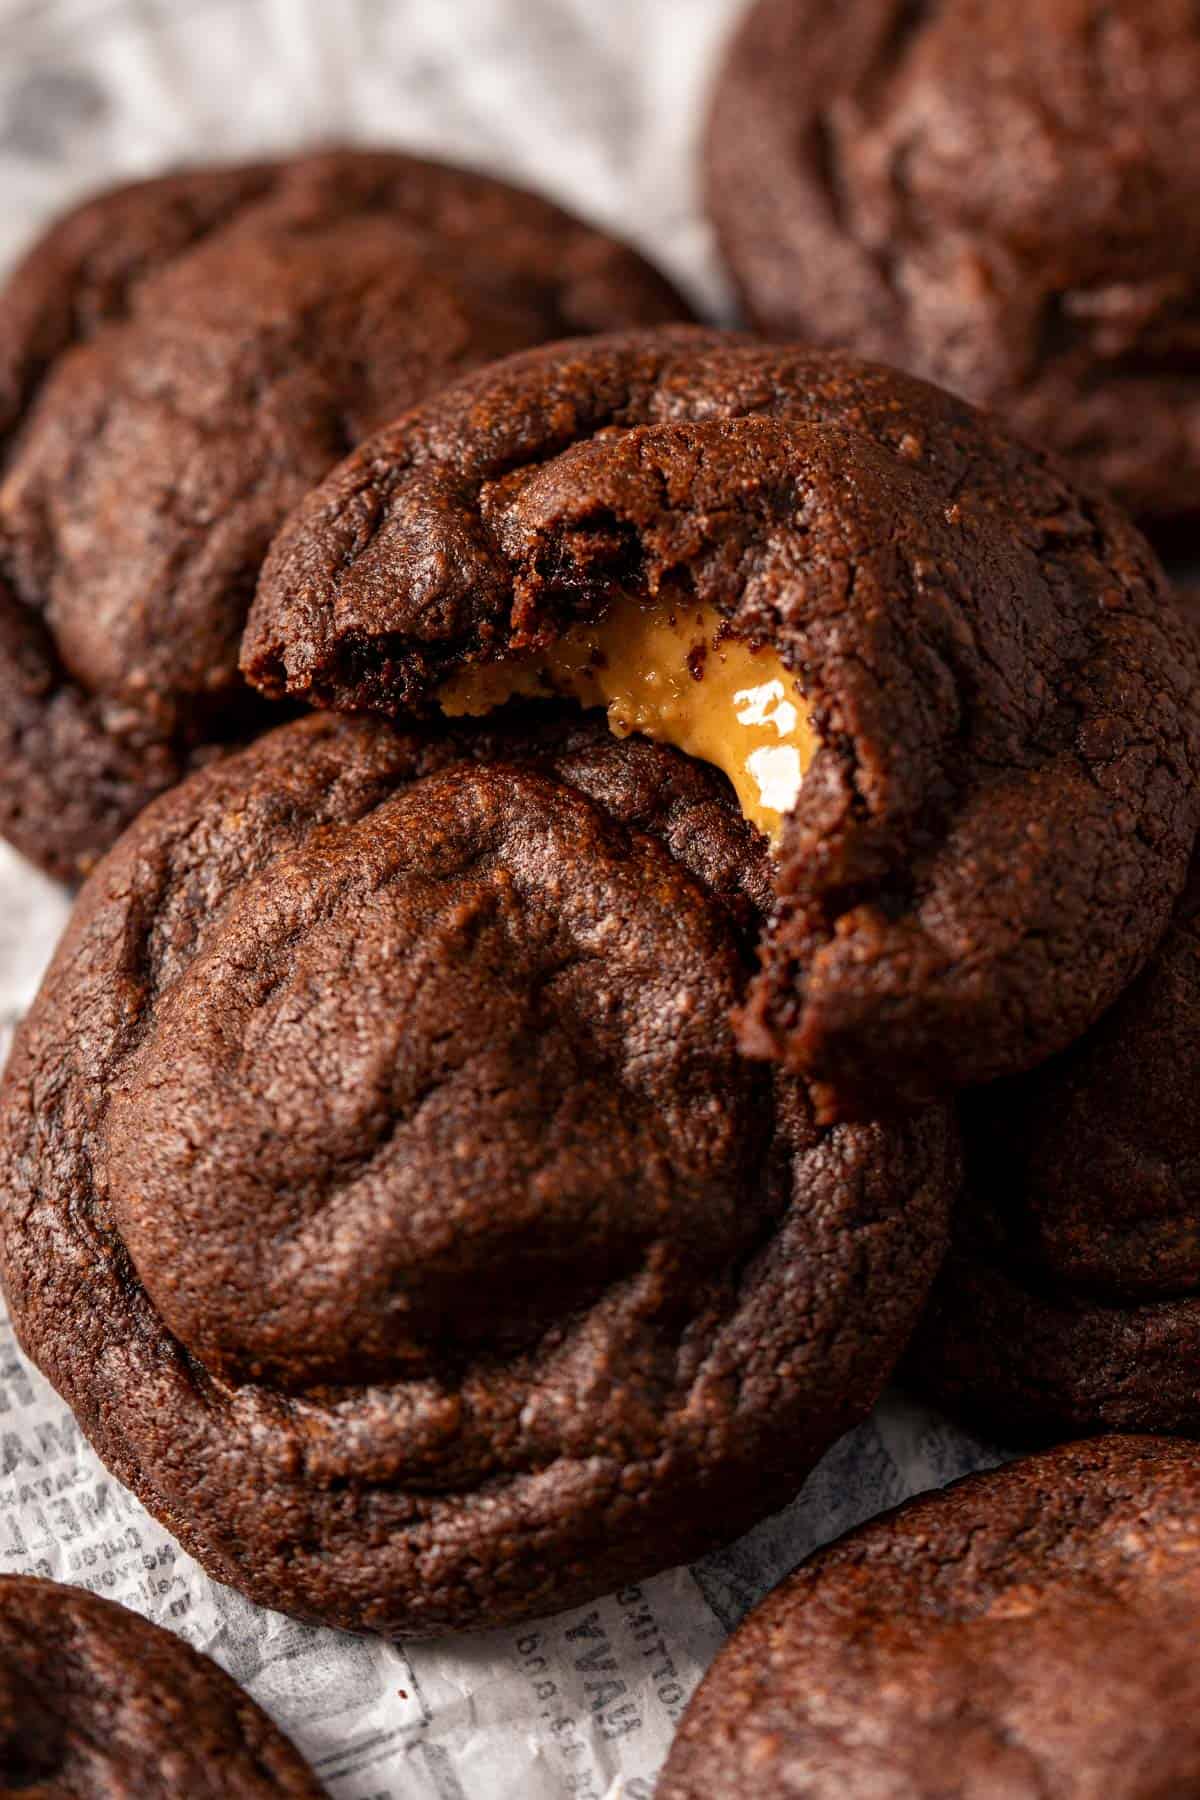
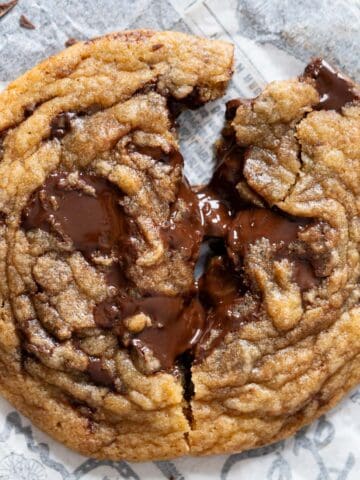
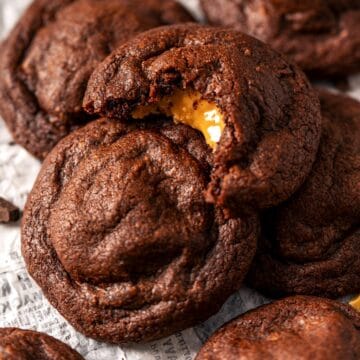
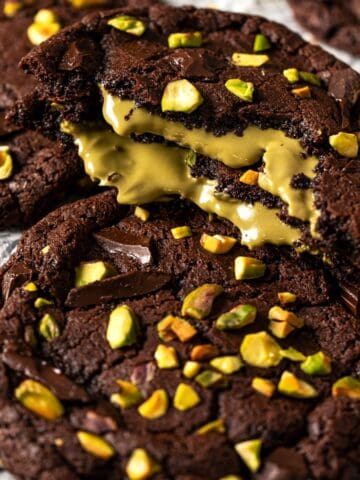
These peanut butter stuffed chocolate cookies bake up with soft, fudgy centers and chewy edges, and the secret is a chilled peanut butter core that keeps the middle perfectly gooey. Every bite melts in your mouth, combining rich chocolate and creamy peanut butter in one irresistible cookie.
📮 Save this recipe for later!
Jump to:
- Why you'll love them
- Pro techniques and cues for perfect peanut butter stuffed cookies
- Ingredients you'll need
- Substitutions and variations
- Watch the video recipe
- Step-by-step instructions
- Best tips for peanut butter stuffed chocolate cookies
- Troubleshooting common problems
- Serve and storage guide
- Frequently asked questions
- More cookies recipes
- 📖 Recipe
- 💬 Comments
We fell in love with these peanut butter stuffed chocolate cookies years ago for their creamy center. Since then, we've aimed to make them even better, cookies that look bakery-perfect but are still easy to bake at home.
So we refined everything: the texture, the flavor, and the look. Now they're soft, rich, and just as beautiful for gifting as they are for keeping all to yourself.
You can find more inspiration in our cookie recipes collection, all simple bakes made to look and taste incredible.
Why you'll love them
This recipe works because chilling the peanut butter filling and using a soft, cocoa-rich dough create cookies that stay thick, rippled, and irresistibly gooey inside.
If you love homemade bakery-style cookies, these cookies are for you. Here's why:
- That creamy peanut butter center: Each cookie has a smooth, melt-in-your-mouth middle that makes them taste like true peanut butter stuffed cookies.
- Soft and gooey texture: Every bite has that perfect mix of fudgy center and chewy edges - pure cookie comfort.
- Easy enough for anyone: The steps are simple and reliable, even if it's your first time making stuffed cookies.
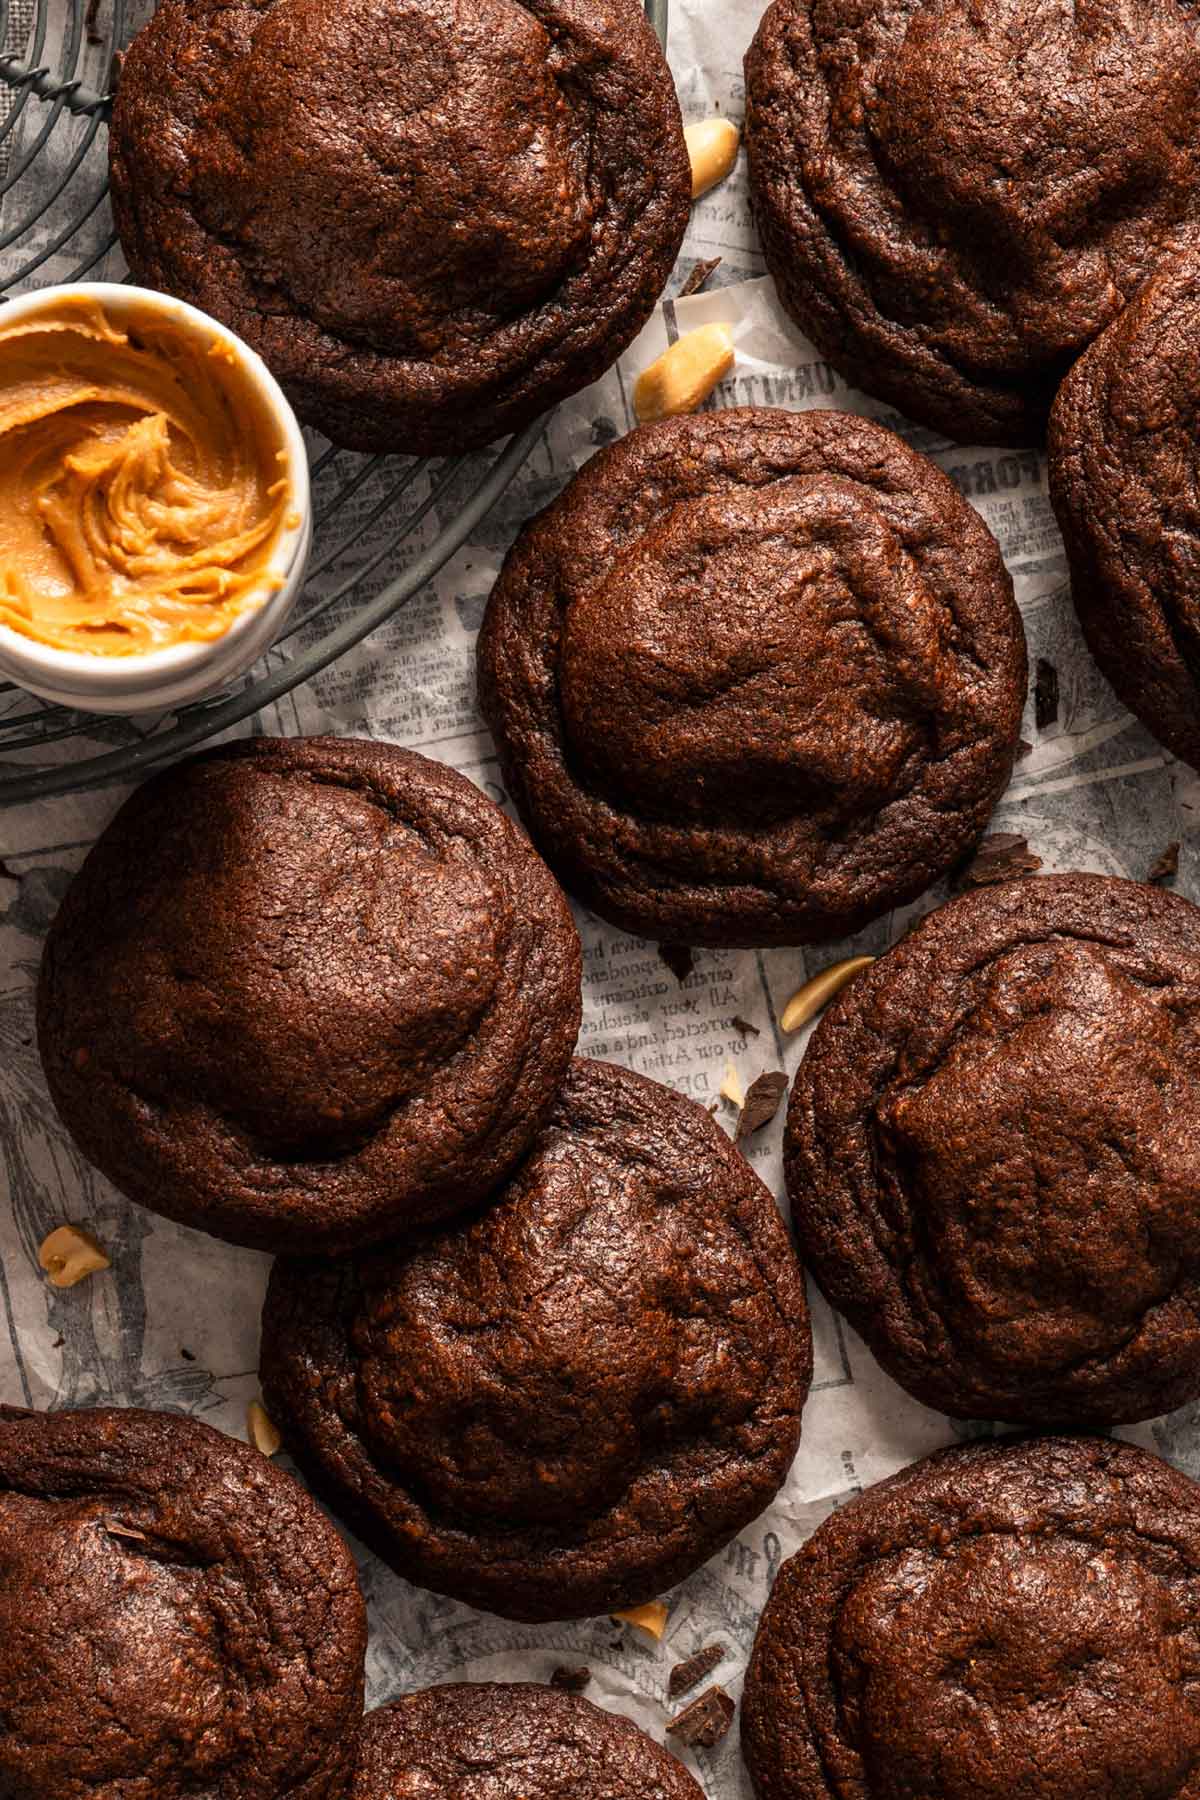
- Perfect for gifting (or keeping): They hold their shape beautifully and stay soft for days.
- Your favorite flavor combo: Chocolate and peanut butter never go out of style, and these peanut butter filled chocolate cookies prove why.
Craving more bakery-style goodness? Try our Nutella-stuffed cookies with chocolate chunks and chocolate pistachio cookies next, ones of our favorites!
Pro techniques and cues for perfect peanut butter stuffed cookies
Think of this as your cheat sheet to make sure your cookies bake up with soft centers and those bakery-style ripples!
These cues cover everything from filling prep to bake timing, helping you master the signature soft center and rippled edges every time.
- Peanut butter fillings: Scoop and freeze the filling first so it's firm and easy to wrap.
- Dough: It should be cool, soft, and slightly glossy, like clay. That texture gives you smooth, even cookies.
- Texture: Gently press your fingertips over each dough ball. These tiny dents bake into those beautiful ripples you see in stuffed chocolate cookies.
- Two-stage bake: Start at a higher temperature to set the edges, then lower the heat so the centers stay soft and glossy.
- Bake cues:
- Minute 4 → Edges set, tops puffed and glossy, time to lower the temperature.
- Minute 7-8 → Tops dulling, edges a shade darker, centers still shiny.
- Minute 10-11 → Edges firm, light cracks and ripples forming, centers soft.
- Cooling → Cookies flatten as they rest; ripples deepen within 10-15 minutes for that bakery-style finish.
- Quick Troubleshooting:
- Domed cookies → Dough too cold; let it rest 5-10 minutes before baking.
Flat cookies → Dough too warm or over-creamed; chill briefly, then bake.
Peanut butter leaking → Filling not sealed; patch thin spots before baking.
- Domed cookies → Dough too cold; let it rest 5-10 minutes before baking.
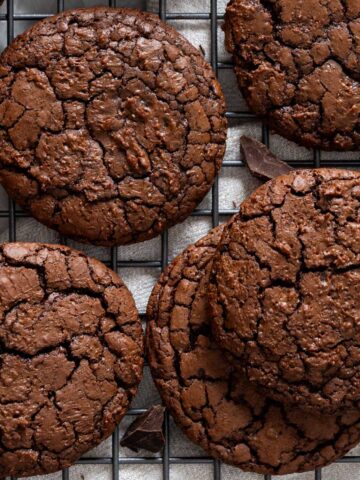
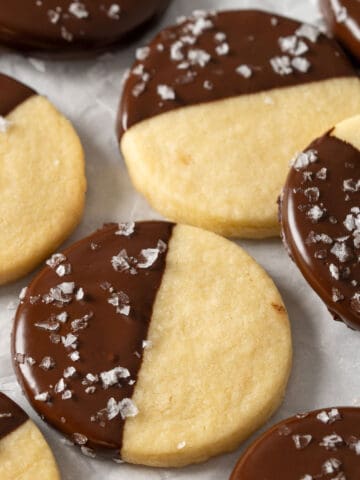
Love chocolate-rich cookies? You'll also enjoy our fudgy brownie cookies and chocolate-dipped shortbread cookies, they're irresistible!
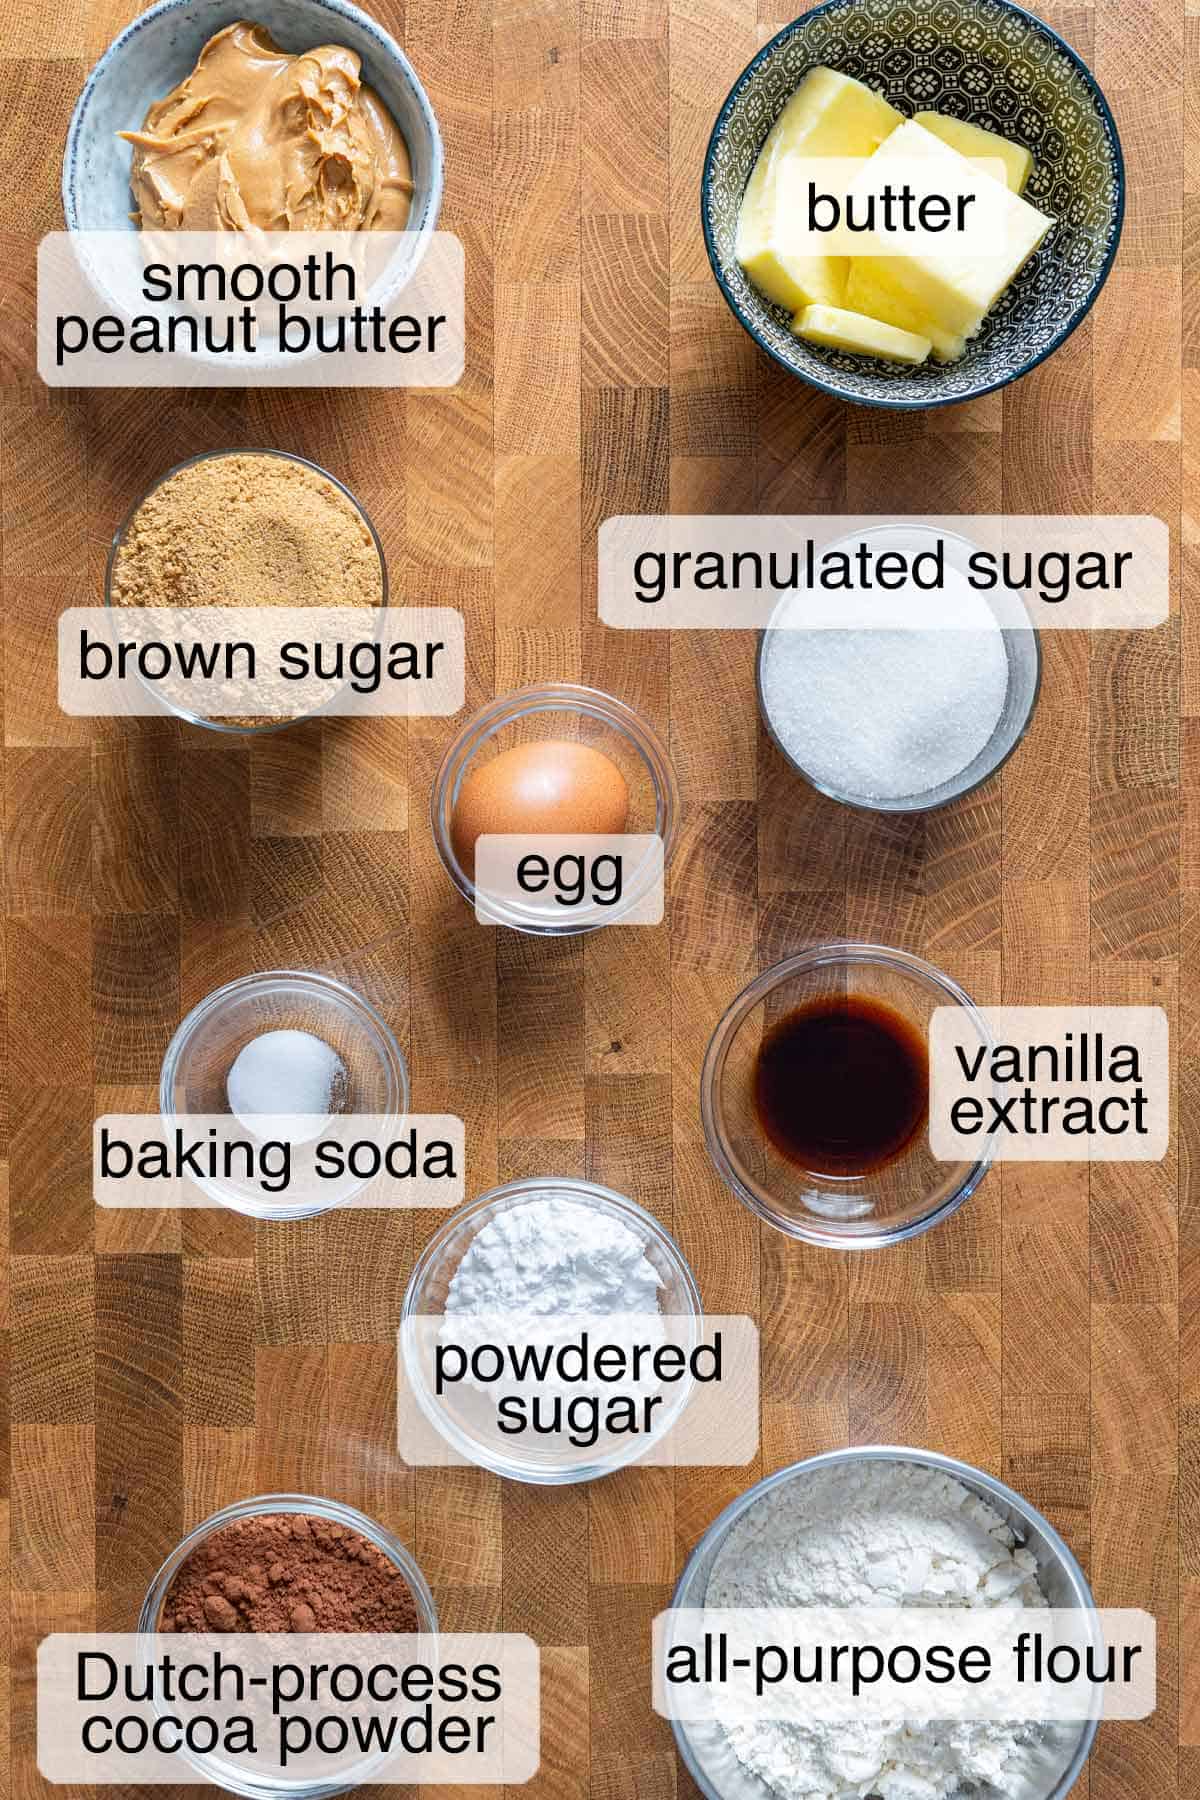
Ingredients you'll need
Here's what you'll need to make these peanut butter stuffed chocolate cookies:
Key ingredients note:
- Creamy peanut butter: Use the no-stir kind, not natural. It keeps the filling smooth and creamy. We recommend Jif Creamy Peanut Butter or Skippy Creamy Peanut Butter for the perfect texture.
- Salted butter: Adds richness and brings out deeper flavor in both the chocolate and peanut butter.
- Dutch-processed cocoa powder: Use unsweetened for a deeper color and smoother flavor, something like Guittard Cocoa Rouge or Valrhona Dutch Cocoa Powder works beautifully.
- Granulated sugar: Helps the cookies spread slightly and gives crisp edges.
- Brown sugar: Adds moisture and chewiness, creating that soft, bakery-style center.
- Baking soda: Just enough lift for thick, bakery-style cookies.
- Salt: A pinch brings out all the chocolate and peanut butter flavors.
- Egg: Binds everything and adds moisture for that soft-chewy texture.
That's it! Simple pantry ingredients that come together into the most irresistible chocolate peanut butter filled cookies.
You'll find all the exact measurements in the recipe card below.
Substitutions and variations
These peanut butter stuffed chocolate cookies are easy to customize. Here's how:
Mini version: Scoop smaller dough balls and reduce bake time by 1-2 minutes for bite-sized cookies.
Other nut butter: Almond or cashew butter works too, but the flavor will be milder. Use creamy, no-stir style nut butter for the best texture.
Filling ideas: Swap the peanut butter for Nutella or cookie butter for a twist, perfect if you love making peanut butter filled cookies and want to try something new.
Watch the video recipe
Watch our video to see how to make peanut butter stuffed chocolate cookies. Learn to identify key signs for perfect dough and edges, so your cookies turn out great every time!
Step-by-step instructions
Let's bake peanut butter stuffed chocolate cookies! Follow the steps and look for cues on the dough texture and when the cookies are perfectly set.
Make the filling
Mix peanut butter, powdered sugar, butter, and vanilla until smooth. Form into 14 balls and freeze.
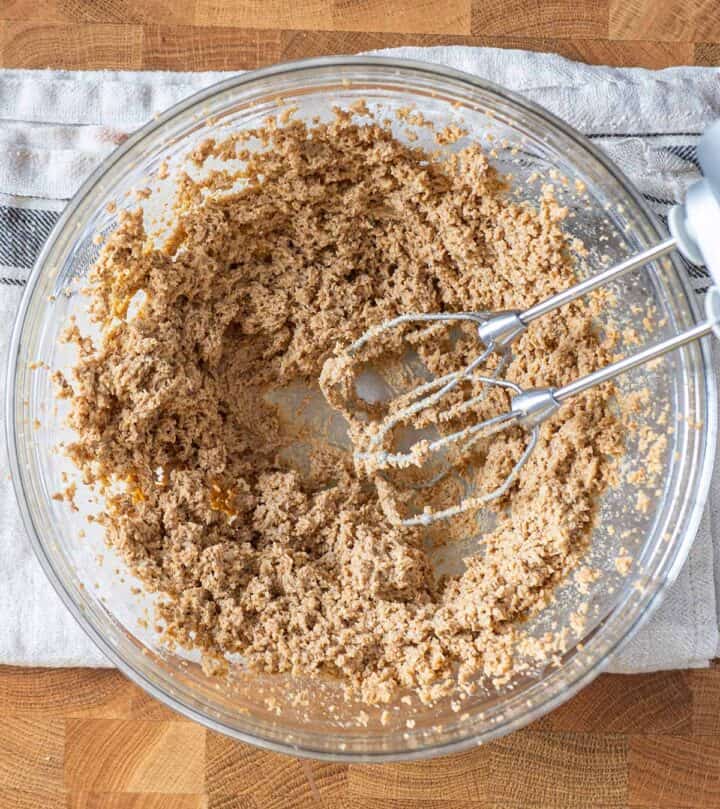
Cream butter and both sugars
Beat butter, granulated sugar, and brown sugar until fluffy.
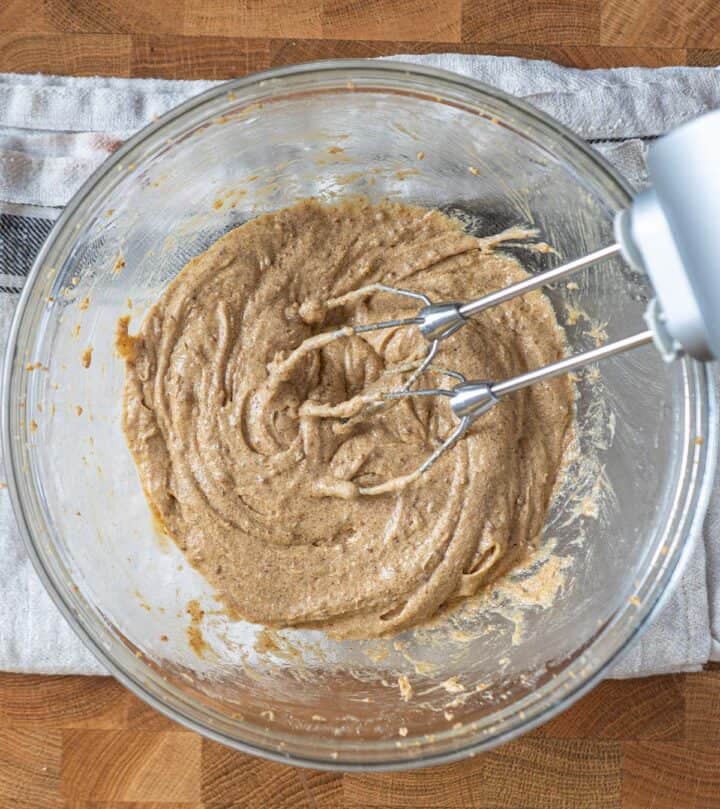
Add wet ingredients
Mix in the egg and vanilla just until combined. The mixture should look glossy and soft.
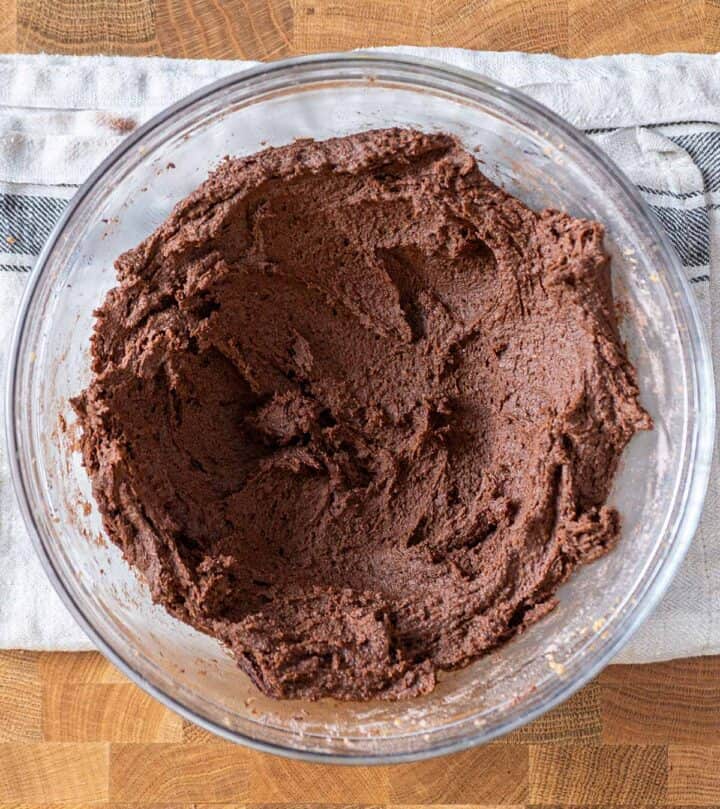
Add dry ingredients
Whisk flour, cocoa, baking soda, and salt, then stir into the wet mix. Spread the dough up the sides of the bowl; this helps it chill faster (20-30 minutes).
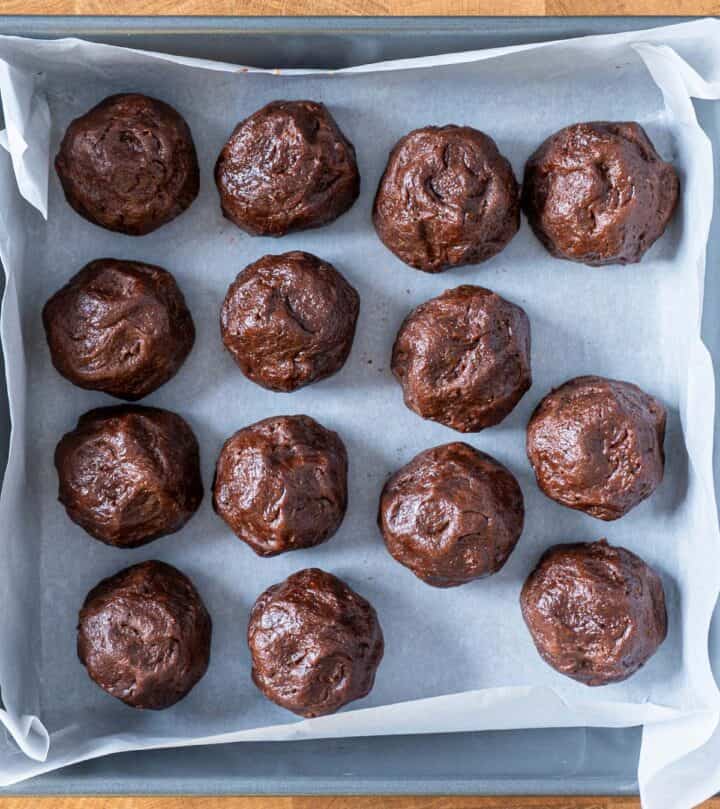
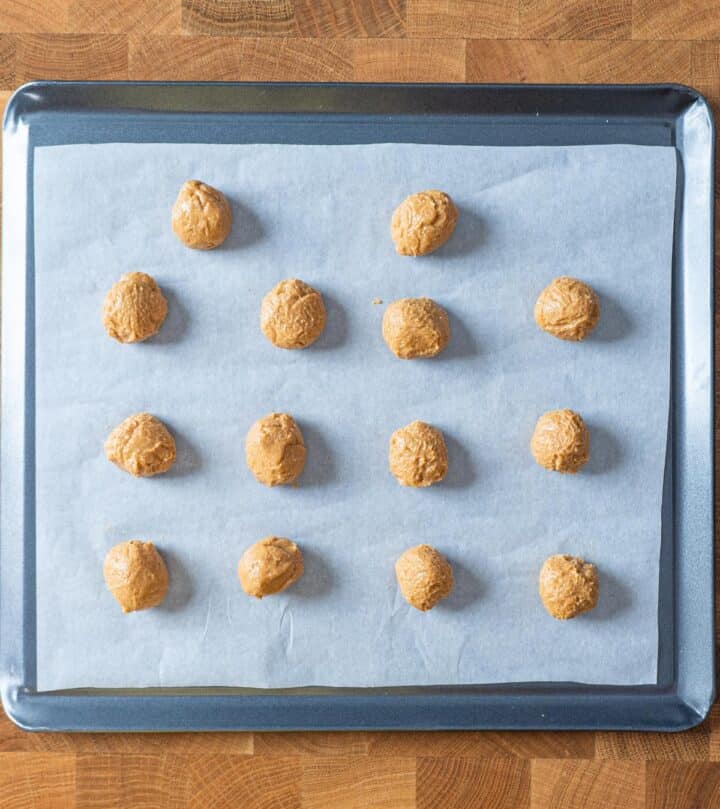
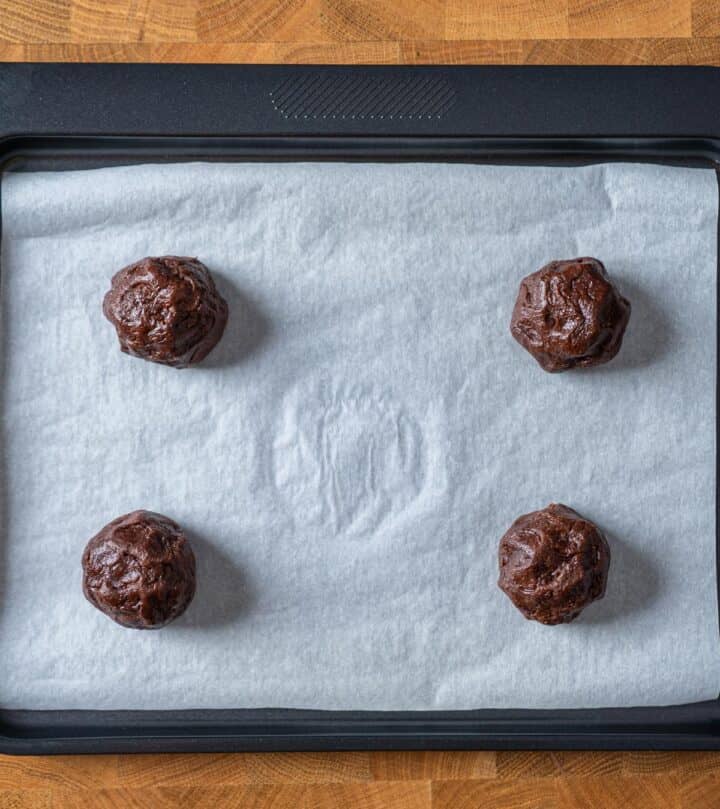
Assemble
Divide the dough into 14 balls and slightly flatten each one. Place frozen peanut butter in the center, wrap the dough around it, and seal well. Roll into smooth balls and gently press your fingertips on top for texture.
Bake
Bake at 375°F (190°C) for 4 minutes, then lower to 350°F (175°C) for 6-7 minutes.

Cool
Let the cookies rest on the tray for 10 minutes. They'll settle, form ripples, and the centers will stay soft and glossy.
Best tips for peanut butter stuffed chocolate cookies
A few simple habits make these stuffed chocolate cookies turn out bakery-perfect every time. These tips focus on texture, consistency, and timing, the little details that make all the difference.
- Don't over-chill the dough: You want cool, pliable dough, not firm. If it's too cold, the cookies won't spread or ripple.
- Seal for smooth edges: Patch any cracks before baking to keep that peanut butter center creamy and hidden.
- Bake one tester cookie first: Every oven behaves differently; a quick test helps you nail your perfect timing.
- Let them cool on the tray: They finish baking as they rest and form those signature rippled tops.
- Scoop evenly: Using the same dough-to-filling ratio gives consistent texture and shape for all your peanut butter filled cookies.
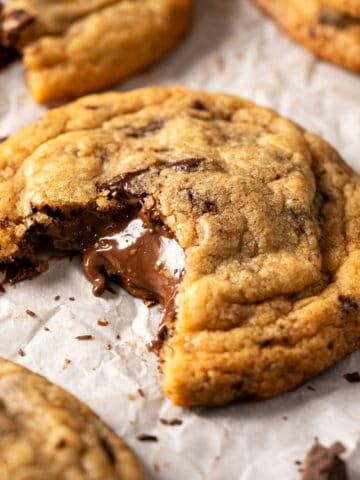
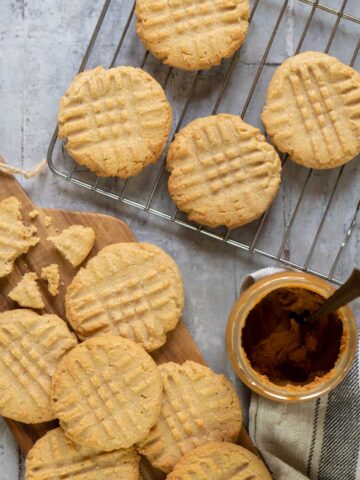
If you love baking cookies like these, try our chewy chocolate chunk cookies or easy peanut butter cookies next! Both are simple, satisfying, and just as addictive.
Troubleshooting common problems
Even the best bakers run into cookie quirks now and then! If your peanut butter stuffed chocolate cookies don't look bakery-perfect, here's how to fix them fast.
- Cookies domed: The dough was too cold. Let it rest at room temperature for 5-10 minutes before baking next time.
- Cookies spread too much: The dough was too warm or over-creamed. Chill it for 10 minutes before shaping.
- Peanut butter leaking out: The filling wasn't sealed completely. Patch any thin spots and smooth the surface before baking.
- Dry or crumbly texture: The cookies were slightly overbaked. Pull them once the edges set and the centers look soft and shiny.
- Uneven shape or cracks: The peanut butter ball wasn't centered. Try wrapping evenly so you get perfect peanut butter filled cookies every time.
Serve and storage guide
Soft, gooey cookies don't stay that way by accident. Here's exactly how to serve, store, and freeze your peanut butter stuffed chocolate cookies so they stay delicious for days.
Serve
- These cookies are best slightly warm, about 5-10 minutes after baking, when the centers are soft and creamy!
Store
- Keep in an airtight container at room temperature for up to 3 days.
- If the peanut butter centers firm up, a quick 10-second microwave warm-up brings them back to gooey perfection.
Freezer
- Freeze unbaked: Shape and seal the cookies, then freeze on a lined tray. Once solid, transfer to bags for up to two months. Bake straight from frozen, adding one to two minutes to the bake time.
- Freeze baked: Cool and store in an airtight container for up to 2 months. Thaw at room temperature to enjoy the chewy peanut butter stuffed cookies again!
They taste amazing, eaten slightly warm from the oven or reheated for just a few seconds, pure chocolate-peanut butter bliss.
Frequently asked questions
Got questions about making the perfect peanut butter stuffed chocolate cookies? Here are quick answers to the most common issues and baking tips.
The dough was likely too warm or the butter over-creamed. Chill it for 10-15 minutes before baking, and your cookies will hold their shape and ripple beautifully.
Yes! Shape and seal the dough balls, then freeze them on a lined tray. Once solid, transfer to bags and bake straight from frozen, just add 1-2 minutes to the bake time.
Keep them in an airtight container at room temperature for up to 3 days. If the centers firm up, a quick 10-second microwave warm-up brings back that soft, melty middle.
Yes! A sturdy whisk and spatula work well. Cream the butter and sugars by hand until fluffy, and you'll get soft, gooey peanut butter stuffed cookies.
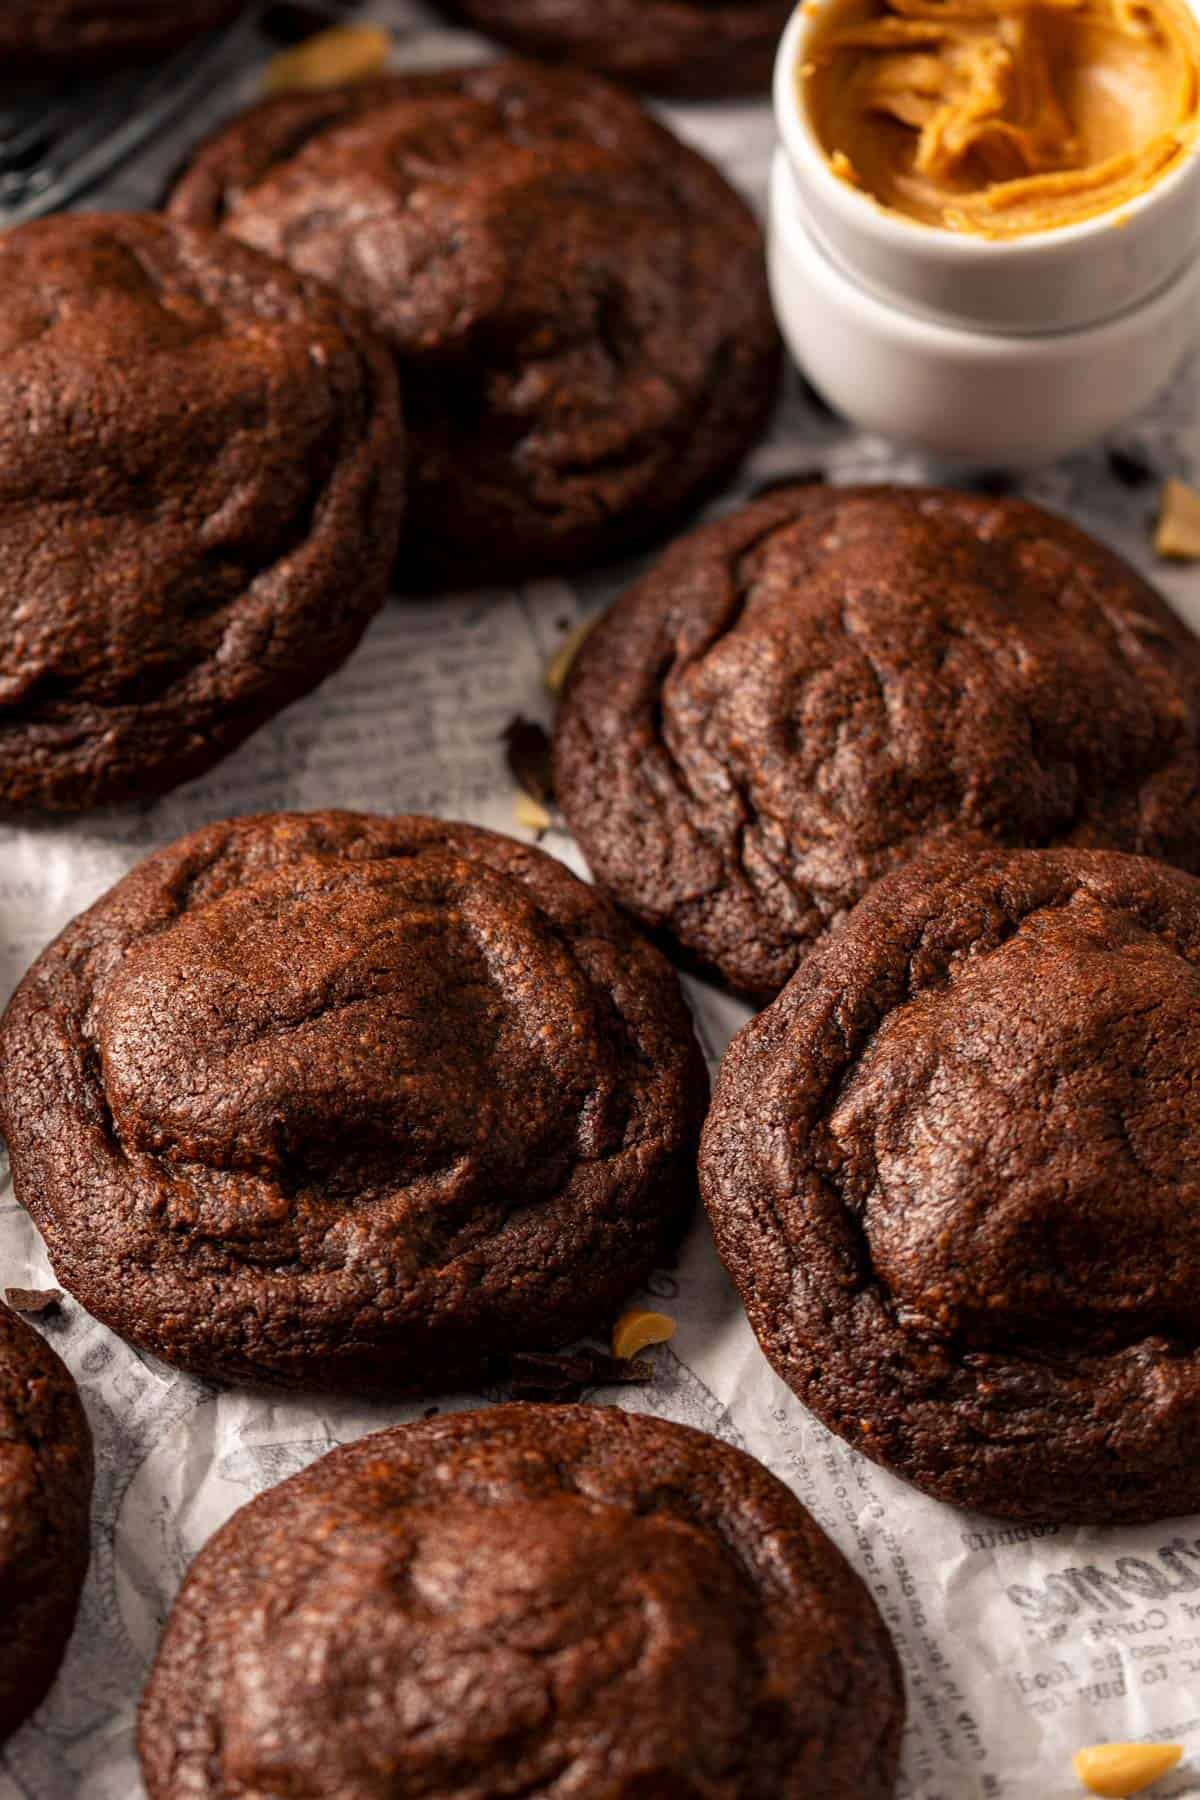
These cookies look fancy but deliver comforting homemade goodness. The gooey peanut butter center pairs perfectly with the chewy chocolate edges, making them disappear quickly from our kitchen.
Bake a batch, share them, or keep them all to yourself; either way, you'll come back to this recipe again and again.
Did you try these peanut butter stuffed chocolate cookies?
We'd love to hear from you! Please leave us a ★★★★★ rating and share your thoughts in the comments. If you post on Instagram, tag us, we'd love to see it!
Thank you! - Bea and Marco
📖 Recipe
Peanut Butter Stuffed Chocolate Cookies
Video
Equipment
Ingredients
Filling
- ½ cup (120 g) creamy peanut butter (not natural/oily type)
- 2 tablespoon (30) powdered sugar
- 1 tablespoon (15 g) salted butter softened
- ½ teaspoon vanilla extract
Dry ingredients
- 1⅓ cup (175 g) all-purpose flour
- ½ cup (40 g) Dutch-processed cocoa powder unsweetened
- ½ teaspoon baking soda
- ¼ teaspoon salt
Wet Ingredients
- ½ cup (115 g) salted butter softened
- ½ cup (100 g) granulated sugar
- ¾ cup (150 g) packed brown sugar
- 1 large egg room temperature
- 2 teaspoon vanilla extract
Instructions
Filling
- Mix peanut butter, powdered sugar, butter, and vanilla extract until smooth.½ cup creamy peanut butter (not natural/oily type), 2 tablespoon powdered sugar, 1 tablespoon salted butter, ½ teaspoon vanilla extract
- Scoop into 14 balls and freeze for 20-25 minutes while making the dough.
Dry ingredients
- In a bowl, whisk together flour, cocoa powder, baking soda, and salt. Set aside.1⅓ cup all-purpose flour, ½ cup Dutch-processed cocoa powder, ½ teaspoon baking soda, ¼ teaspoon salt
Wet ingredients
- In a large bowl, using a handheld mixer, beat butter, granulated sugar, and brown sugar until fluffy and slightly pale, about 2-3 minutes.👉 Cue: light and airy, but still a bit grainy, over-creaming causes overspreading.½ cup salted butter, ½ cup granulated sugar, ¾ cup packed brown sugar
- Beat in egg and vanilla just until combined.👉 Cue: smooth and glossy; stop once egg disappears to avoid greasy dough.1 large egg, 2 teaspoon vanilla extract
- Add dry ingredients to the wet mixture and mix on low until no dry streaks remain.👉 Cue: dough should be soft, slightly sticky, but hold together, not batter-like.
Chill
- Spread the dough up along the sides of the bowl, forming a thin, even layer. Chill 20-30 minutes, just until firmer and easier to shape.
Assemble
- Preheat oven to 190°C (375°F). Line two baking trays with parchment paper.
- Scoop dough into 14 balls (about 3 tablespoons or 45 g each). Flatten slightly, place a frozen filling ball in the center, wrap, and seal completely. Lightly texture the tops with your fingertips for natural bakery wrinkles.👉 Cue: no visible seams; filling fully enclosed. If your kitchen runs warm, chill them for 10 minutes just until they feel firm to the touch.
Bake
- Place dough balls on a tray, leaving about 8 cm (3 inches) of space between each cookie, they'll spread as they bake.
- Bake for 4 minutes on the middle rack, then lower the temperature to 350°F (175°C), and bake for another 6-7 minutes. Pull when edges set and slightly wrinkled, centers glossy and soft.
- Oven behavior timeline0-4 min: Dough balls hold shape; edges just starting to soften. Tops glossy and slightly domed.5-7 min: Edges spreading outward, tops beginning to dull slightly. Centers puffed but still glossy.👉 Check: early indicator stage. If spreading too fast → dough too warm. If no spread → dough too cold.8-9 min: Edges darker and more defined, faint cracks forming. Centers still raised and soft; PB filling starting to warm and loosen.10-11 min: Edges fully set, tops slightly wrinkled, centers glossy and soft. PB filling creamy, not runny.12 min (max): Edges firm, centers set but chewy. Cookies flatten slightly as steam escapes, and ripples deepen during cooling.
- Rest on the tray 10 minutes, then transfer to a wire rack. They come out domey but will slightly sink and show ripples within those minutes!
Notes
- Measure flour accurately: For optimal results, use a kitchen scale. If using cups, measure by spooning flour into the cup and leveling it with a knife. Avoid scooping directly from the bag, as this can lead to tough, dry cookies.
- Weigh your ingredients: Baking, especially cookies, is a science. For accuracy and consistency, use a kitchen scale whenever possible. If using measuring cups, spoon and level your dry ingredients to avoid adding too much flour.
- Peanut butter: Use creamy, no-stir peanut butter. Natural types separate and can make the filling oily.
- Serving: Best enjoyed warm for gooey centers. Reheat in the microwave for 8-10 seconds to bring back the ooze.
Nutrition Facts
The nutrition facts provided are an estimate per serving. Accuracy is not guaranteed.
Bea tested this recipe multiple times to perfect the soft centers and chewy edges you see here. Originally published on Apr 18, 2019. Updated with improved text, recipe, and pictures on Oct 11, 2025.

Rishika says
Amazing recipe...the cookies turned out so good and they are delicious 😋😍
Bea says
Awesome! Happy to hear that, thanks for your feedback Rishika!
Nat155 says
Великолепное печенье, благодарю за рецепт!!!!
Bea says
Glad that you liked them, thank you! 😍
Nicole says
Can i use vegetable oil instead of butter?
Bea says
No, you can't. Sorry! It'll totally change the consistency of the dough.
Riri says
I made this cake it"s delicious. I put M & M choco peanut on the top. Thank You for recipe. Oh I made coffee cheese cake also.
Thank you Elmundo
Riri From Indonesia
Bea says
That's great, glad that you liked them. Thank you!
Jade Williams says
Hello Bea,
I made the cookies on Friday and put half in the freezer. They are so amazing!!!
I am baking the frozen cookies now.
Thank you! Greetings from Australia <3
Bea says
Hi Jade! Yes, they're delicious right? I'm making these for my BIL who's coming in a few weeks time 😀 Thank you so much Jade!