

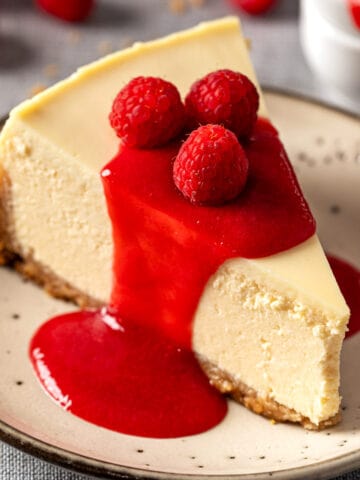
This mini cheesecake recipe is for those times when you want a dessert that looks impressive but is secretly so easy to make. Baked in a standard 12-cup muffin pan with no water bath, these little cheesecakes turn out smooth, rich, and perfectly portioned every time.
★★★★★
These mini cheesecakes were a huge hit - creamy, smooth, and perfectly portioned. No cracks, no water bath, just perfection.
- Hithesh Ponnanna
📮 Save this recipe for later!
Jump to:
This mini cheesecake recipe is one of our most-loved desserts because it gives you everything people love about cheesecake in a simpler format, rich, creamy, and impressive without the fuss of making a full one. They're easy to bake, easy to serve, and always feel a little special.
It's been amazing to see how much love this mini cheesecake recipe has received over the years, with the video reaching more than 20 million views on our YouTube channel.
They bake in just 15 minutes, chill beautifully, and are perfect for birthdays, holidays, parties, or anytime you want a dessert that's simple to make but guaranteed to impress, just like so many of our cheesecake recipes.
Why this recipe works
This mini cheesecake recipe gives you all the rich, creamy flavor of a classic cheesecake, like our New York style cheesecake, but in a smaller format that's easier to portion and serve. It's quick, beginner-friendly, and designed to give you smooth, perfectly portioned cheesecakes without the extra steps of baking a full one.
- No water bath needed: We tested different bake times and oven temperatures so you can skip the water bath without risking cracks.
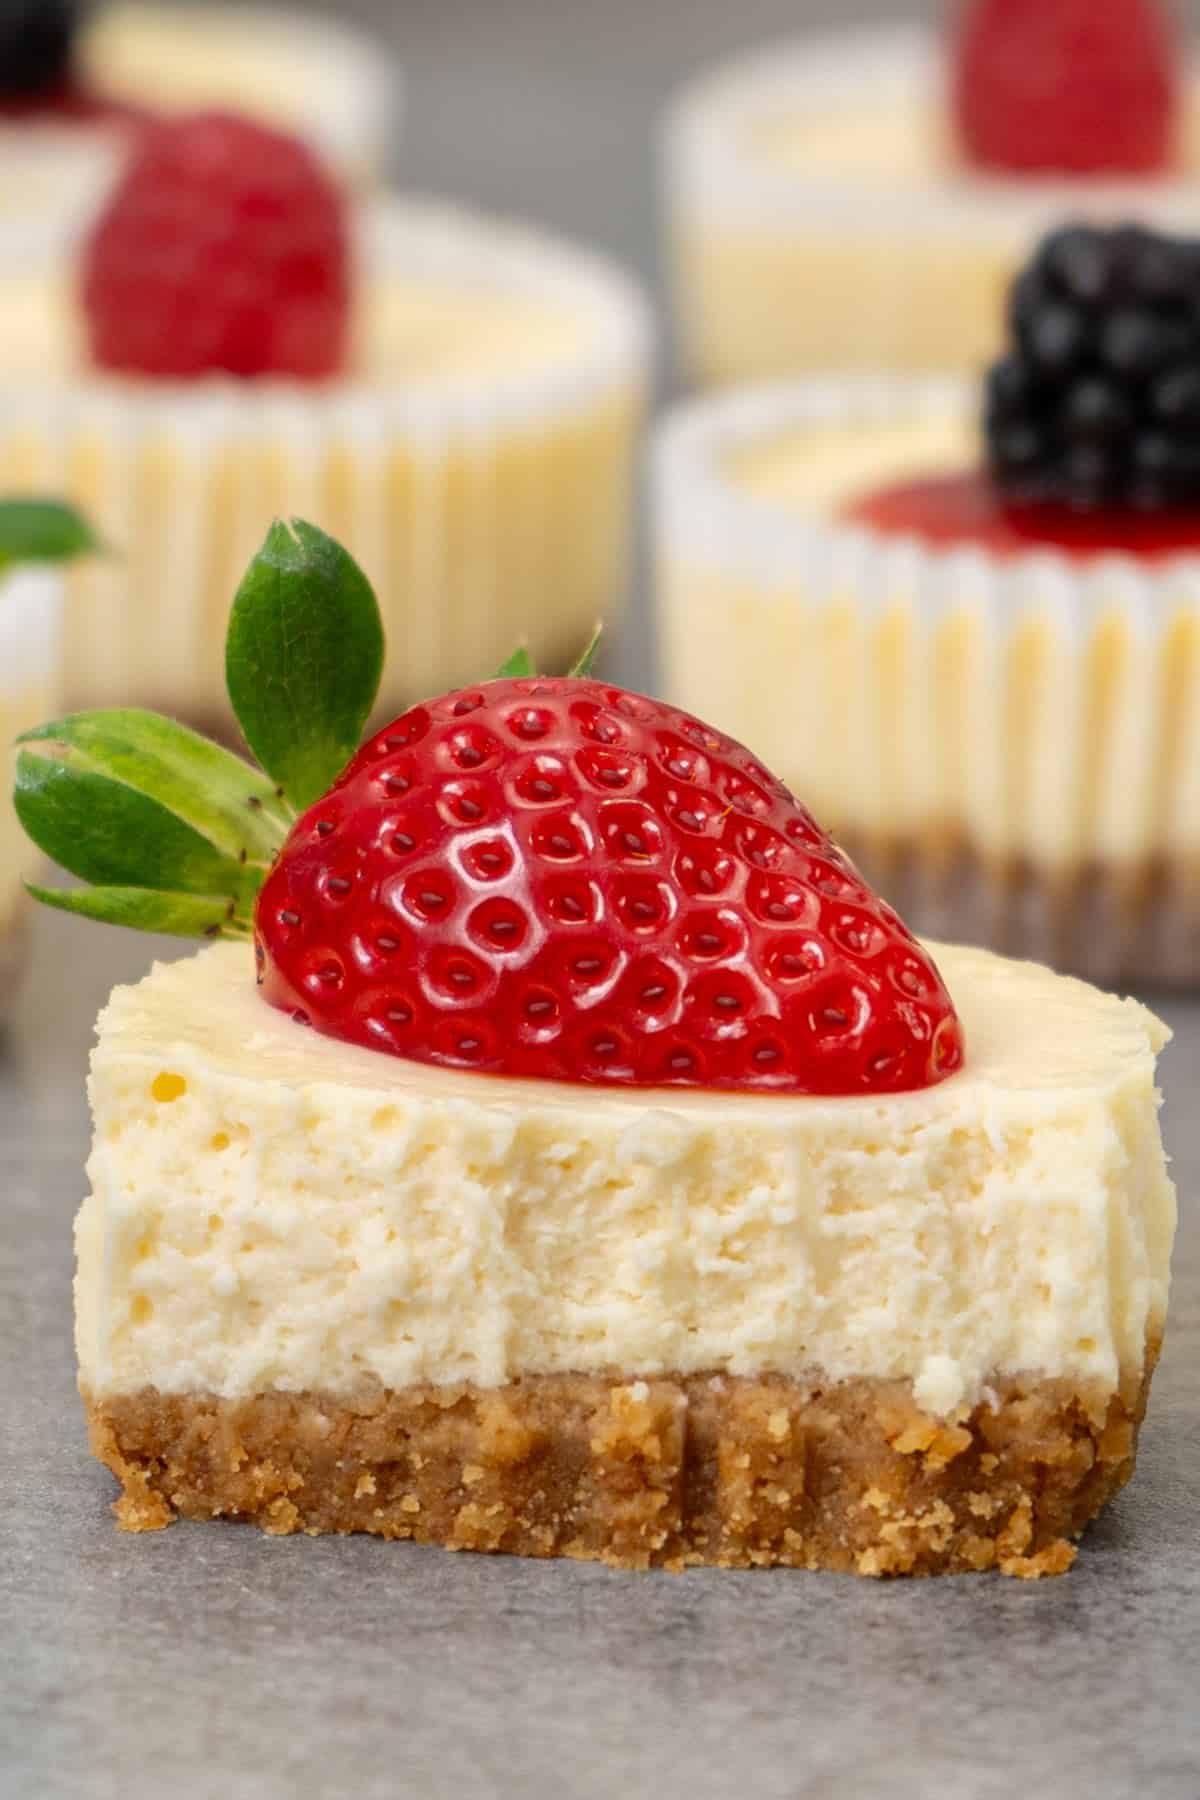
- Creamy, smooth texture: These cheesecakes bake up rich and silky, with just the right balance of firmness and creaminess.
- Quick and easy: They bake in just 15 minutes, making them perfect when you want a dessert that feels special without taking all day.
- Proven success: Thousands of home bakers have made this recipe and shared rave reviews, many calling it their go-to dessert.
- Beginner-friendly: With simple ingredients and straightforward steps, this recipe is easy to follow and reliable even if it's your first time making cheesecake.
Ingredients list
You only need a handful of simple ingredients to make this mini cheesecake recipe, and most of them are probably already in your kitchen.
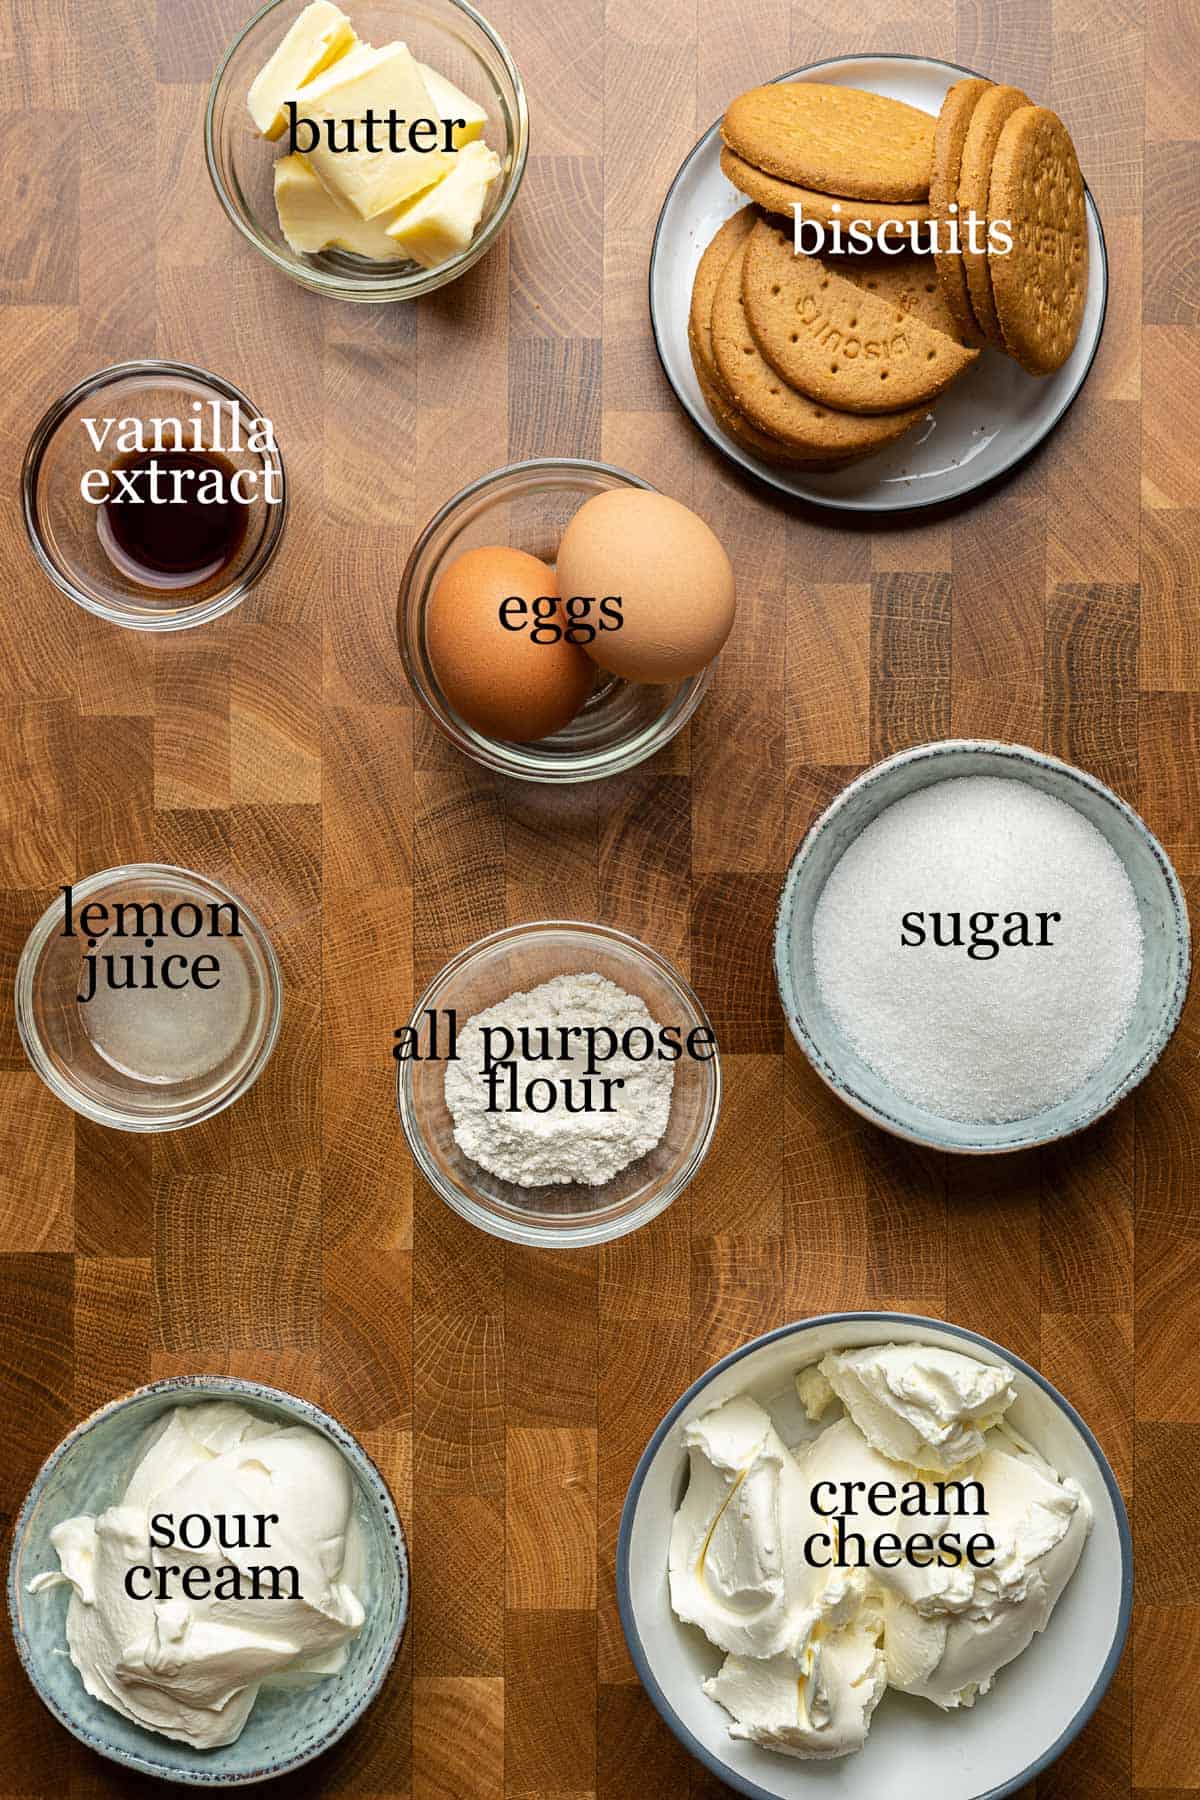
Key ingredient notes:
- Cream cheese: Use full-fat block cream cheese and let it come to room temperature first so the filling mixes up smooth and lump-free.
- Eggs: They help bind the filling and give the cheesecakes structure, so they set properly while staying smooth and creamy.
- All-purpose flour: Just a small amount helps stabilize the filling so the cheesecakes bake up neatly and hold their shape well.
- Sour cream: This adds a slight tang and helps give the filling its creamy, silky texture.
- Lemon juice: A small amount brightens the flavor and balances the richness of the filling.
You'll find all the exact measurements in the recipe card below.
Substitutions and variations
One of the best things about this mini cheesecake recipe is how easy it is to adapt. You can switch up the crust, make a couple of simple swaps, or finish them with different toppings depending on what you have and the occasion.
- Biscuits: Graham crackers, digestive biscuits, Biscoff cookies, or crushed Oreos all work well for the crust.
- Butter: Unsalted butter is best, but salted butter works fine too.
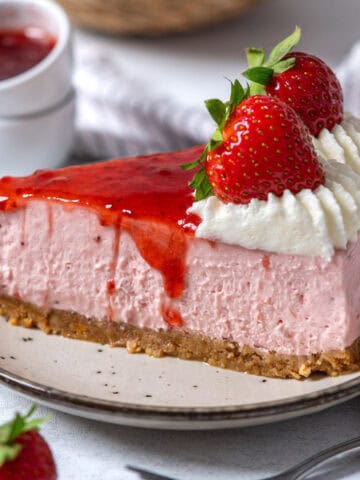
- Sour cream: Full-fat Greek yogurt works well too. And if you're after an oven-free option, our no-bake strawberry cheesecake is another favorite.
- Flour: Swap it with cornstarch by weight for a gluten-free option.
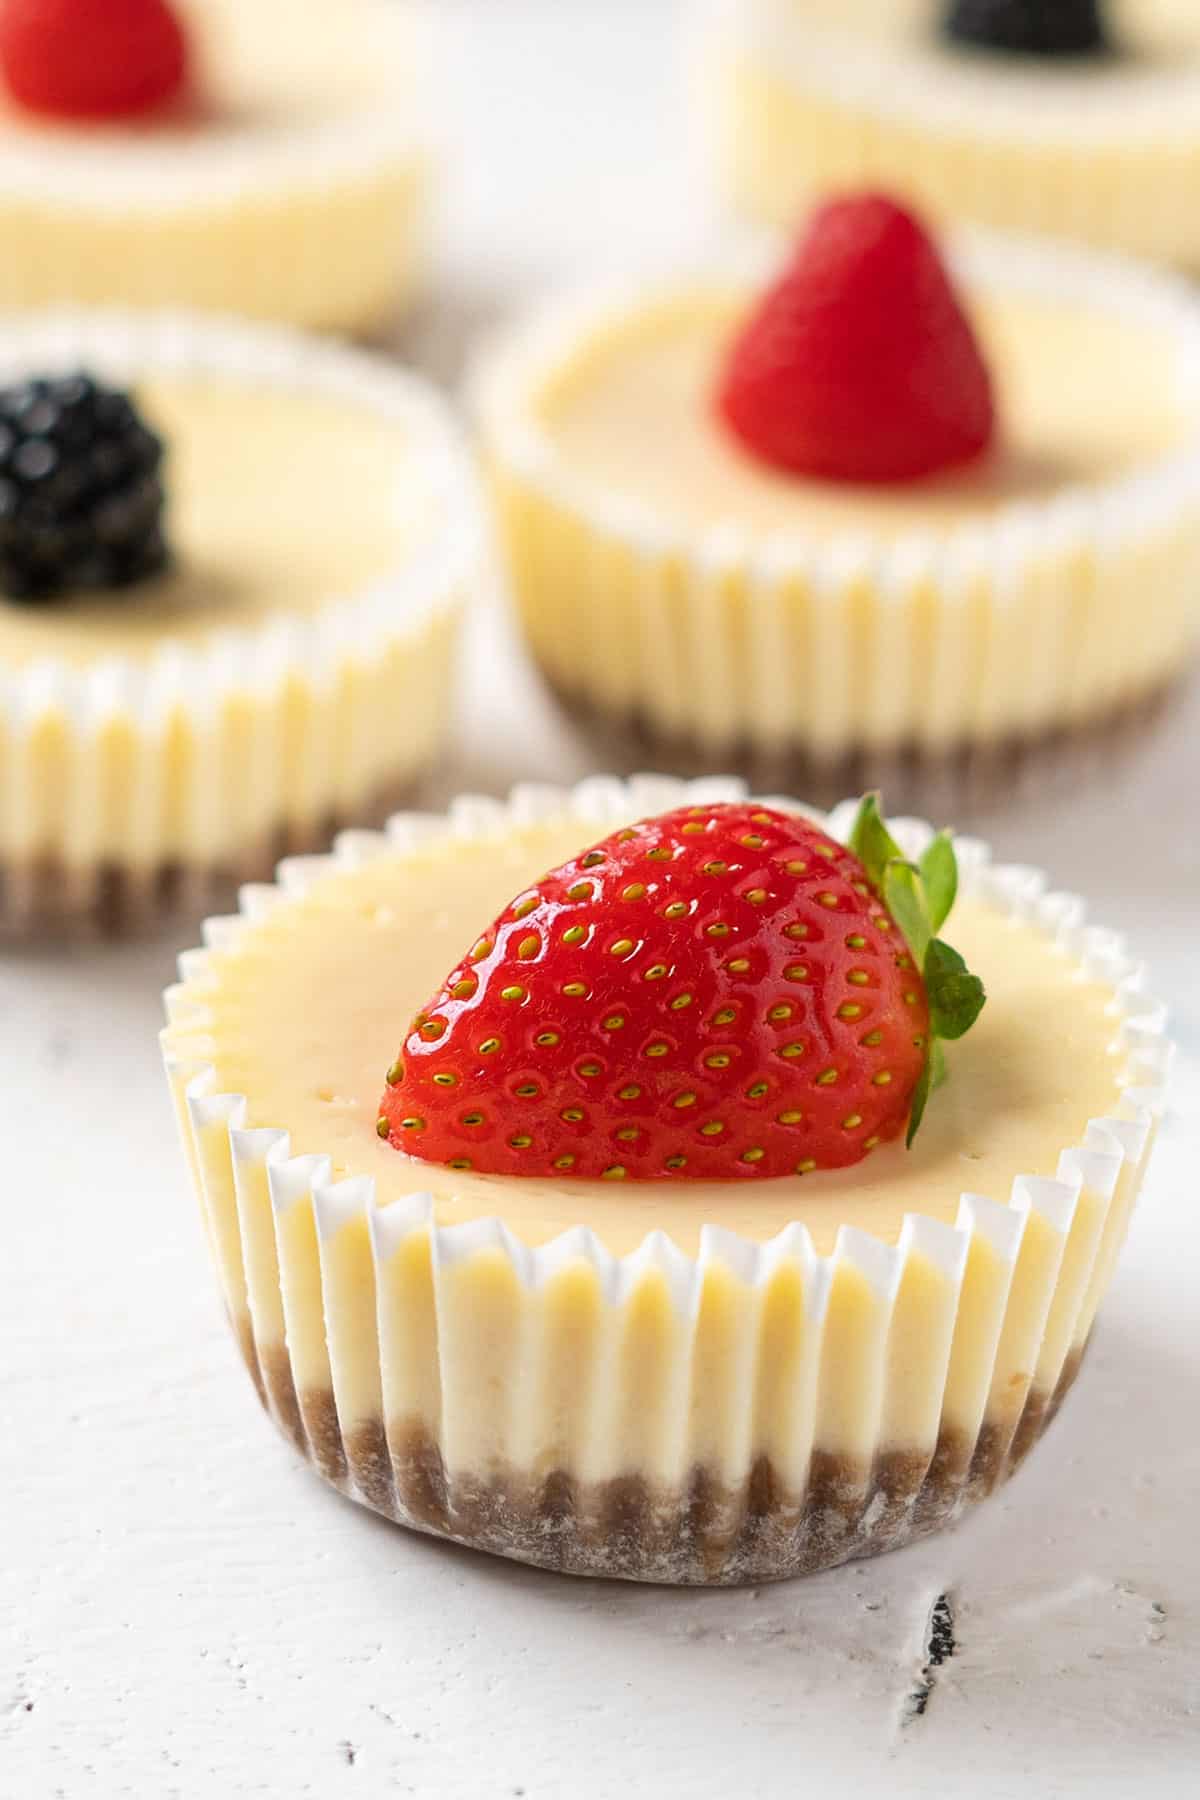
- Toppings: Jam, fresh fruit, lemon curd, chocolate ganache, Nutella, Biscoff spread, caramel, dulce de leche, or whipped cream all work beautifully here.
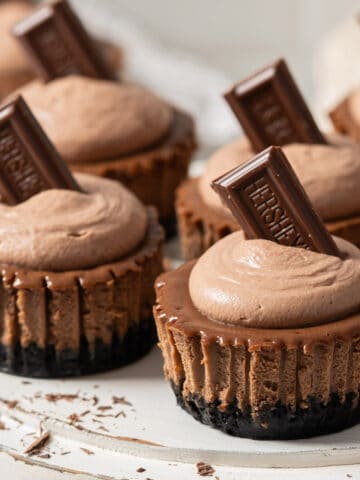
- Chocolate twist: For a richer variation, try our mini chocolate cheesecakes.
Watch the video
If you'd like to see this mini cheesecake recipe in action, follow along with our step-by-step video. It shows exactly how the crust and filling should look, how full to fill each cup, and what the cheesecakes should look like when they're done baking.
Step-by-step instructions
Here's how to make this mini cheesecake recipe step by step.
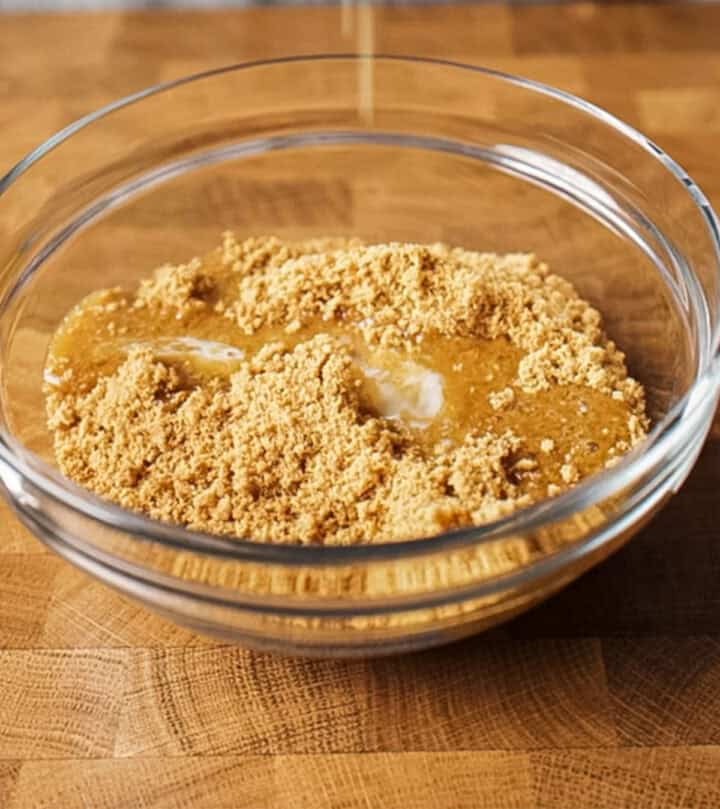
Make the crust
Stir the biscuit crumbs and melted butter together until evenly combined.
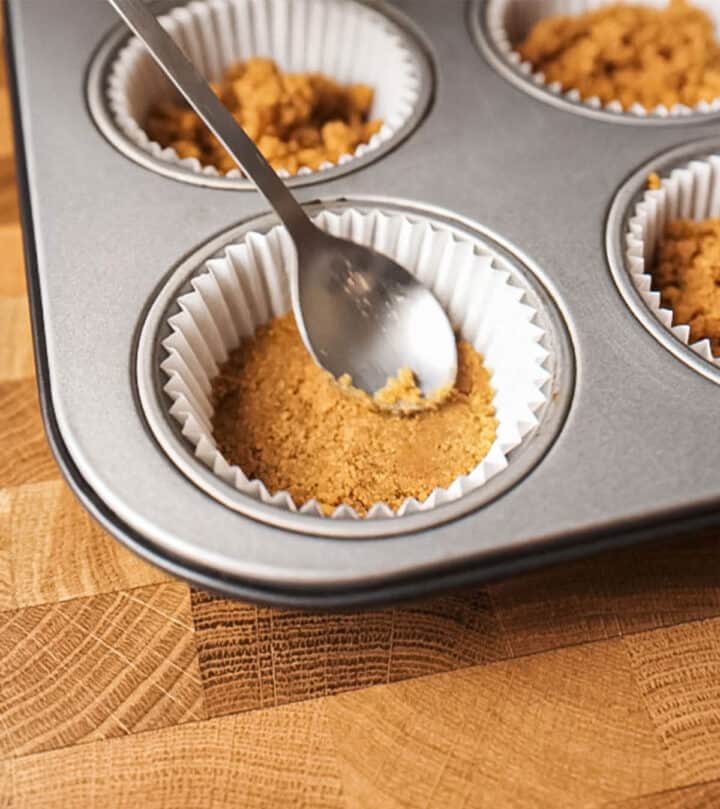
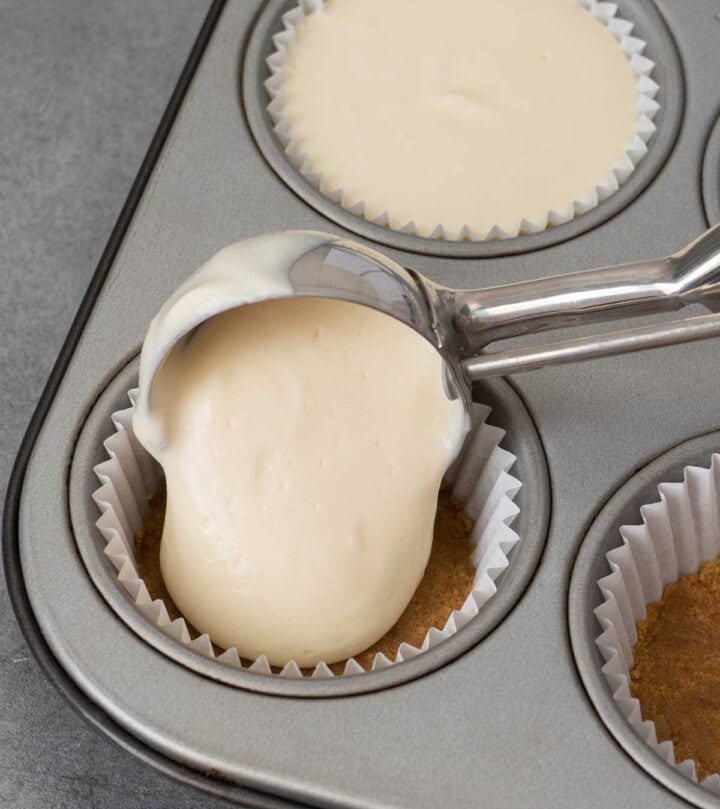
Fill the liners
Divide the mixture between the muffin liners and press it down firmly to form the crust.
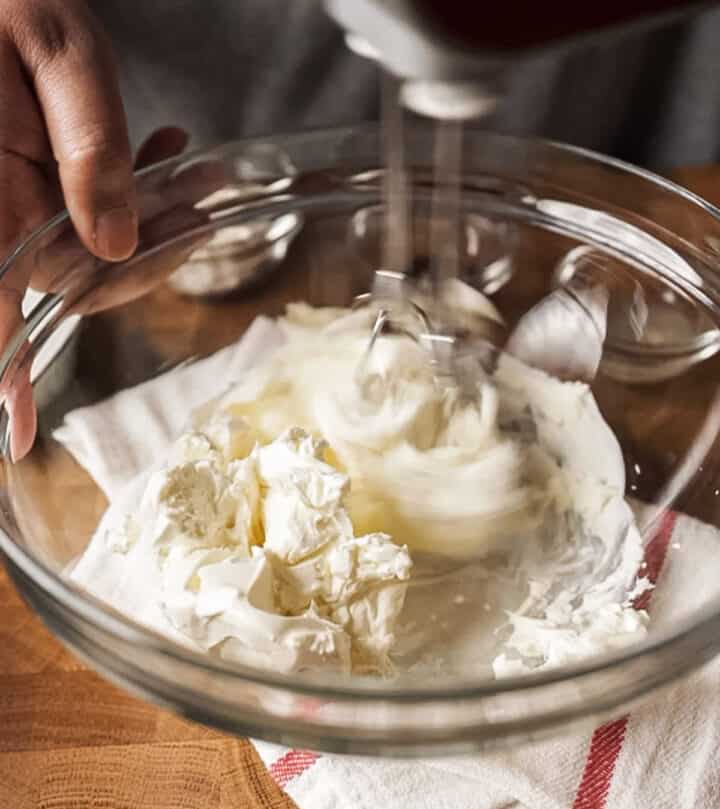
Beat the cream cheese
In a large bowl, beat the cream cheese on low speed just until smooth and creamy.
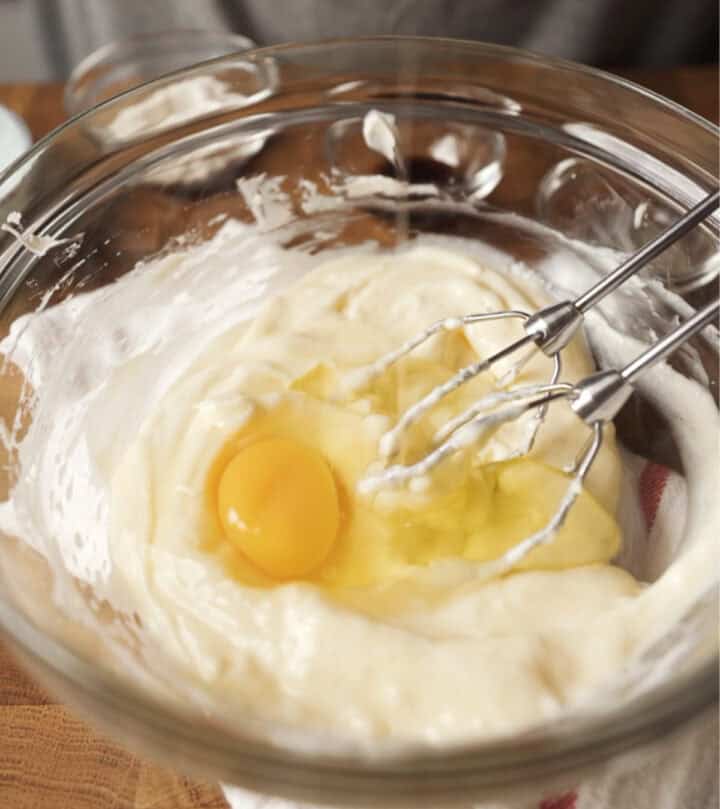
Add the eggs
Add the eggs one at a time, mixing on low speed after each addition so you don't incorporate too much air.
Finish the batter
Mix in the vanilla and flour, then fold in the sour cream until fully combined. Divide the batter evenly between the muffin cups.
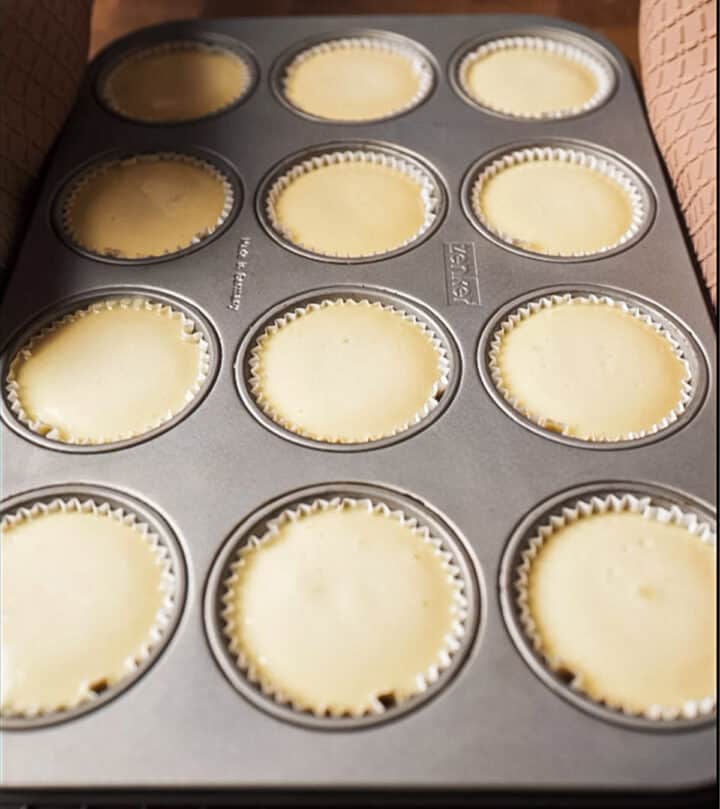
Bake
Bake at 320°F (160°C) for 15 to 18 minutes, or until the centers are just set. Let them cool completely in the pan, then refrigerate for at least 4 hours before serving.
How to know when mini cheesecakes are done
For this mini cheesecake recipe, they're ready when the edges look set and the centers still have a slight wobble. Don't wait until they look fully firm, or they may end up overbaked.
Tips
- Use room temperature cream cheese: Cold cream cheese doesn't blend smoothly and can leave lumps in the batter, so let it sit out for about 1 hour before starting.
- Don't overmix after adding the eggs: Mix just until combined to avoid adding too much air, which can cause cracks and make the cheesecakes rise and sink too much as they cool.
- Bake at a low temperature: Baking at 320°F (160°C) helps the cheesecakes bake gently and evenly while keeping the texture creamy.
- Don't overbake: The edges should look set while the centers still have a slight wobble. They'll continue to set as they cool. If they sink too much, they were likely overbaked, overmixed, or baked in an oven that runs too hot.
- Cool gradually: Let them cool completely in the pan on a wire rack before chilling to help prevent cracks from sudden temperature changes.
How to serve and store
Serving
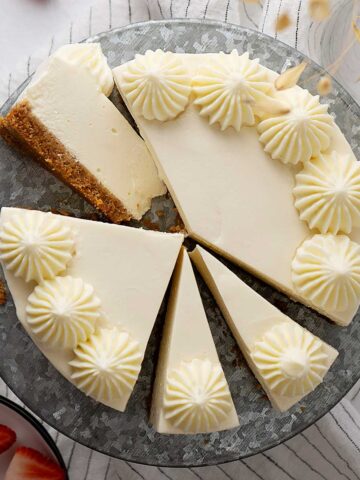
This mini cheesecake recipe tastes best well chilled, so let them chill for at least 4 hours before serving. Add toppings like berries, caramel, chocolate drizzle, or whipped cream just before serving so they stay fresh and look their best. If you're after another chilled cheesecake dessert without turning on the oven, our no-bake vanilla cheesecake is another classic we love.
Storage
Store the plain mini cheesecakes in an airtight container in the fridge for up to 5 days. If they're already topped, they're best enjoyed within 1 to 2 days.
Freezing
For longer storage, freeze the plain cheesecakes individually wrapped for up to 2 months. Thaw them overnight in the fridge, then add any toppings just before serving for the best texture and appearance.
Frequently asked questions
Yes. Because they're smaller and bake more quickly than a full cheesecake, they set evenly without needing a water bath.
They usually take about 15 to 18 minutes at 320°F (160°C), depending on your oven.
Don't overmix the batter, bake at a steady temperature, and remove them when the centers still have a slight wobble. Letting them cool gradually also helps prevent cracks.
Yes. Wrap each one tightly and freeze for up to 2 months. Thaw them overnight in the fridge, then add any toppings after thawing.
Absolutely. Bake and chill them the day before, then add the toppings just before serving for the freshest look and flavor.
If you want a full-size version, we recommend making our New York cheesecake instead. It's fully tested and gives you the same rich, creamy texture in a larger format.
Did you try this mini cheesecake recipe?
We'd love to hear from you! Please leave us a ★★★★★ rating and share your thoughts in the comments. If you post on Instagram, tag us, we'd love to see it!
Thank you! - Bea and Marco
📖 Recipe

Easy Mini Cheesecake Recipe
Video
Ingredients
Crust
- 1 ½ cup (150 g) biscuits crumbs
- ¼ cup (60 g) unsalted butter melted
Filling
- 10.5 oz (300 g) full-fat cream cheese room temperature
- ½ cup (100 g) granulated sugar
- 2 large eggs room temperature
- 1 teaspoon vanilla extract
- 1 tablespoon lemon juice
- 1 ½ tablespoon (14 g) all-purpose flour
- ¾ cup (185 g) full-fat sour cream room temperature
Instructions
- Preheat the oven at 320ºF (160ºC). Line a 12-cup muffin pan with paper liners.
Crust
- Crush your biscuits (graham crackers or your choice) into fine crumbs. Combine with melted unsalted butter, then press evenly into a 12-cup muffin pan lined with paper cups.1 ½ cup biscuits crumbs, ¼ cup unsalted butter
Filling
- Soften the full-fat block cream cheese to room temperature for the smoothest results. Beat it gently on low speed just until creamy, no need to overmix.10.5 oz full-fat cream cheese
- With mixer still on low, add sugar a little at a time until fully incorporated and creamy.½ cup granulated sugar
- Add eggs one at a time on low speed, mixing only until just incorporated. This minimizes air in the batter, helping prevent cracks.2 large eggs
- Add vanilla extract, lemon juice, and flour; mix just until combined.1 teaspoon vanilla extract, 1 ½ tablespoon all-purpose flour, 1 tablespoon lemon juice
- Add room-temperature sour cream and mix just until smooth. Divide batter evenly among cups.¾ cup full-fat sour cream
Bake and chill
- Bake at 320 °F (160 °C) on ⅔ lower rack for 15 minutes, or until the edges are set and the centers still jiggle slightly when gently shaken.
- Let cheesecakes cool completely in the pan on a wire rack before transferring to the refrigerator. Chill for at least 4 hours, preferably overnight, for best texture. Serve chilled, topped just before eating.
Notes
- Use room-temperature cream cheese: Cold cream cheese won't blend properly and leaves lumps. Take it out of the fridge about 1 hour before starting.
- Don't overmix after adding eggs: Too much air in the batter is the #1 reason cheesecakes crack. Mix only until combined.
- Bake at a steady temperature: A low oven (320°F/160°C) gives you a creamy, evenly baked texture. Use a portable oven thermometer to check your oven's accuracy.
- Watch for the "just set" stage: Pull them out when edges are set and centers still jiggle slightly. They'll firm up as they cool.
- Cool gradually: Let them cool in the pan before chilling. Avoid sudden temperature changes to keep the tops smooth and crack-free.


Shaundra says
This is the best cheesecake. I think I ate 7 out of 12. They were still good 3 days later. Today I am making them again for my neices and nephews. Thanks for all the baking tips...I will try it in a large spring pan.
Thanks again
Shaundra 2019 April
Bea says
Haha! Yes, it's difficult to stop, right? I hope your nieces and nephews would love them as much also. Thank you so much Shaundra!
Dina says
It looks delicious....will make this cheesecake as soon as possible😊
Bea says
Thanks Dina, hope you'll like them!
Hong Le says
The instruction is very clear and detailed, easily to follow. The recipe is perfect. My family and my friends love the cheesecakes. Highly recommended.
I am your fan now!
Bea says
I'm happy to know that everybody loved it. Thank you so much!
rohine says
just made these came out fantastic ... absolutely great recipe. thank you so much for sharing. now the waiting
Bea says
Thank you so much Rohine, I'm excited to hear that! 😀
Bridie says
Hi just wondering how long will they last in the fridge please
Bea says
Hi Bridie, I would say they will last up to 3,4 days in the fridge. Hope it helps 🙂
Gina says
How Long will it last in the freezer?
Silvana says
Gostaria de saber oque é
1 1/2 colher de sopa de todos os fins quatro (14g)
Bea says
Hi Silvana, it is flour (farina), sorry it was a mistype, I corrected it. Thanks for the heads up!
Dana says
Delicious! My daughter who doesn't normally eat cheesecake kept asking for more. I had to make adjustments though....I only had cream cheese spread and thick yogurt at home, and I was craving cheesecake. I mixed them in the ratio 2:1 and it came out lovely. This is my go to recipe for cheesecake going forward.
Bea says
That's awesome! Great to know that yogurt works, thank you for the info. I'm excited to hear that your daughter loved it 😀 Thank you so much Dana!
Trine Kaldal says
So easy to make, and oh so delicious! The hardest part of theese yummy and totally mouthwatering tiny cheesecakes is the waiting period.
Bea says
Thank you so much Trine, I really appreciate it!
Trine Kaldal says
What percentage of fat is there in your sour cream? Here I can get 9%, 18% and 38%... I really don't want to mess this beautiful recipe up...
Bea says
My sour cream is 24% fat. You should be good going with the 18%. Also use full fat cream cheese. Hope it helps, thank you!
Trine Kaldal says
I just made them tonight. We had a little sneaky taste. Couldn't wait for tomorrow. And oh my, they are SO delicious.
Bea says
That's awesome! Yes the hardest part is to wait until the next day 😀 . Hope everybody enjoyed it! Thank you!
ps: if you don't mind, would you rate this recipe? (choose the stars above the comment box). it will help us out 🙂 thanks!
your dad says
OMG!!!!! thats amazing i dont care
Trine Kaldal says
Hi there.
They look wonderful.
Can I make them 2 days before serving? And just leave them in the fridge until decorating?
Sincerely
Trine in Denmark
Bea says
Hi Trine, yes you can make them 2 days in advance, moreover since they need time in the fridge to set, so it's fine. Hope you like them. Thank you!
Trine Kaldal says
Thank you very much for the help 👍
Bea says
No problem! 🙂
Sara Mariyam says
Hey gonna make these lovelies tomorrow for a family gathering. Was wondering if I can swirl the filling with raspberry purée and bake them? Will it be okay
Marianne Kellett says
Can you freeze the cheesecakes?
Bea says
Yes you can 🙂
patricia says
I made these darling little cheesecakes for a Birthday party and they were so WONDERFUL..
Thanking you Bea for sharing such a Superbe! recipe. XXX
Bea says
That's so awesome Patricia! Thank you so much for leaving your comment here XXX
Nadine says
I made them today they came out great . The last time I make them they fall in the middle
Bea says
Awesome Nadine!
Marjorie Holste says
These little beauties were so delicious, and pretty. Thank you for sharing your recipe.🥰
Bea says
Hi Marjorie, I'm happy to know that you liked them. Thank you so much for the love!
Buna says
Hi how can i nake this eggless
Ilive cheese cake and recently i gave up eggs
Bea says
Hi Buna, I can't give you a good egg substitute for this recipe, sorry though!
Juana says
You can use egg substitute . they sell them right next to the eggs
monica says
I've been using substitute eggs for years as well as butter. I use soy oil which is tasteless and makes all baked goods much lighter. No one knows the difference. I do add a bit more either vanilla, cinnamon and even a pinch of pepper!
Sueli Pires de Oliveira Lima says
Gostaria de saber que creme azedo 185g é esse
Bea says
Hola! Tengo la receta en espanol, capaz te sirva, aqui te dejo el enlace https://www.elmundoeats.com/es/mini-cheesecakes-faciles/ . La crema es nata/crema agria, asi se llama aqui. Un saludo!
Sarah McMinn says
Does this make 12 mini cupcakes or 12 regular size?
Bea says
This makes 12 regular cupcake size 🙂
Connie says
Love it
Bea says
Happy to know that Connie. Thanks for the love!
Grace says
I tried this recipe and carefully followed the tips. It is soo delicious!! It's super easy. The ingredients are super easy to source. We love it! Will definitely make this again. Thank you very much for sharing your recipe 🙂
Bea says
Right? It's a super easy recipe! I'm glad that you liked it, Grace! thank you so much!
Summer says
Will the recipe work the same if I use dariole moulds instead of cupcake cases?
Maddie says
I think that this was a very simple recipe and we are saving it and putting it on our wall😀